Sign Mappings are the core of @Sign’s automation capabilities. By creating a mapping, you define exactly which Salesforce fields (from any object like Leads, Contacts, or Opportunities) should populate your Zoho Sign templates. This eliminates manual data entry, reduces errors, and ensures that every contract sent is personalized and accurate.
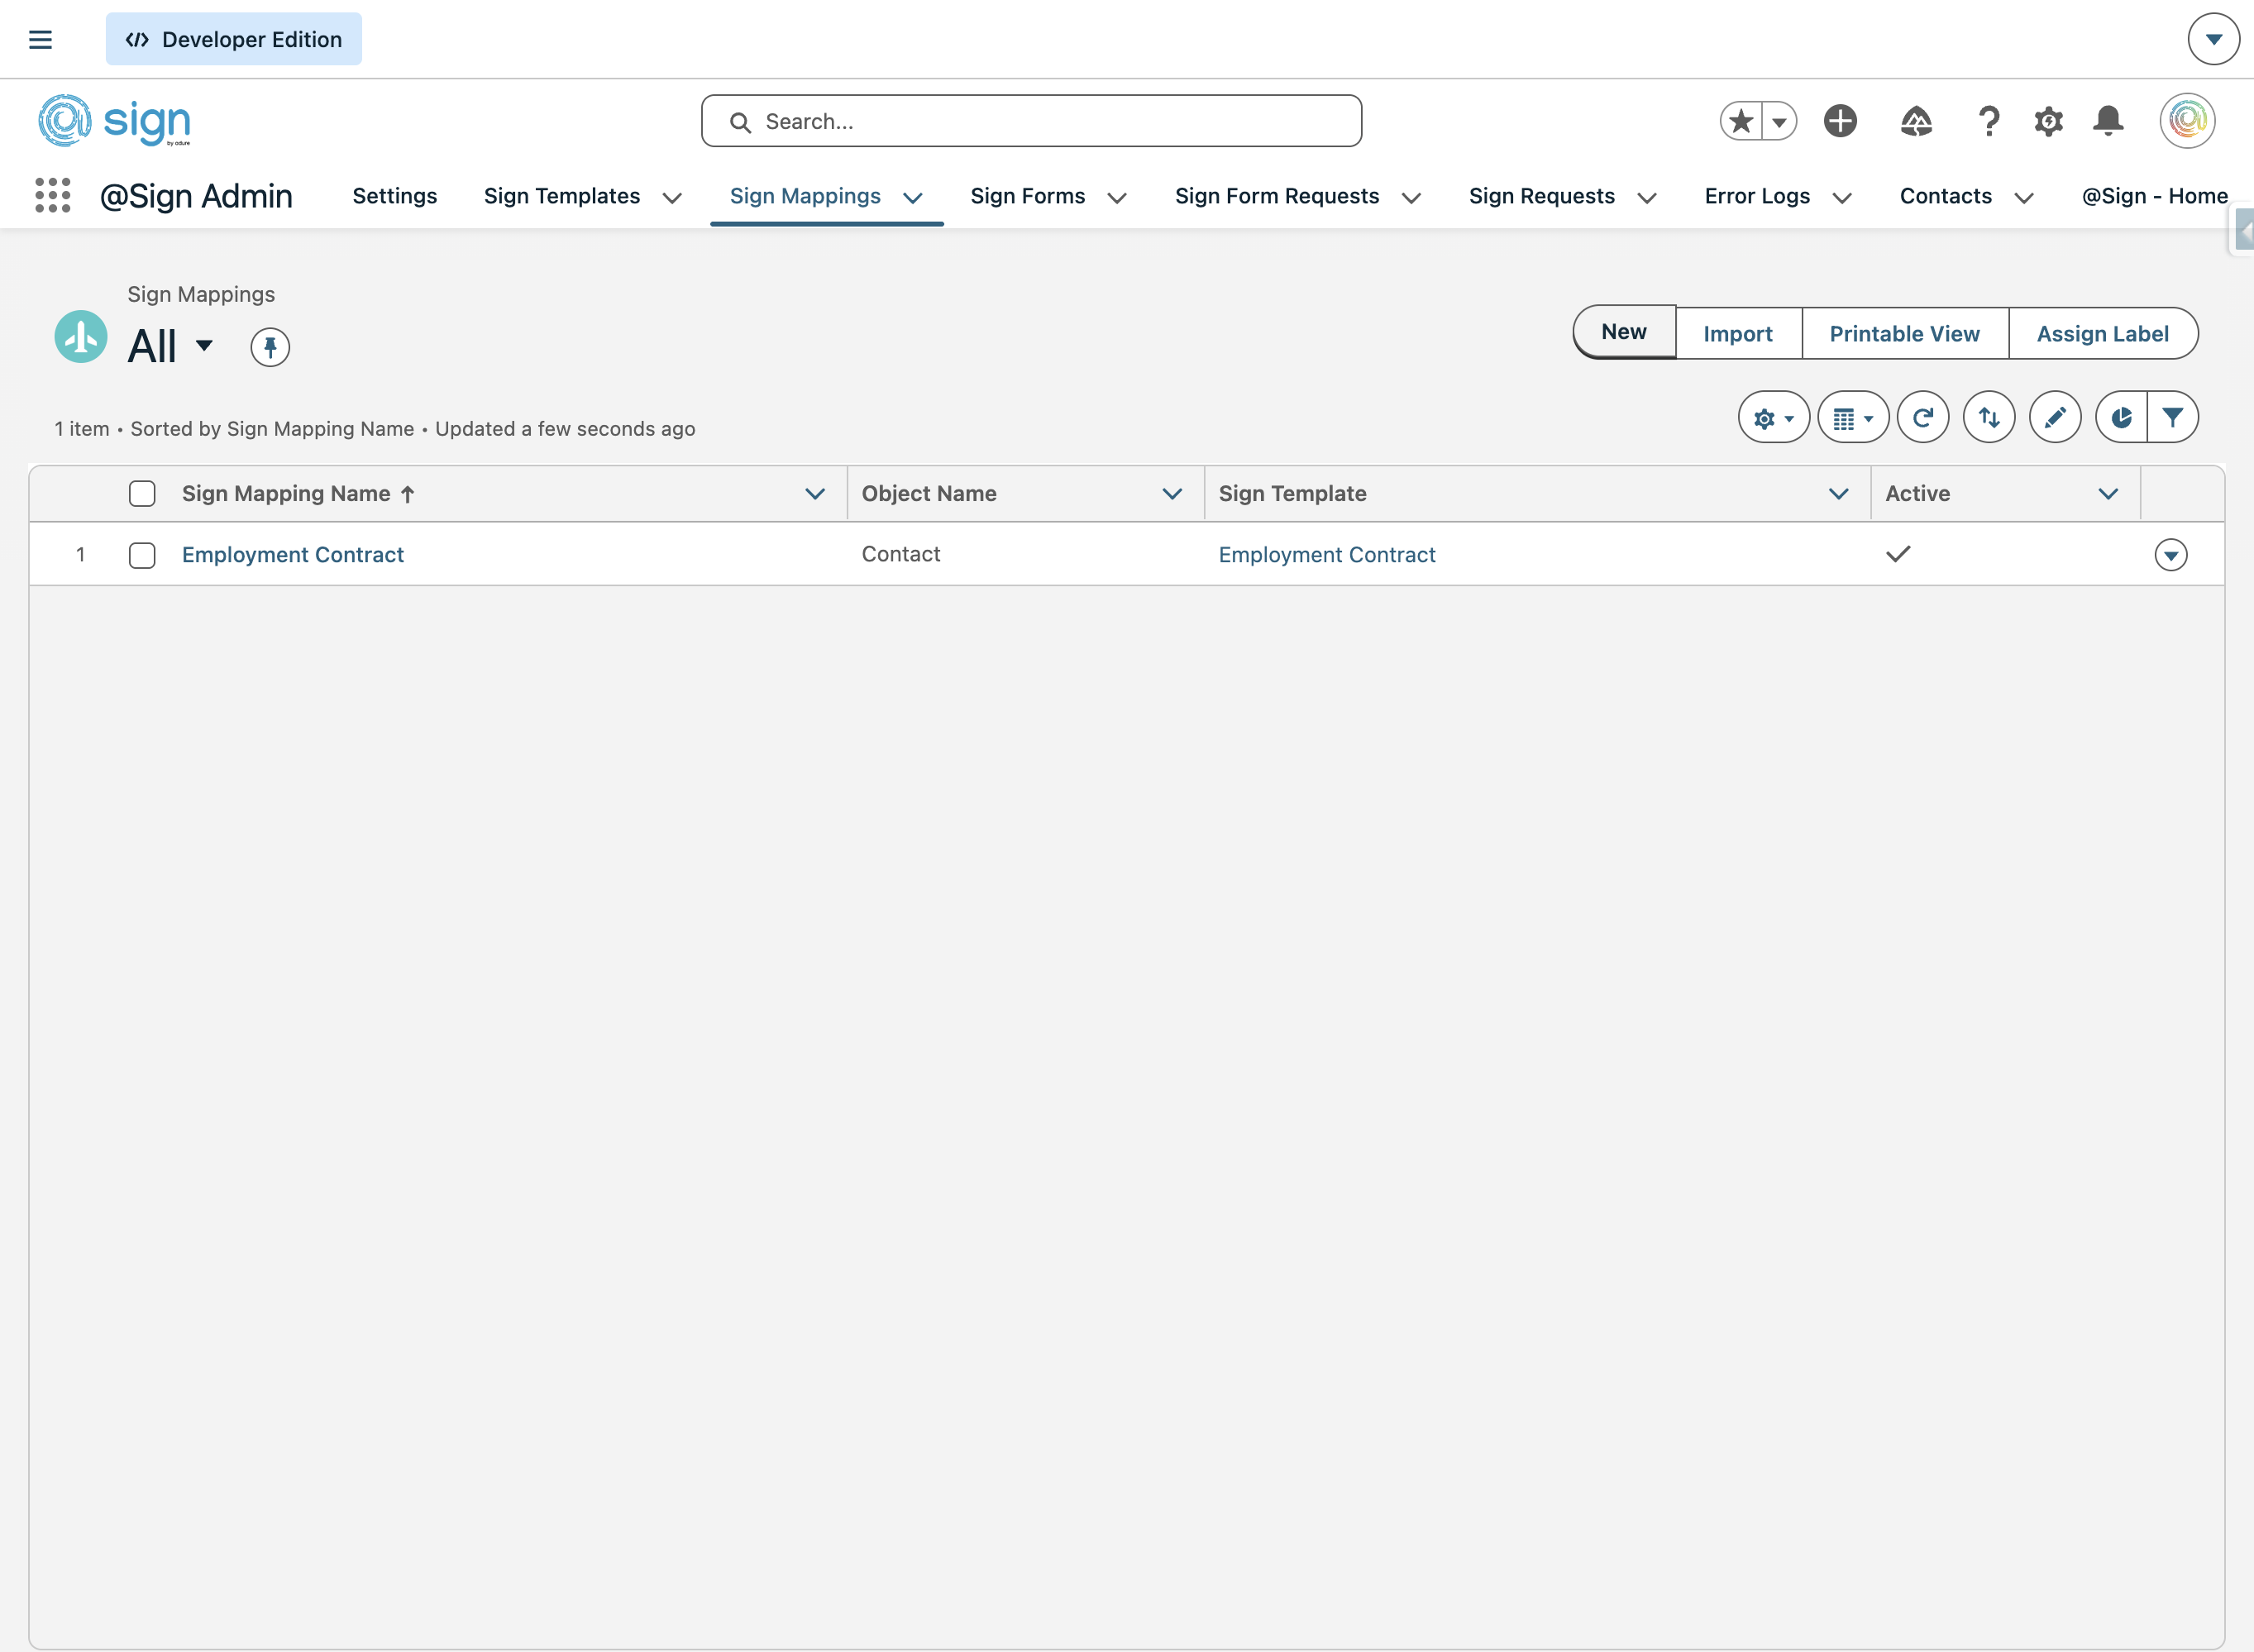
Open the Sign Mappings section in your @Sign Admin
Click 'New' to create a fresh mapping from scratch.
Give the mapping a clear, descriptive name so it's easy to identify later — for example, 'Opportunity NDA' or 'Lead Onboarding Contract'.
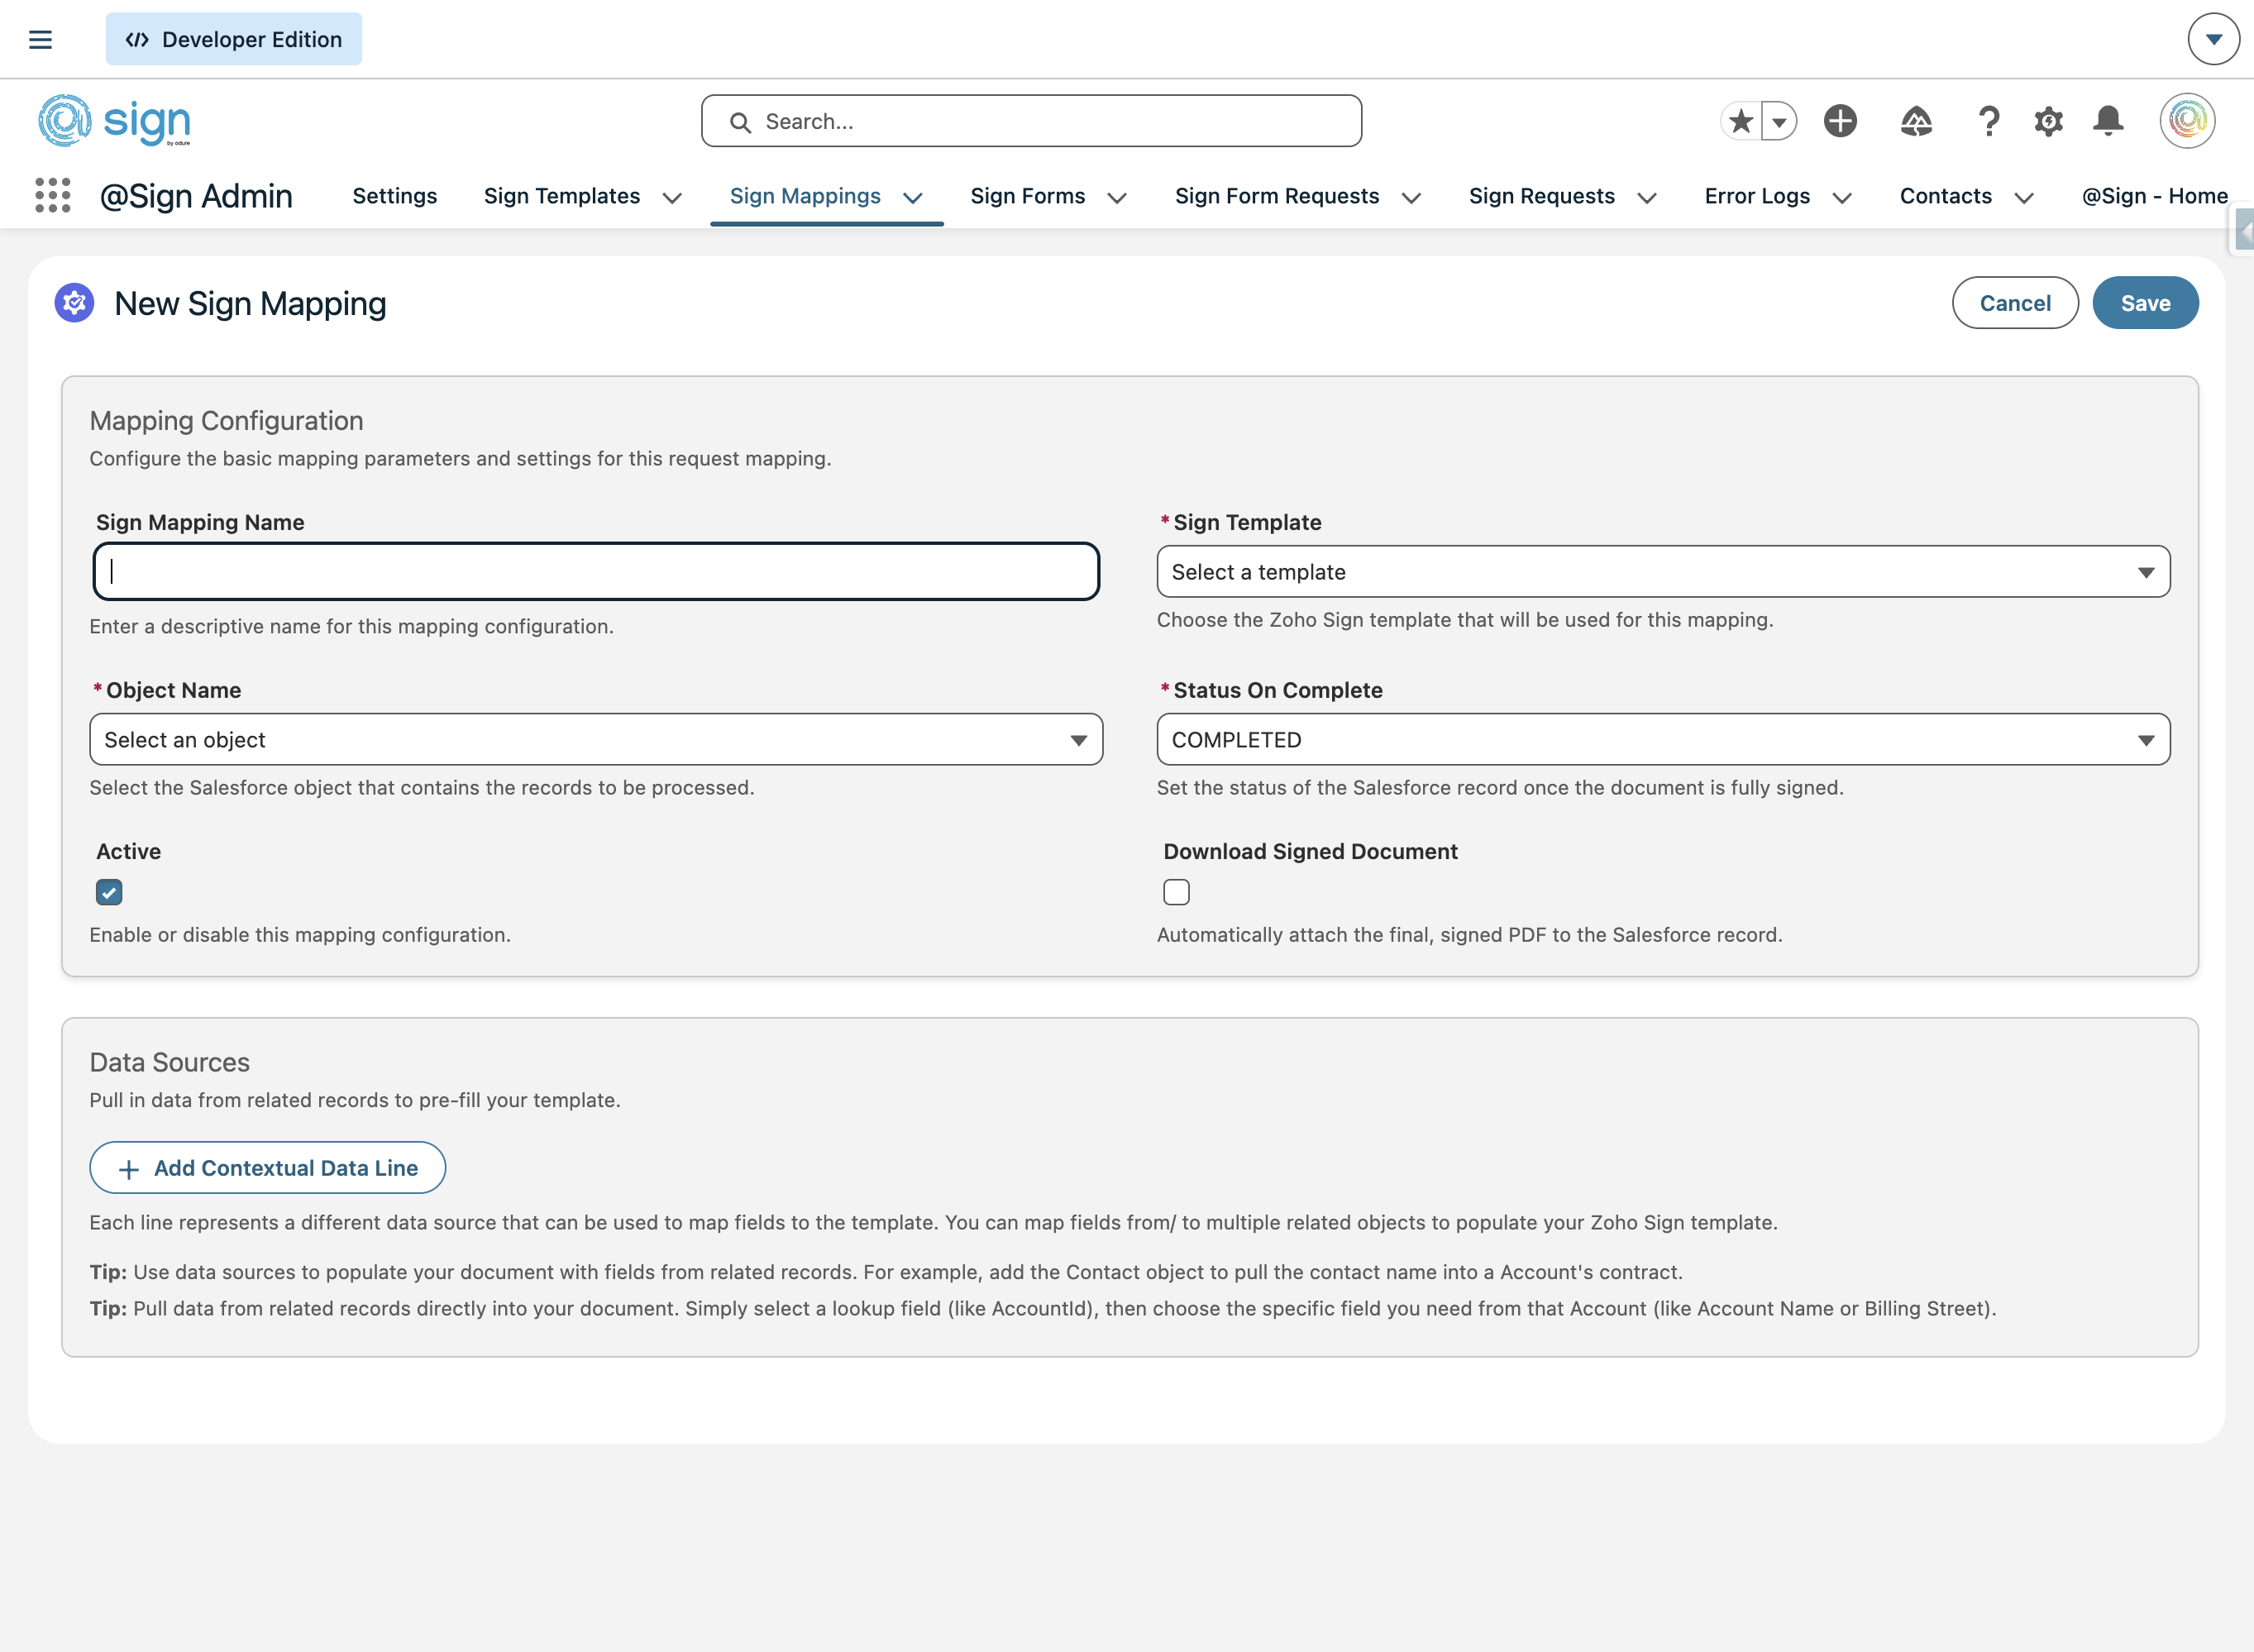
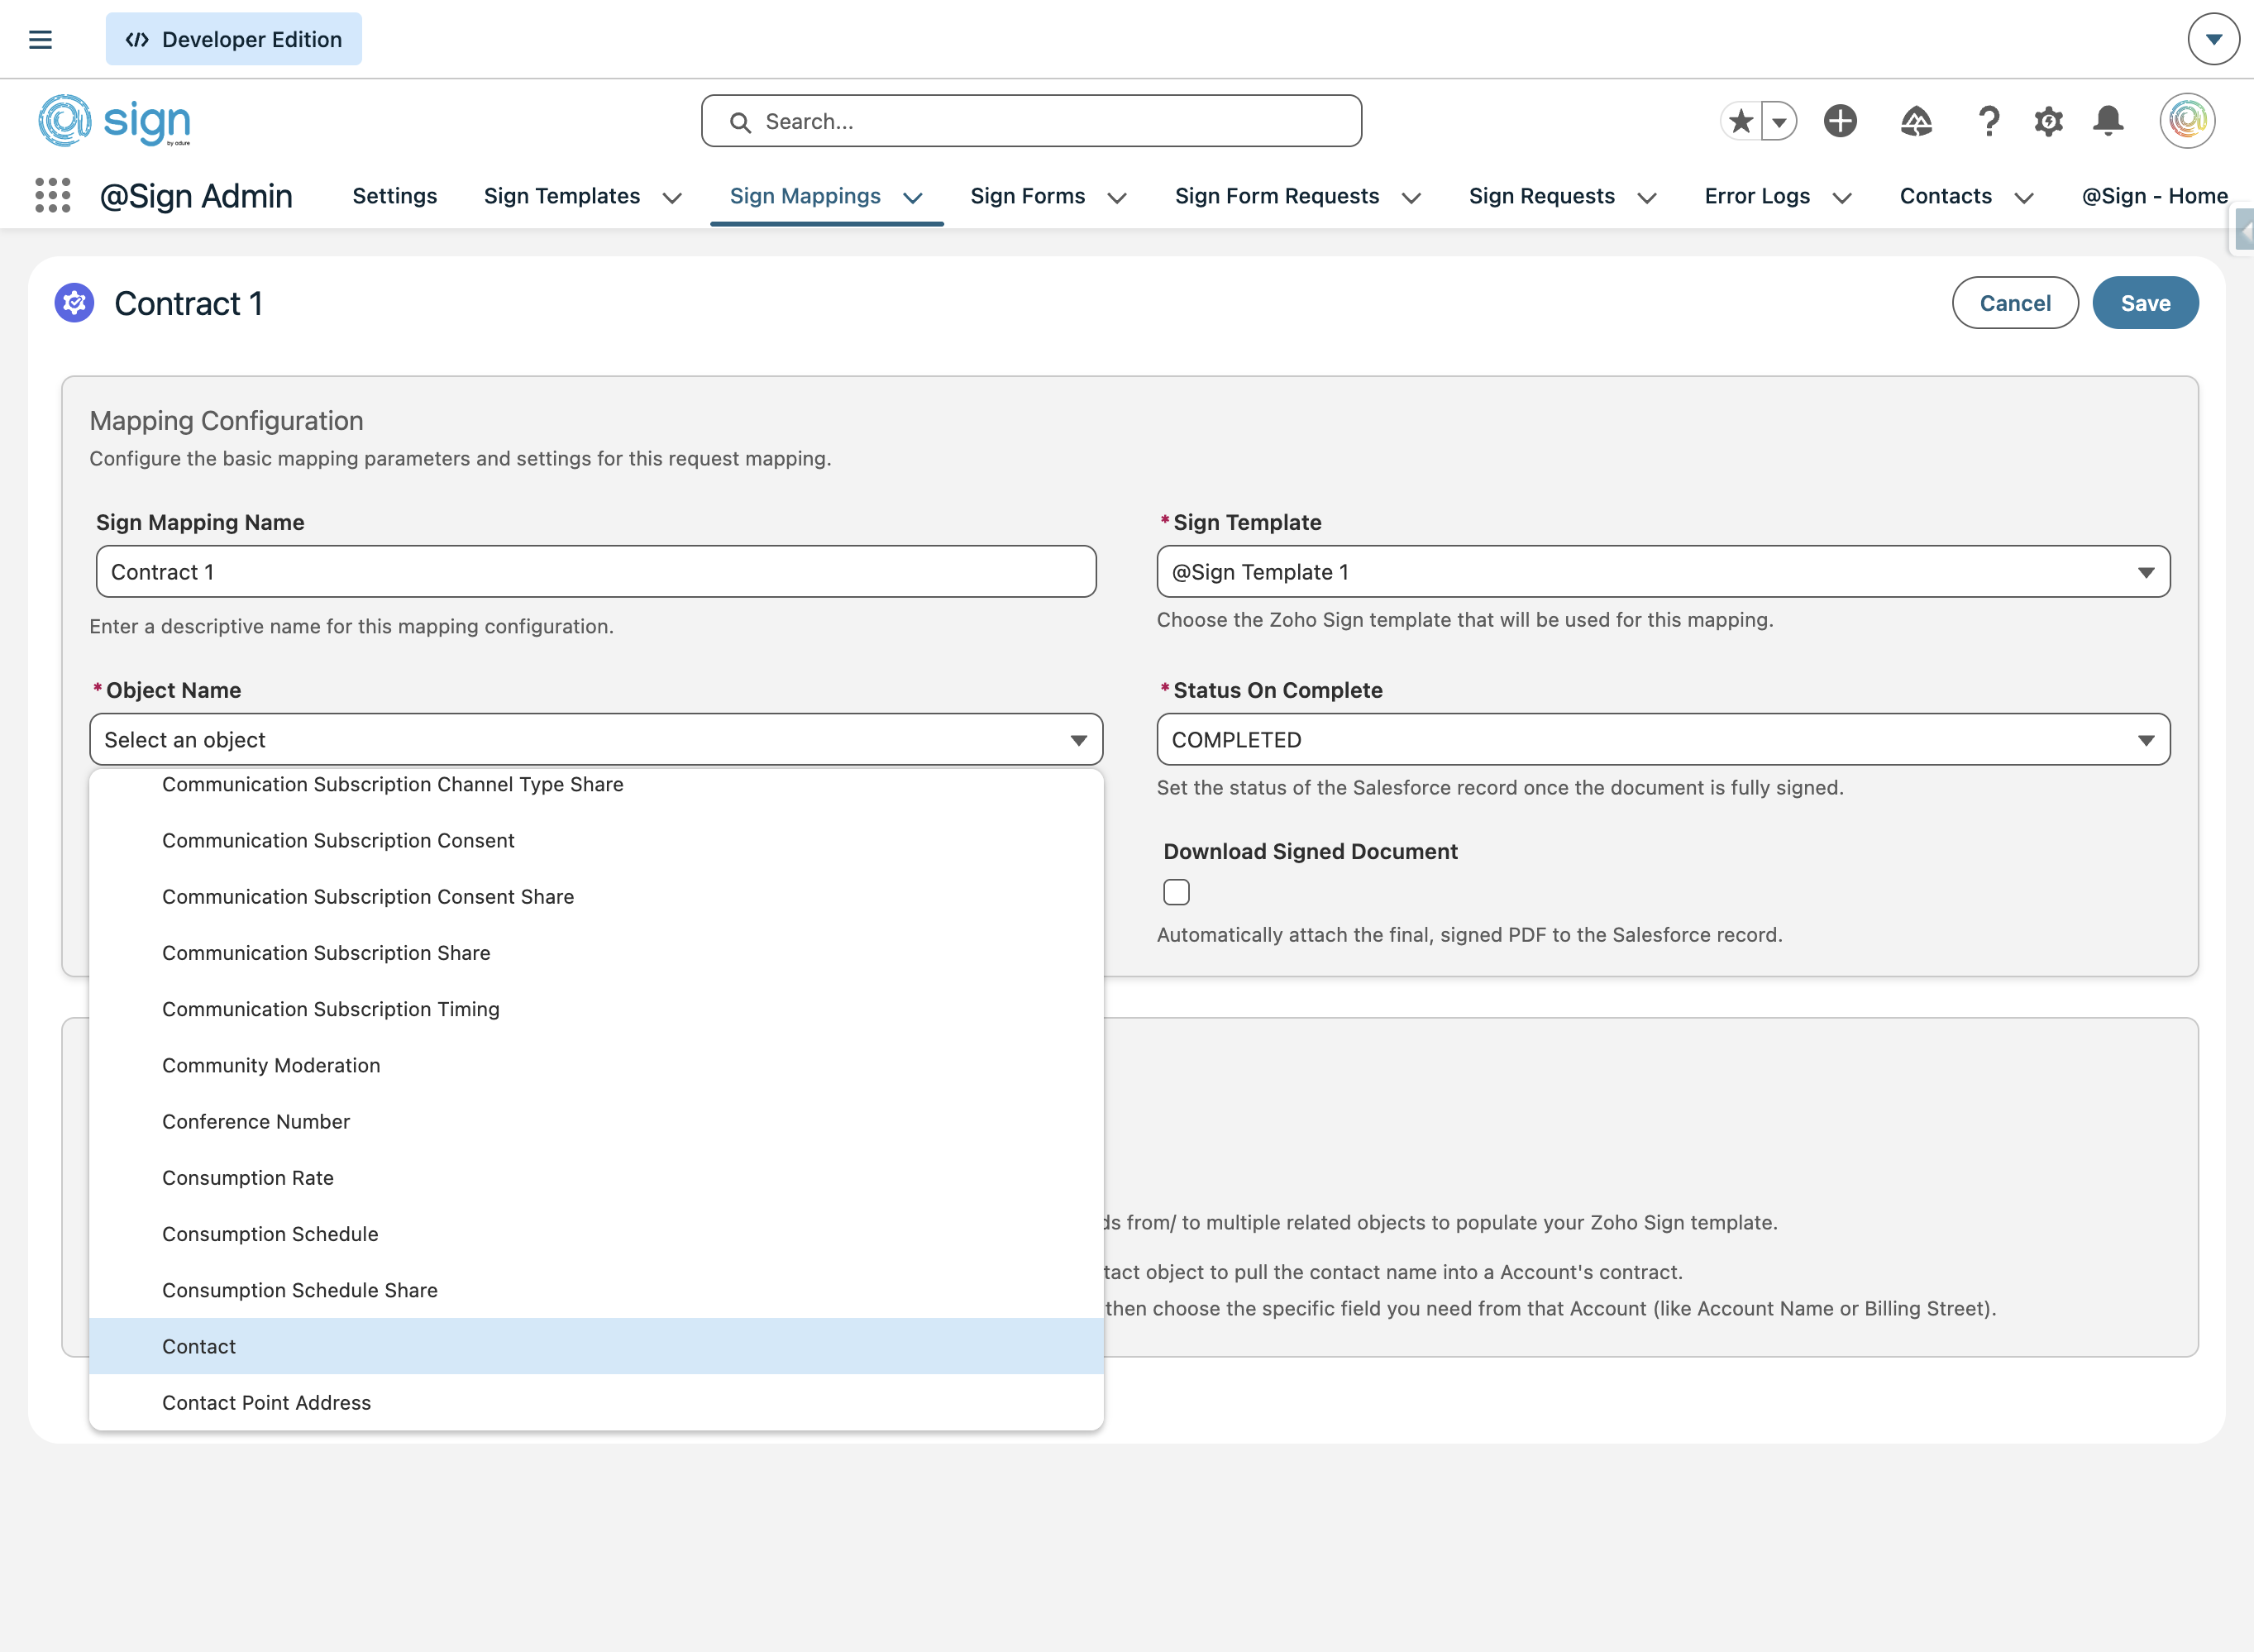
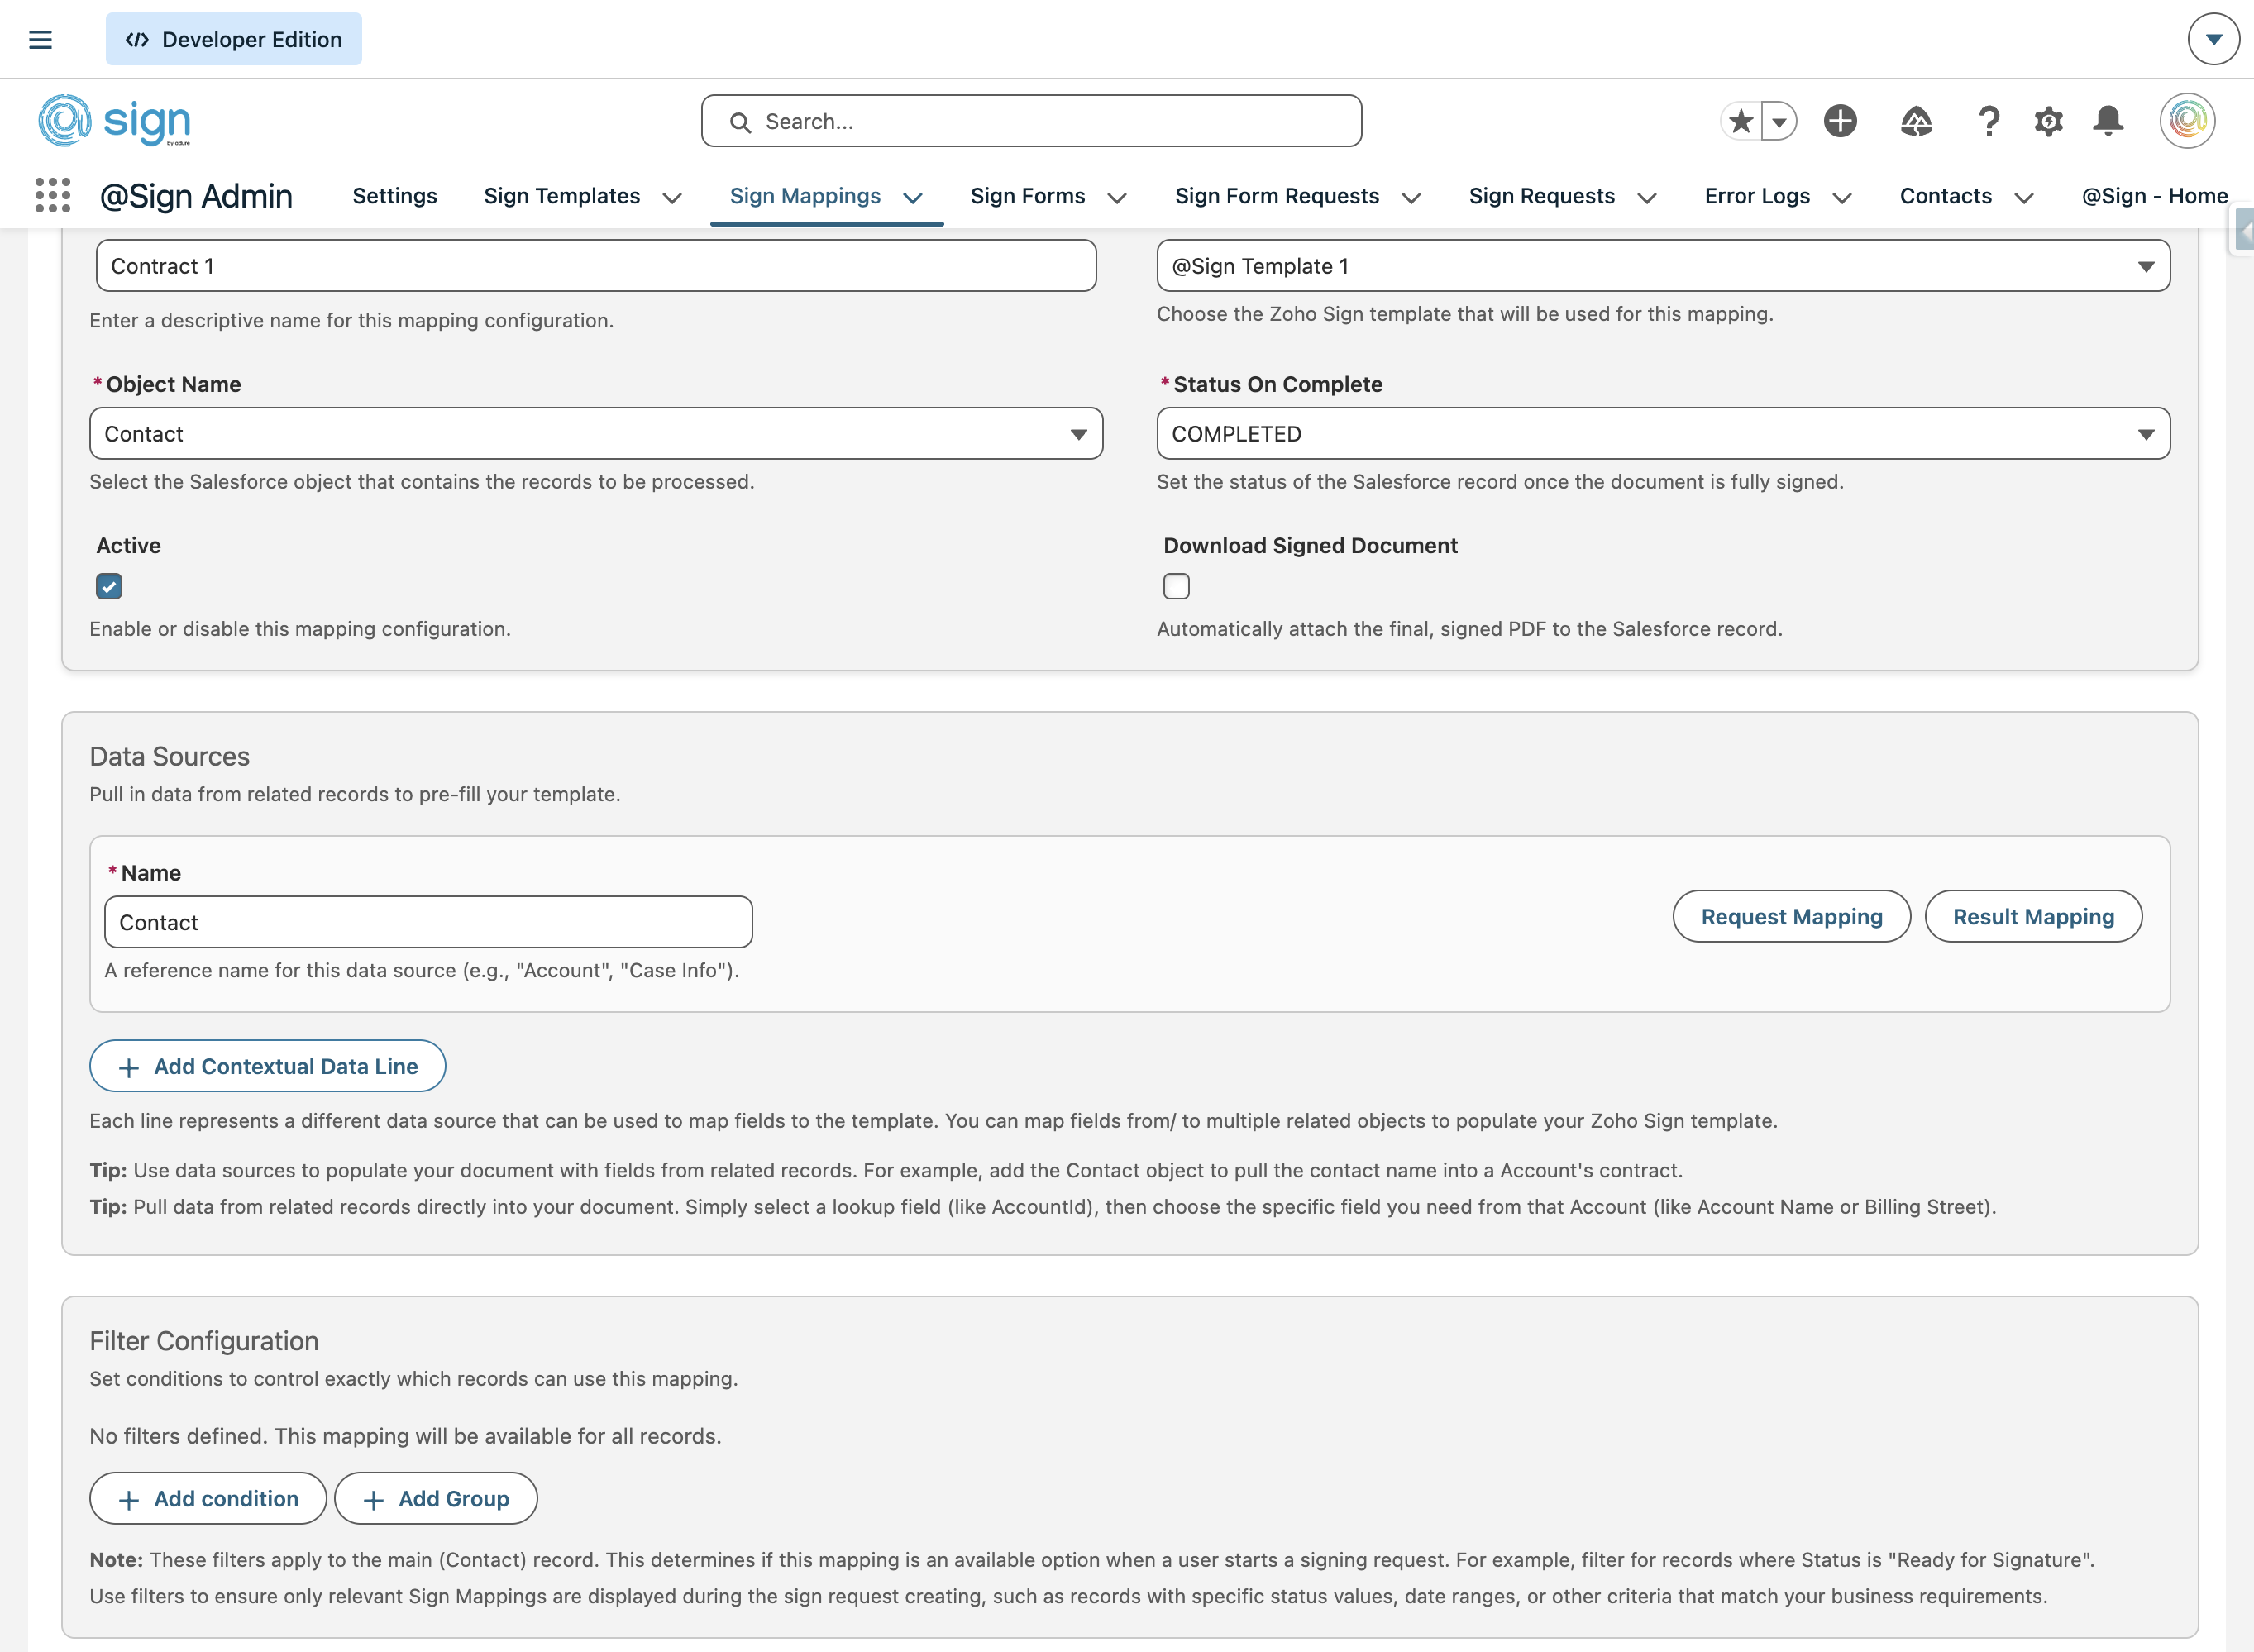
Choose the Sign Template you want this mapping to use. Only synced templates will appear in the list.
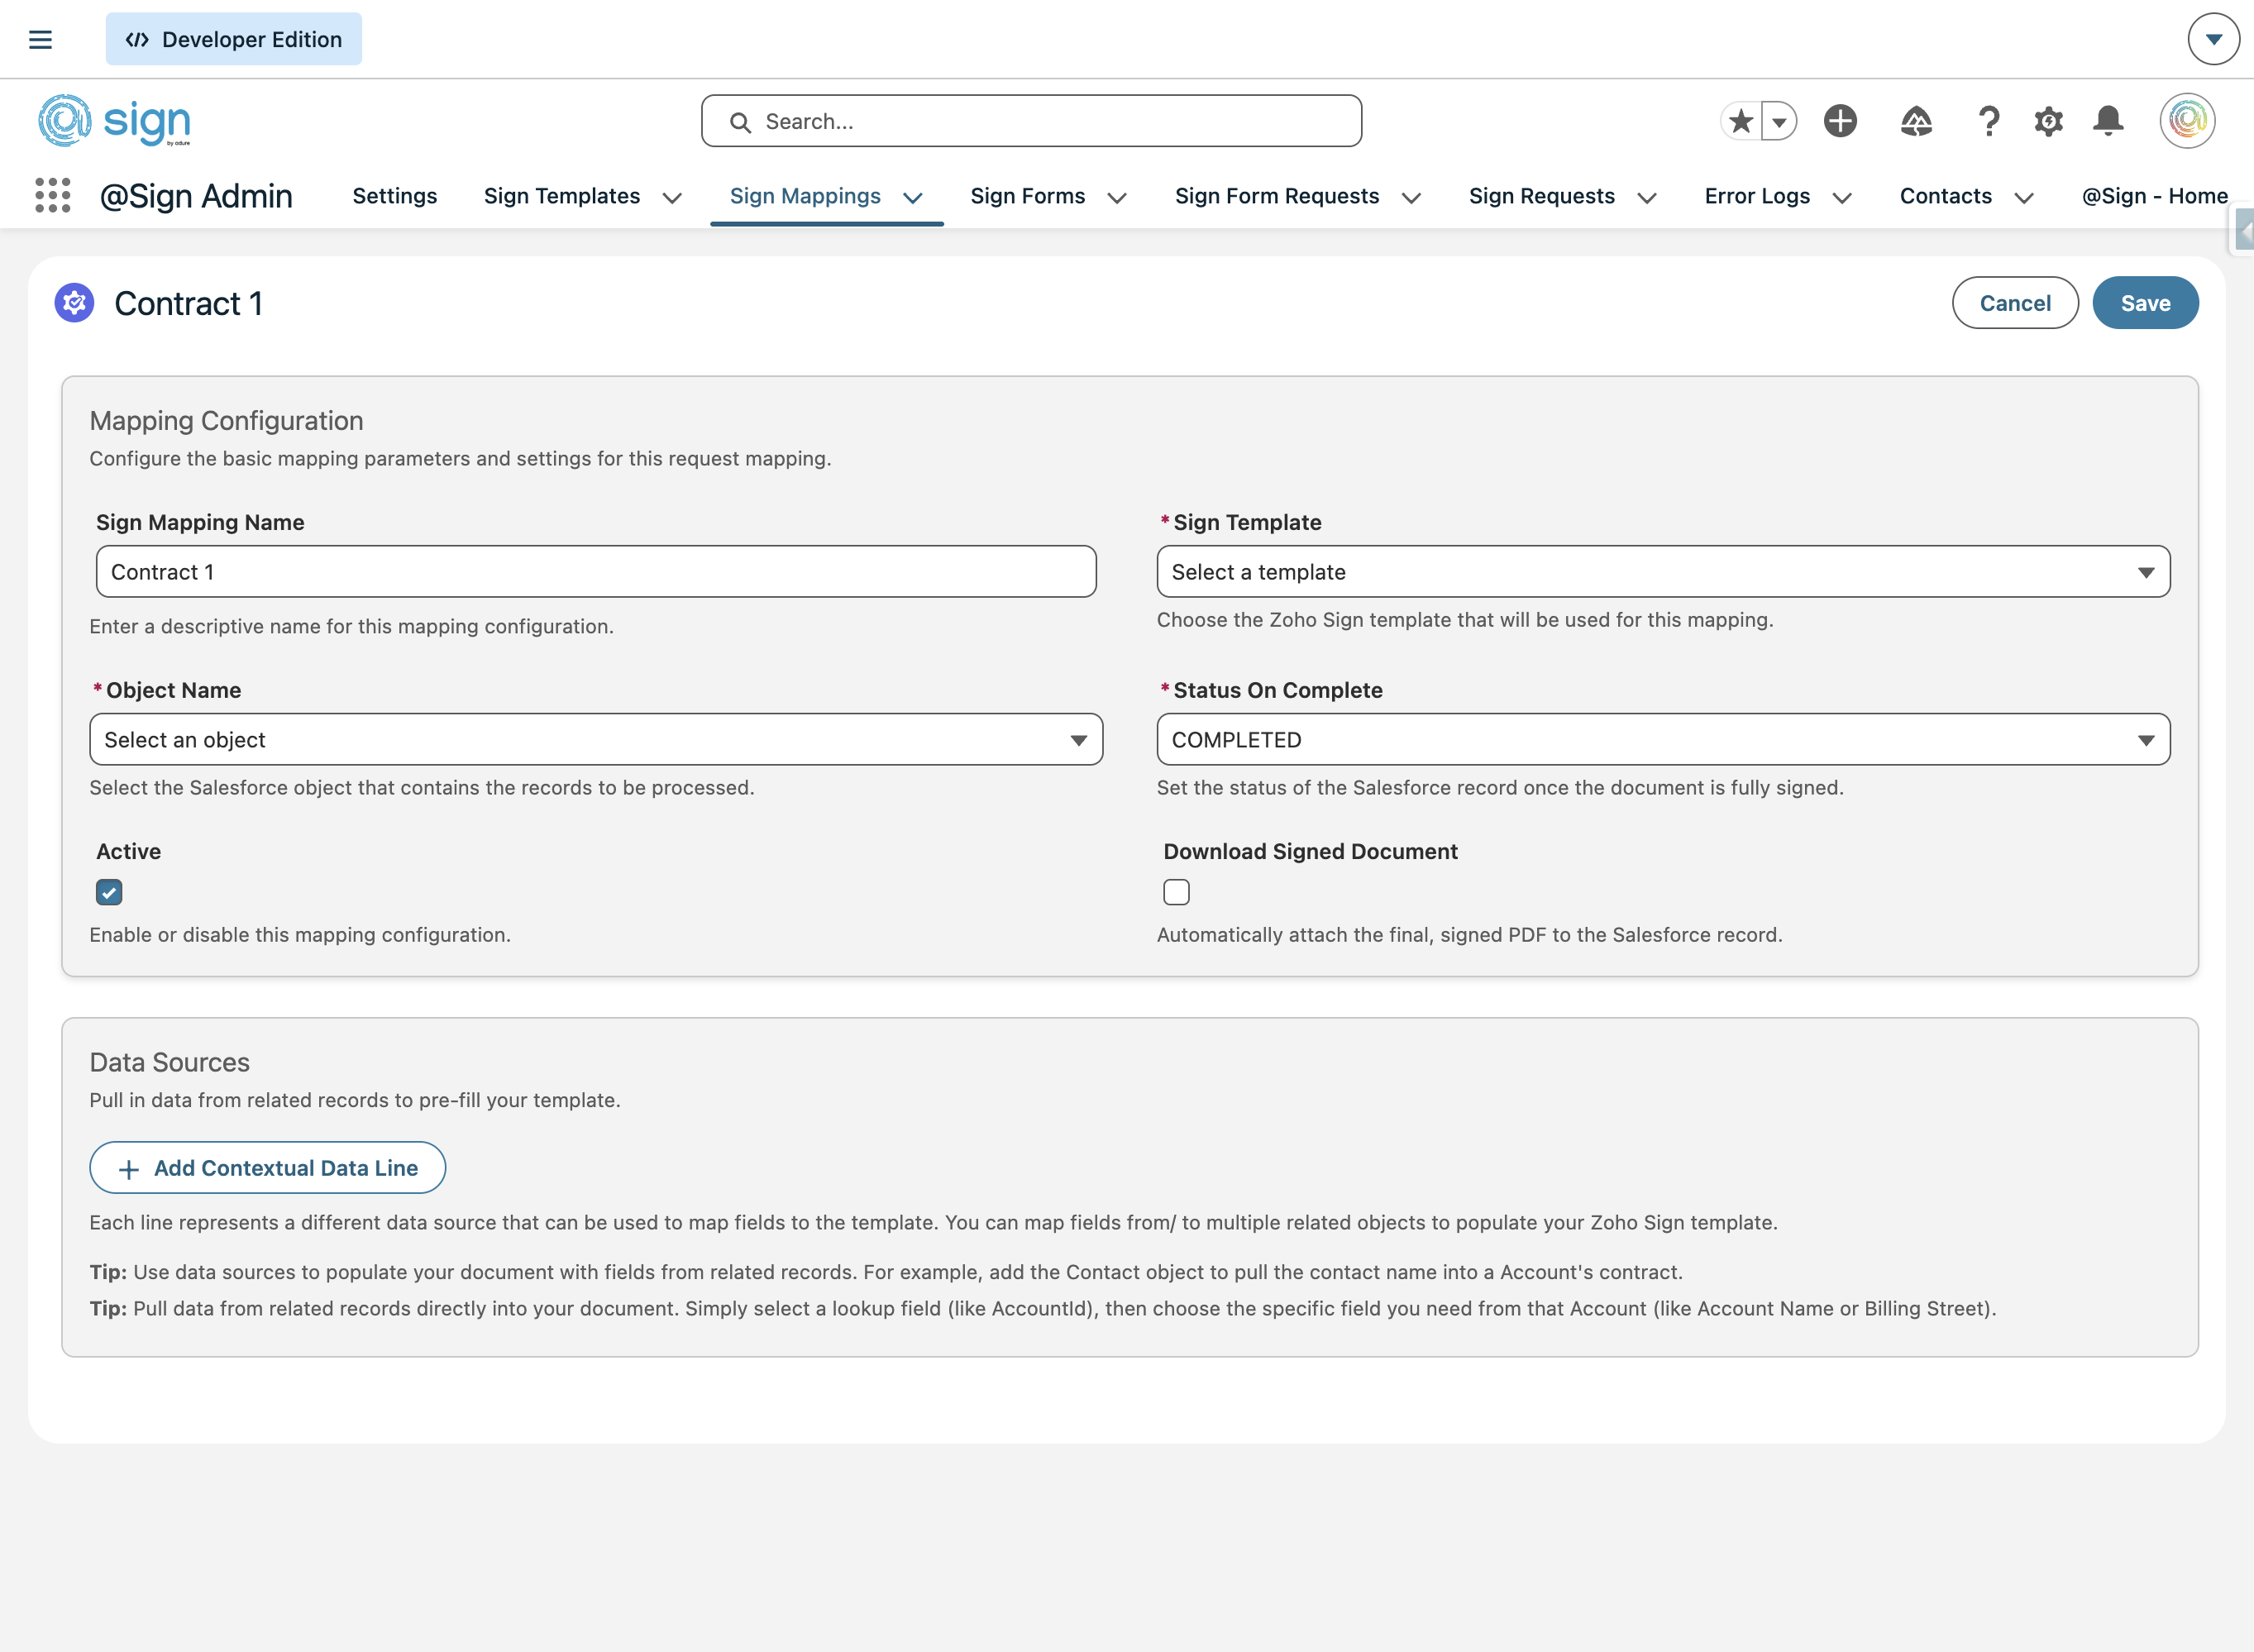
Pick the Salesforce object this mapping will pull data from — for example, Contact, Lead, or Opportunity.
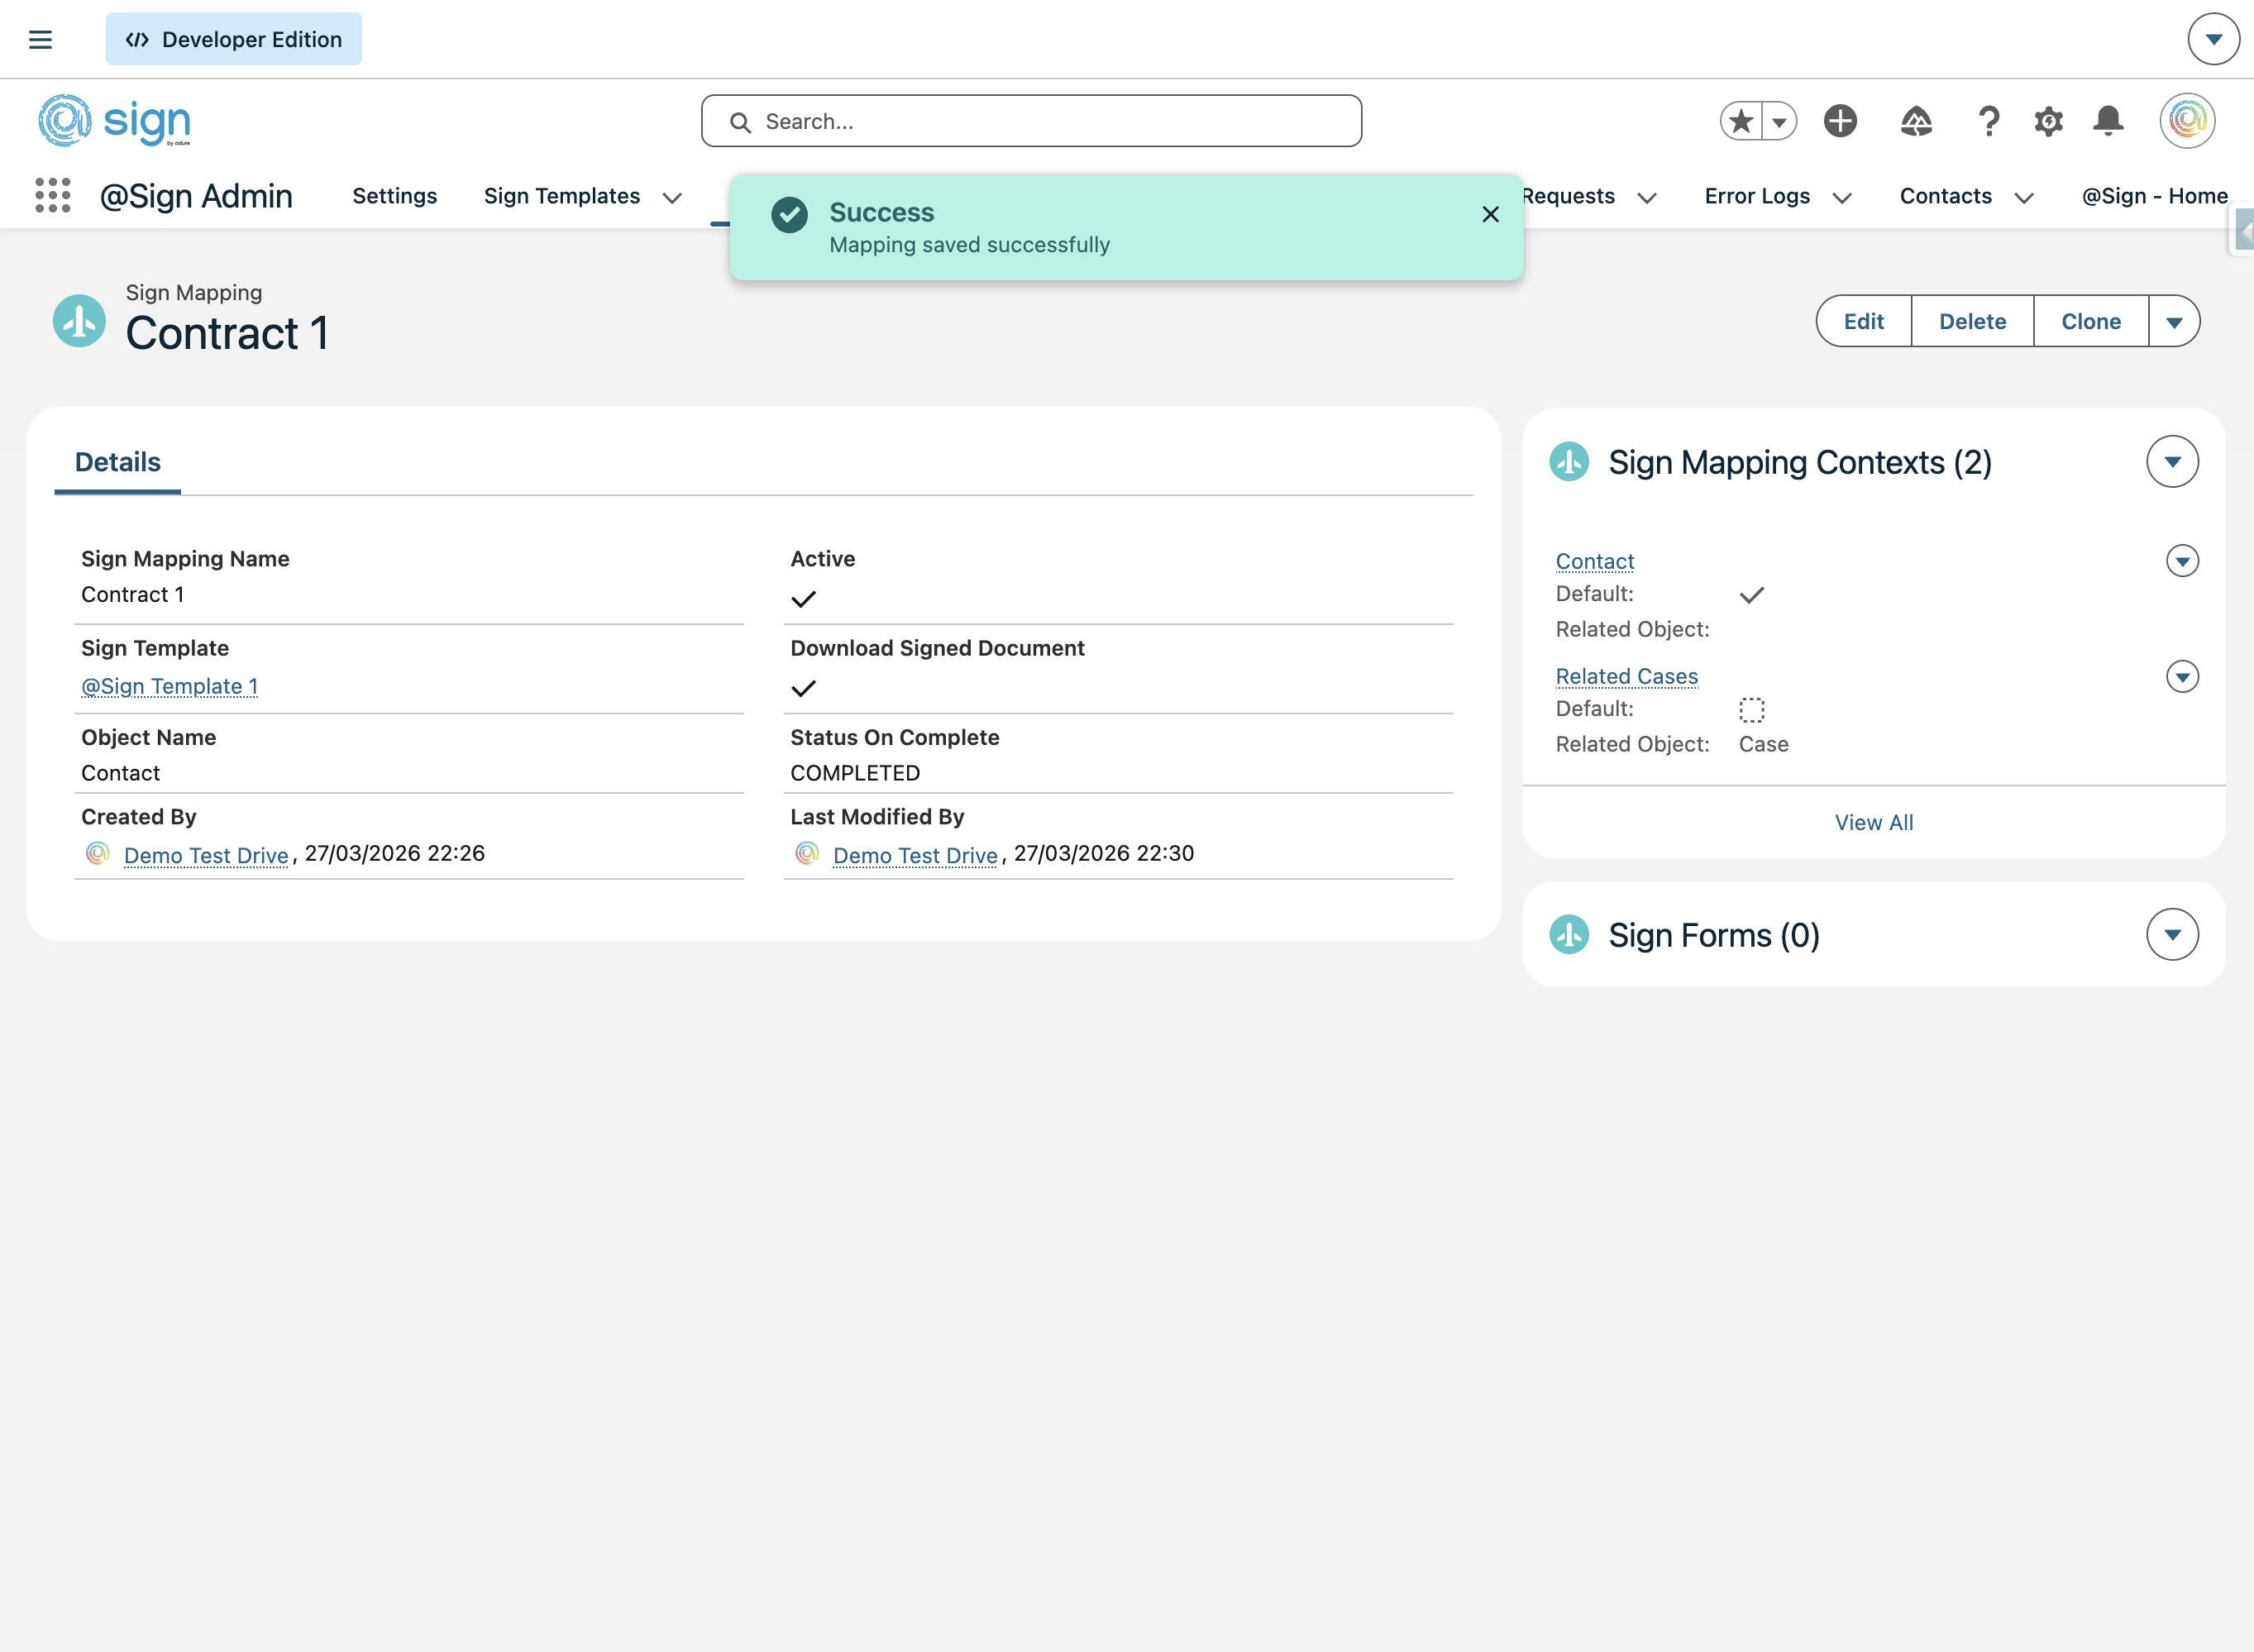
Select the status that @Sign should apply to a contract once it's been signed and synced. Choose 'Completed' if you want to review signed contracts first and perform manual actions before marking them 'Done' — or map it directly to 'Done' to have the process fully automated.
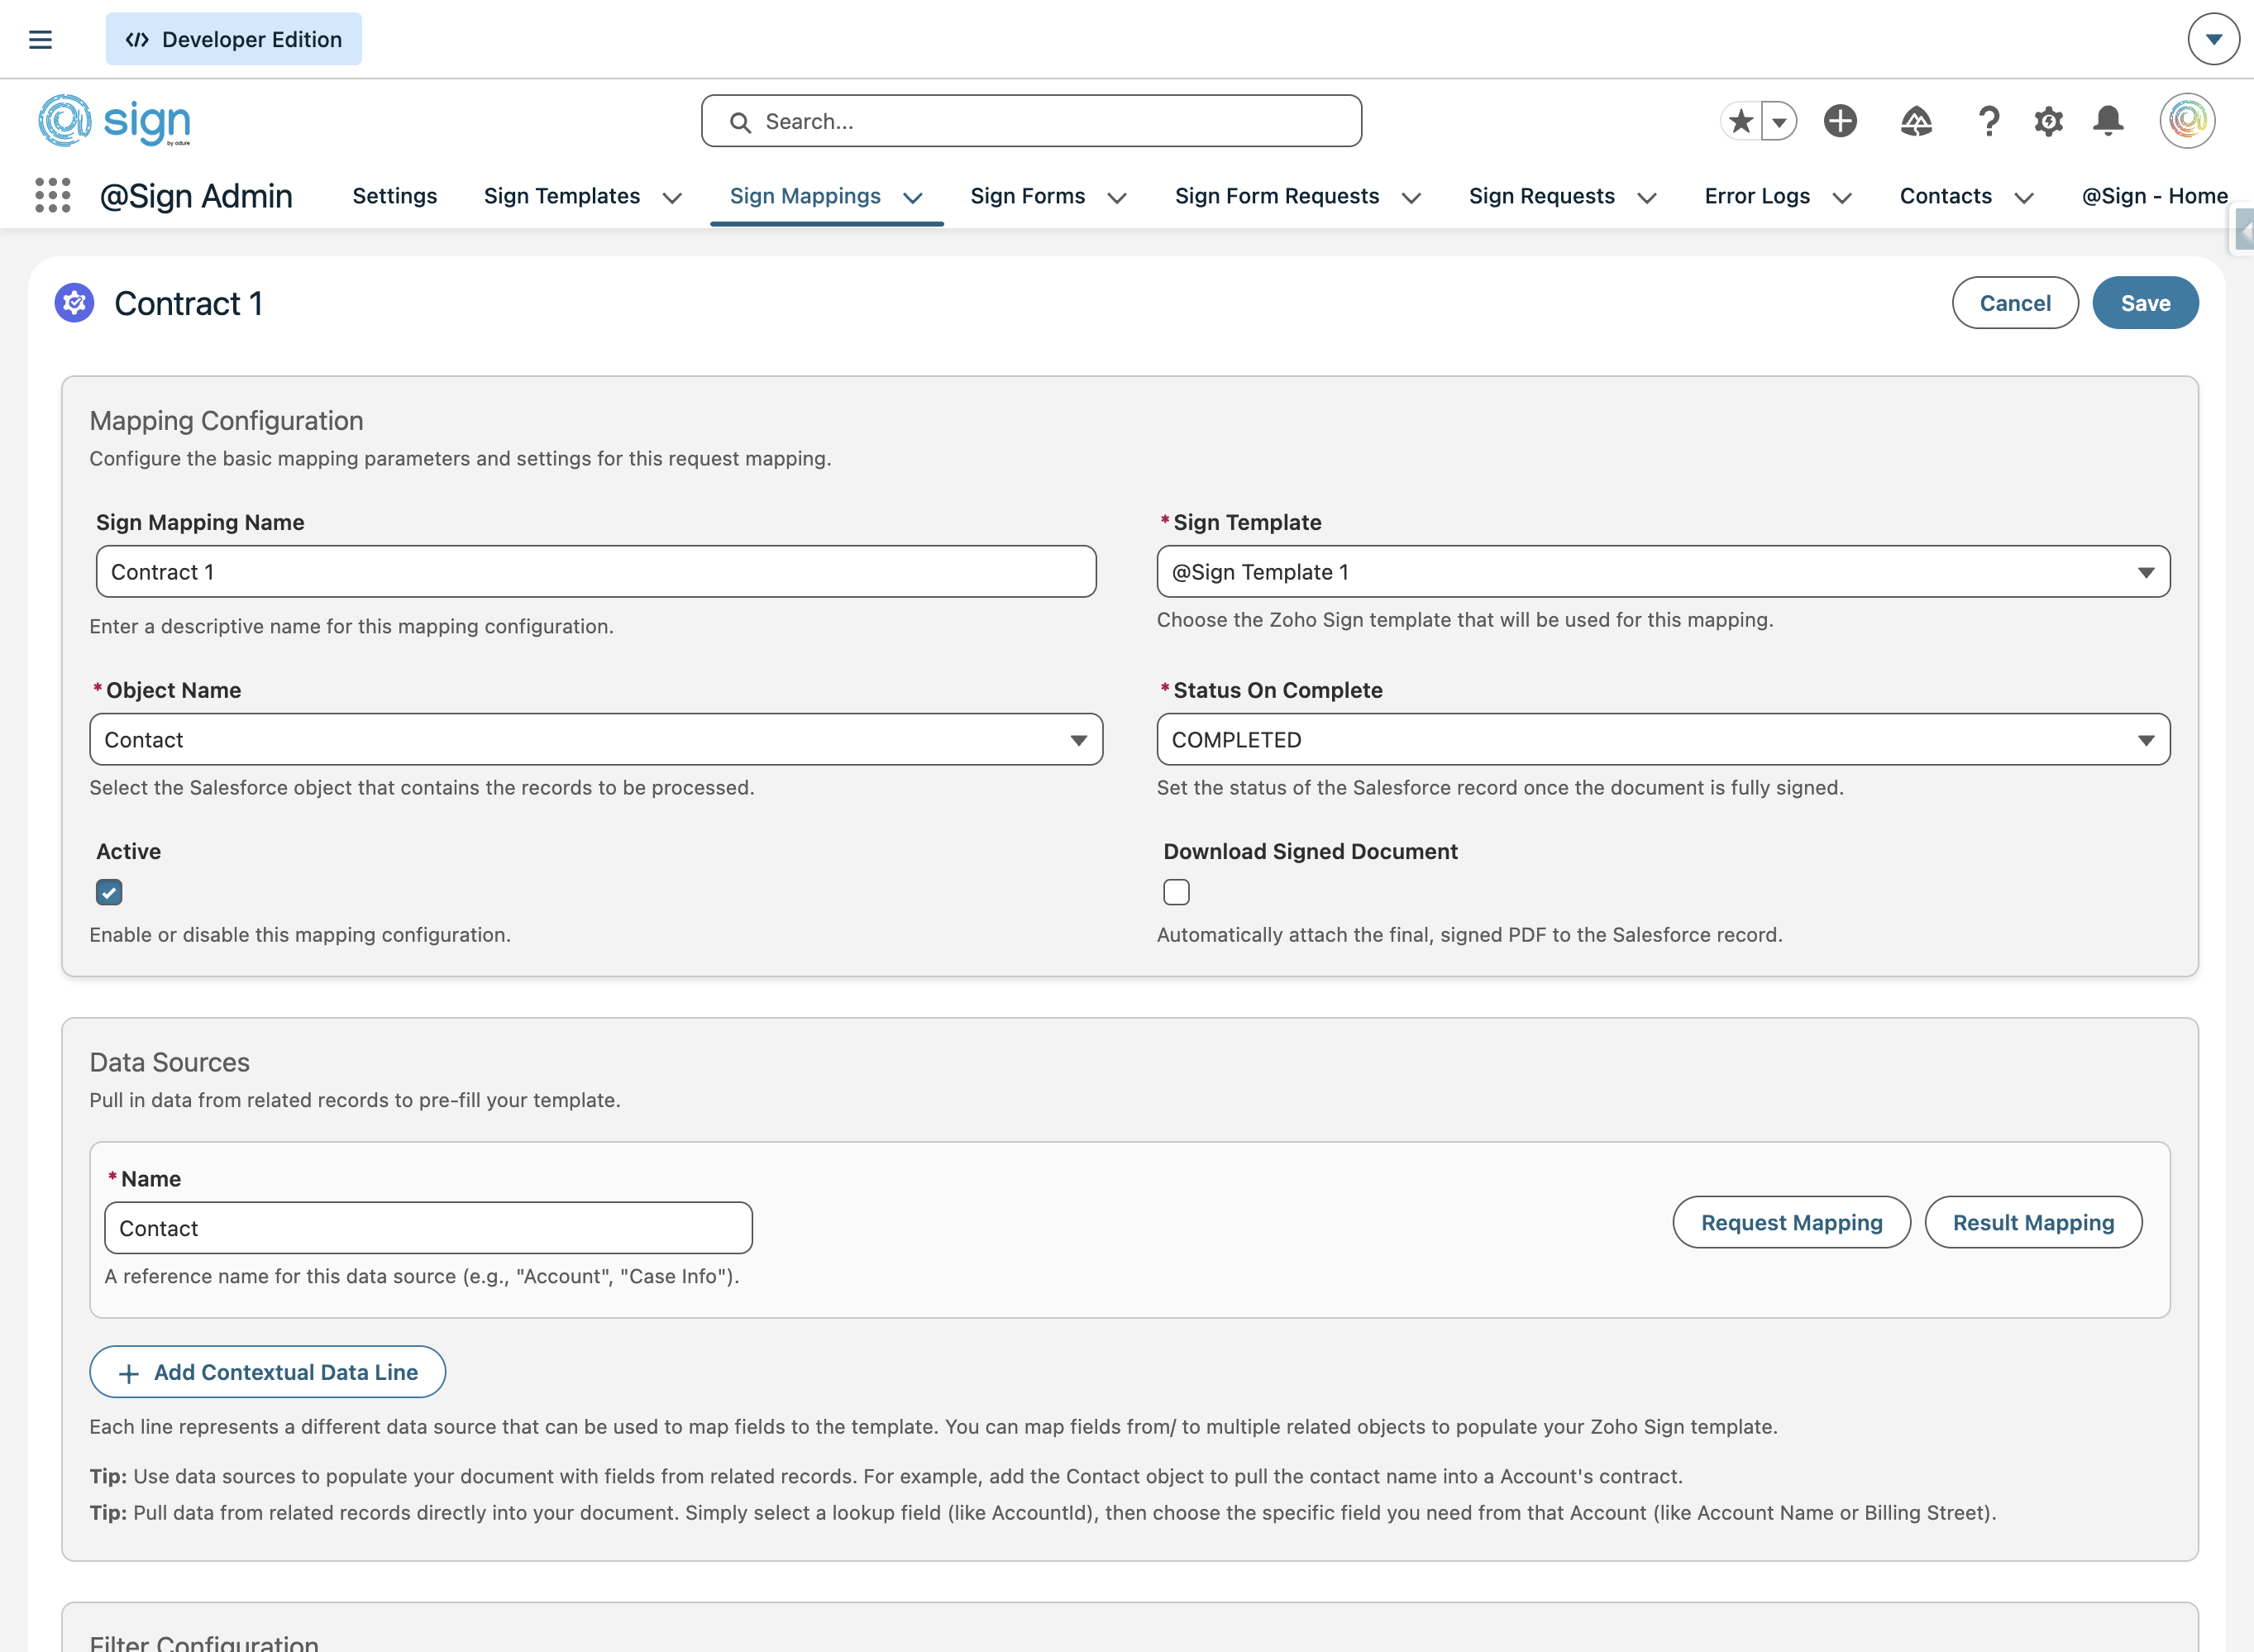
Check this option to automatically save a copy of the fully signed document back into Salesforce once all parties have signed.
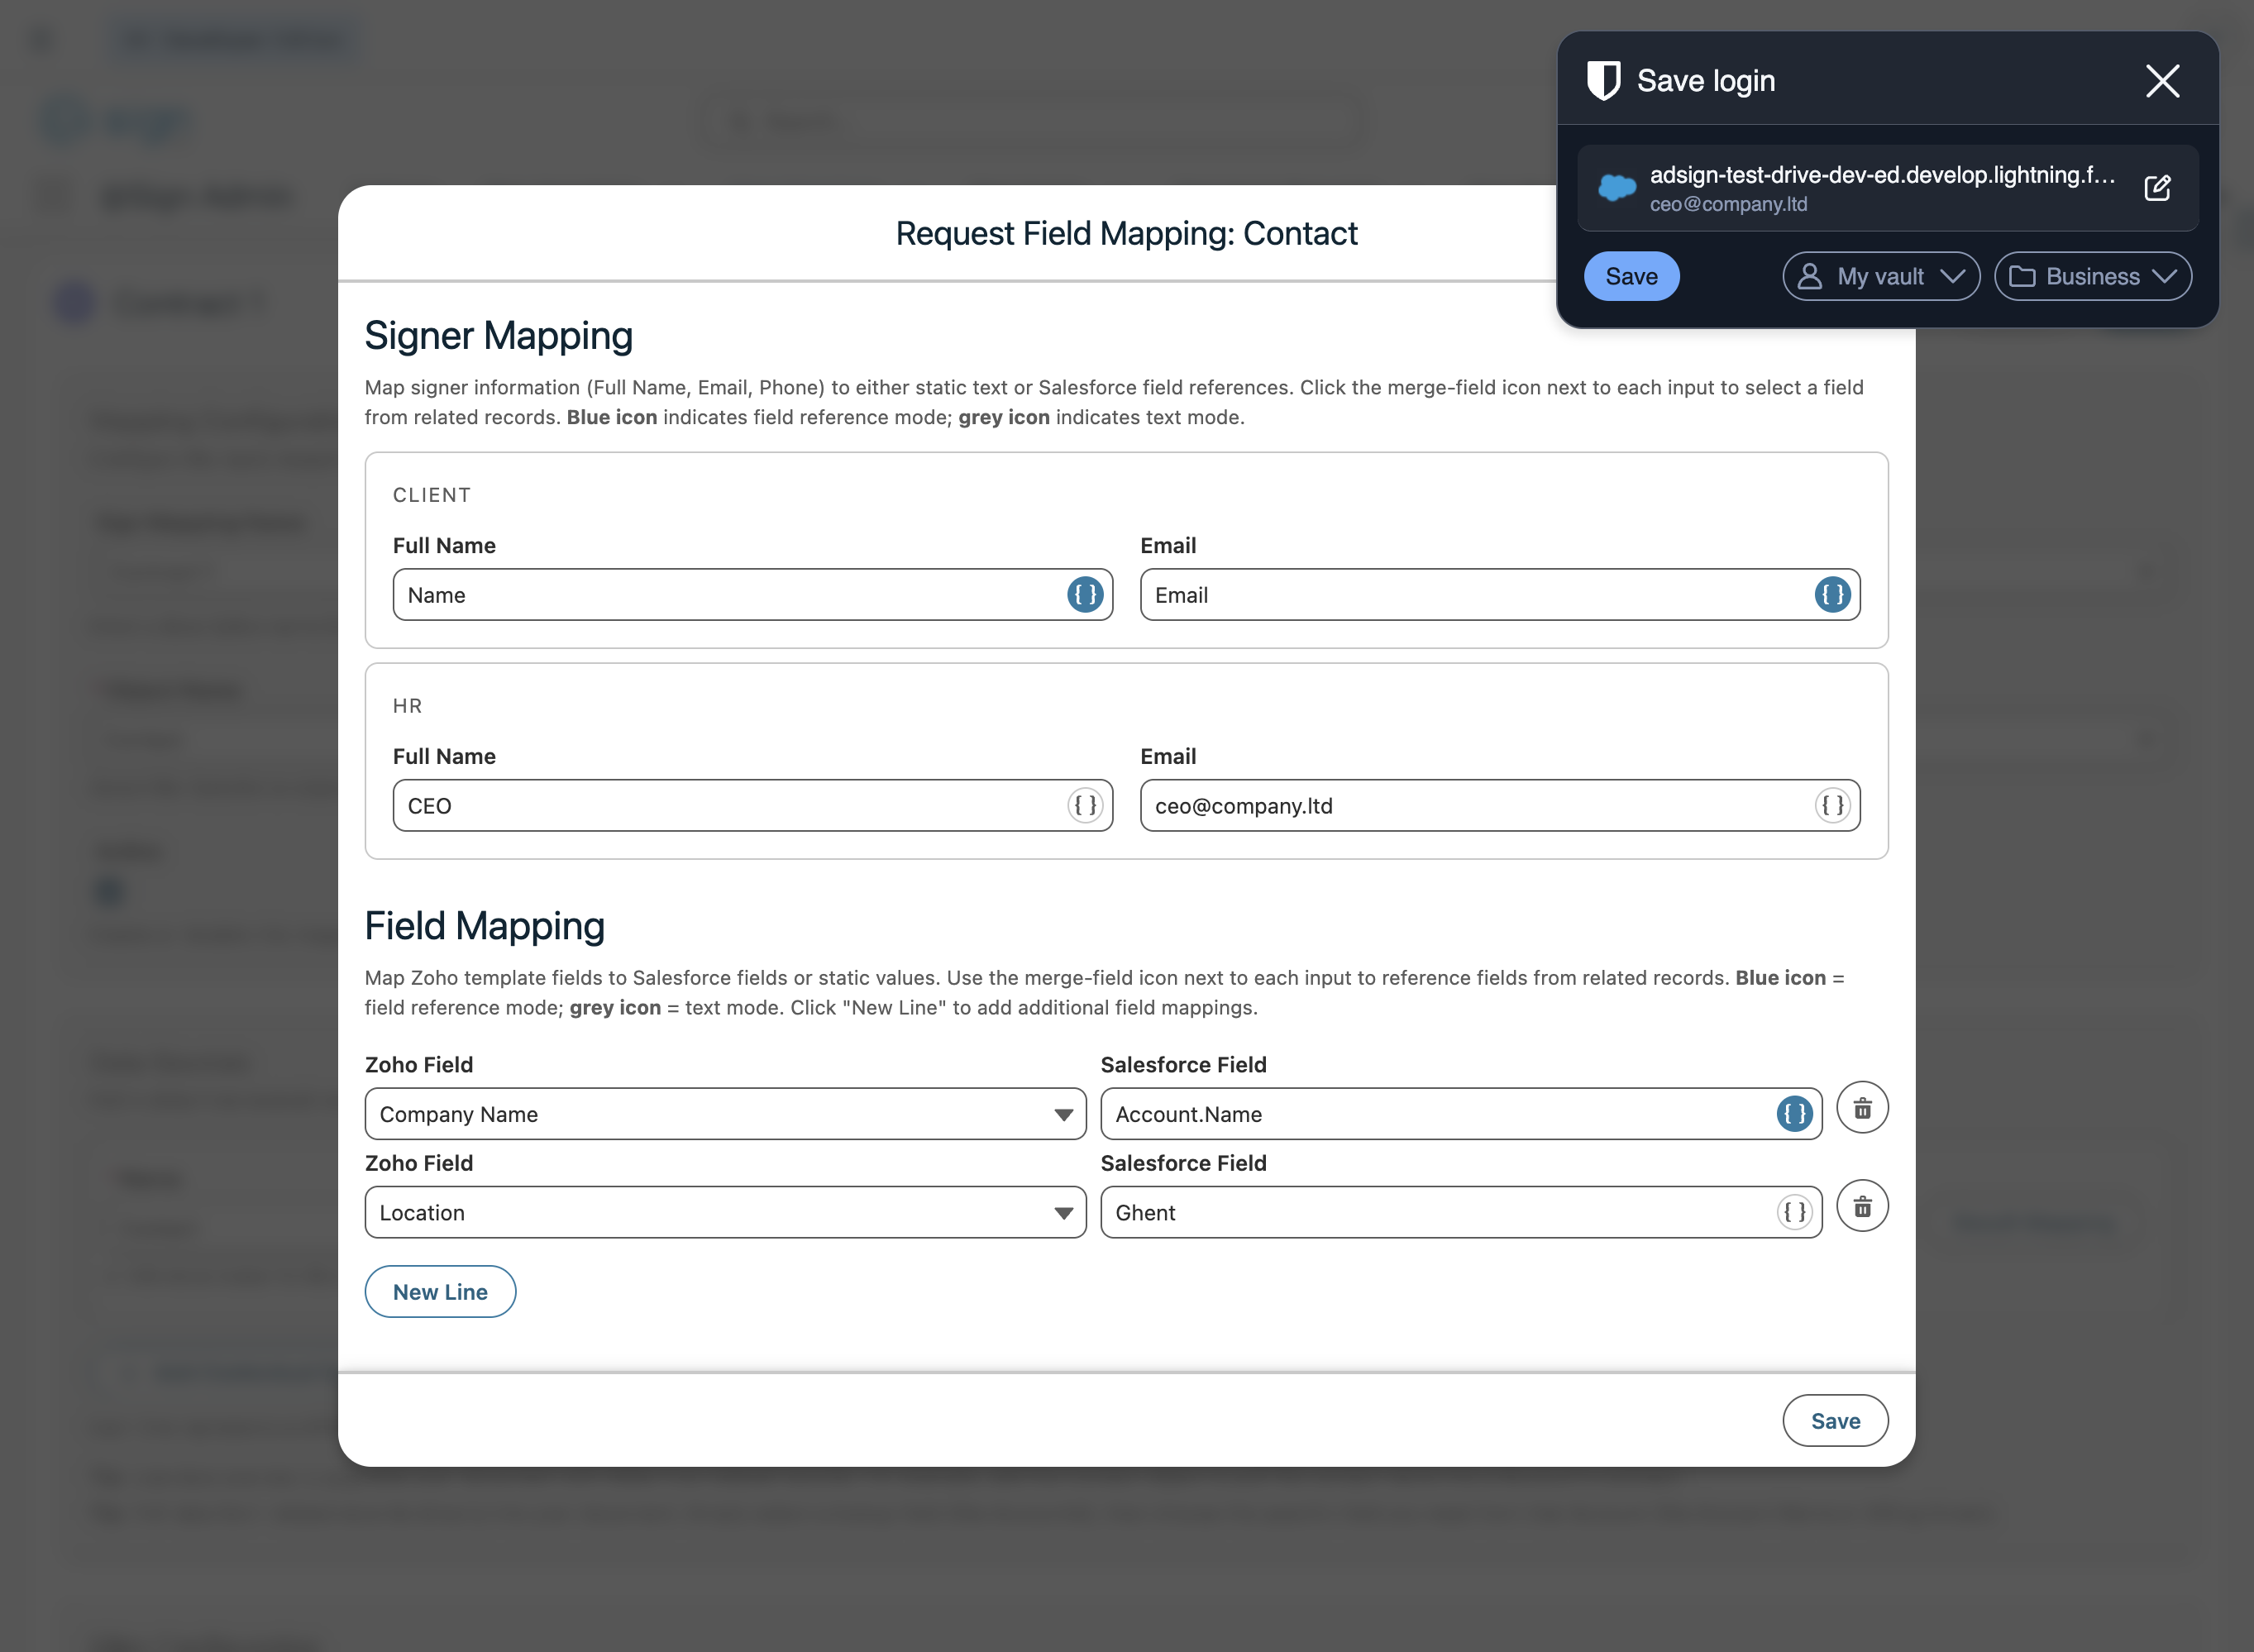
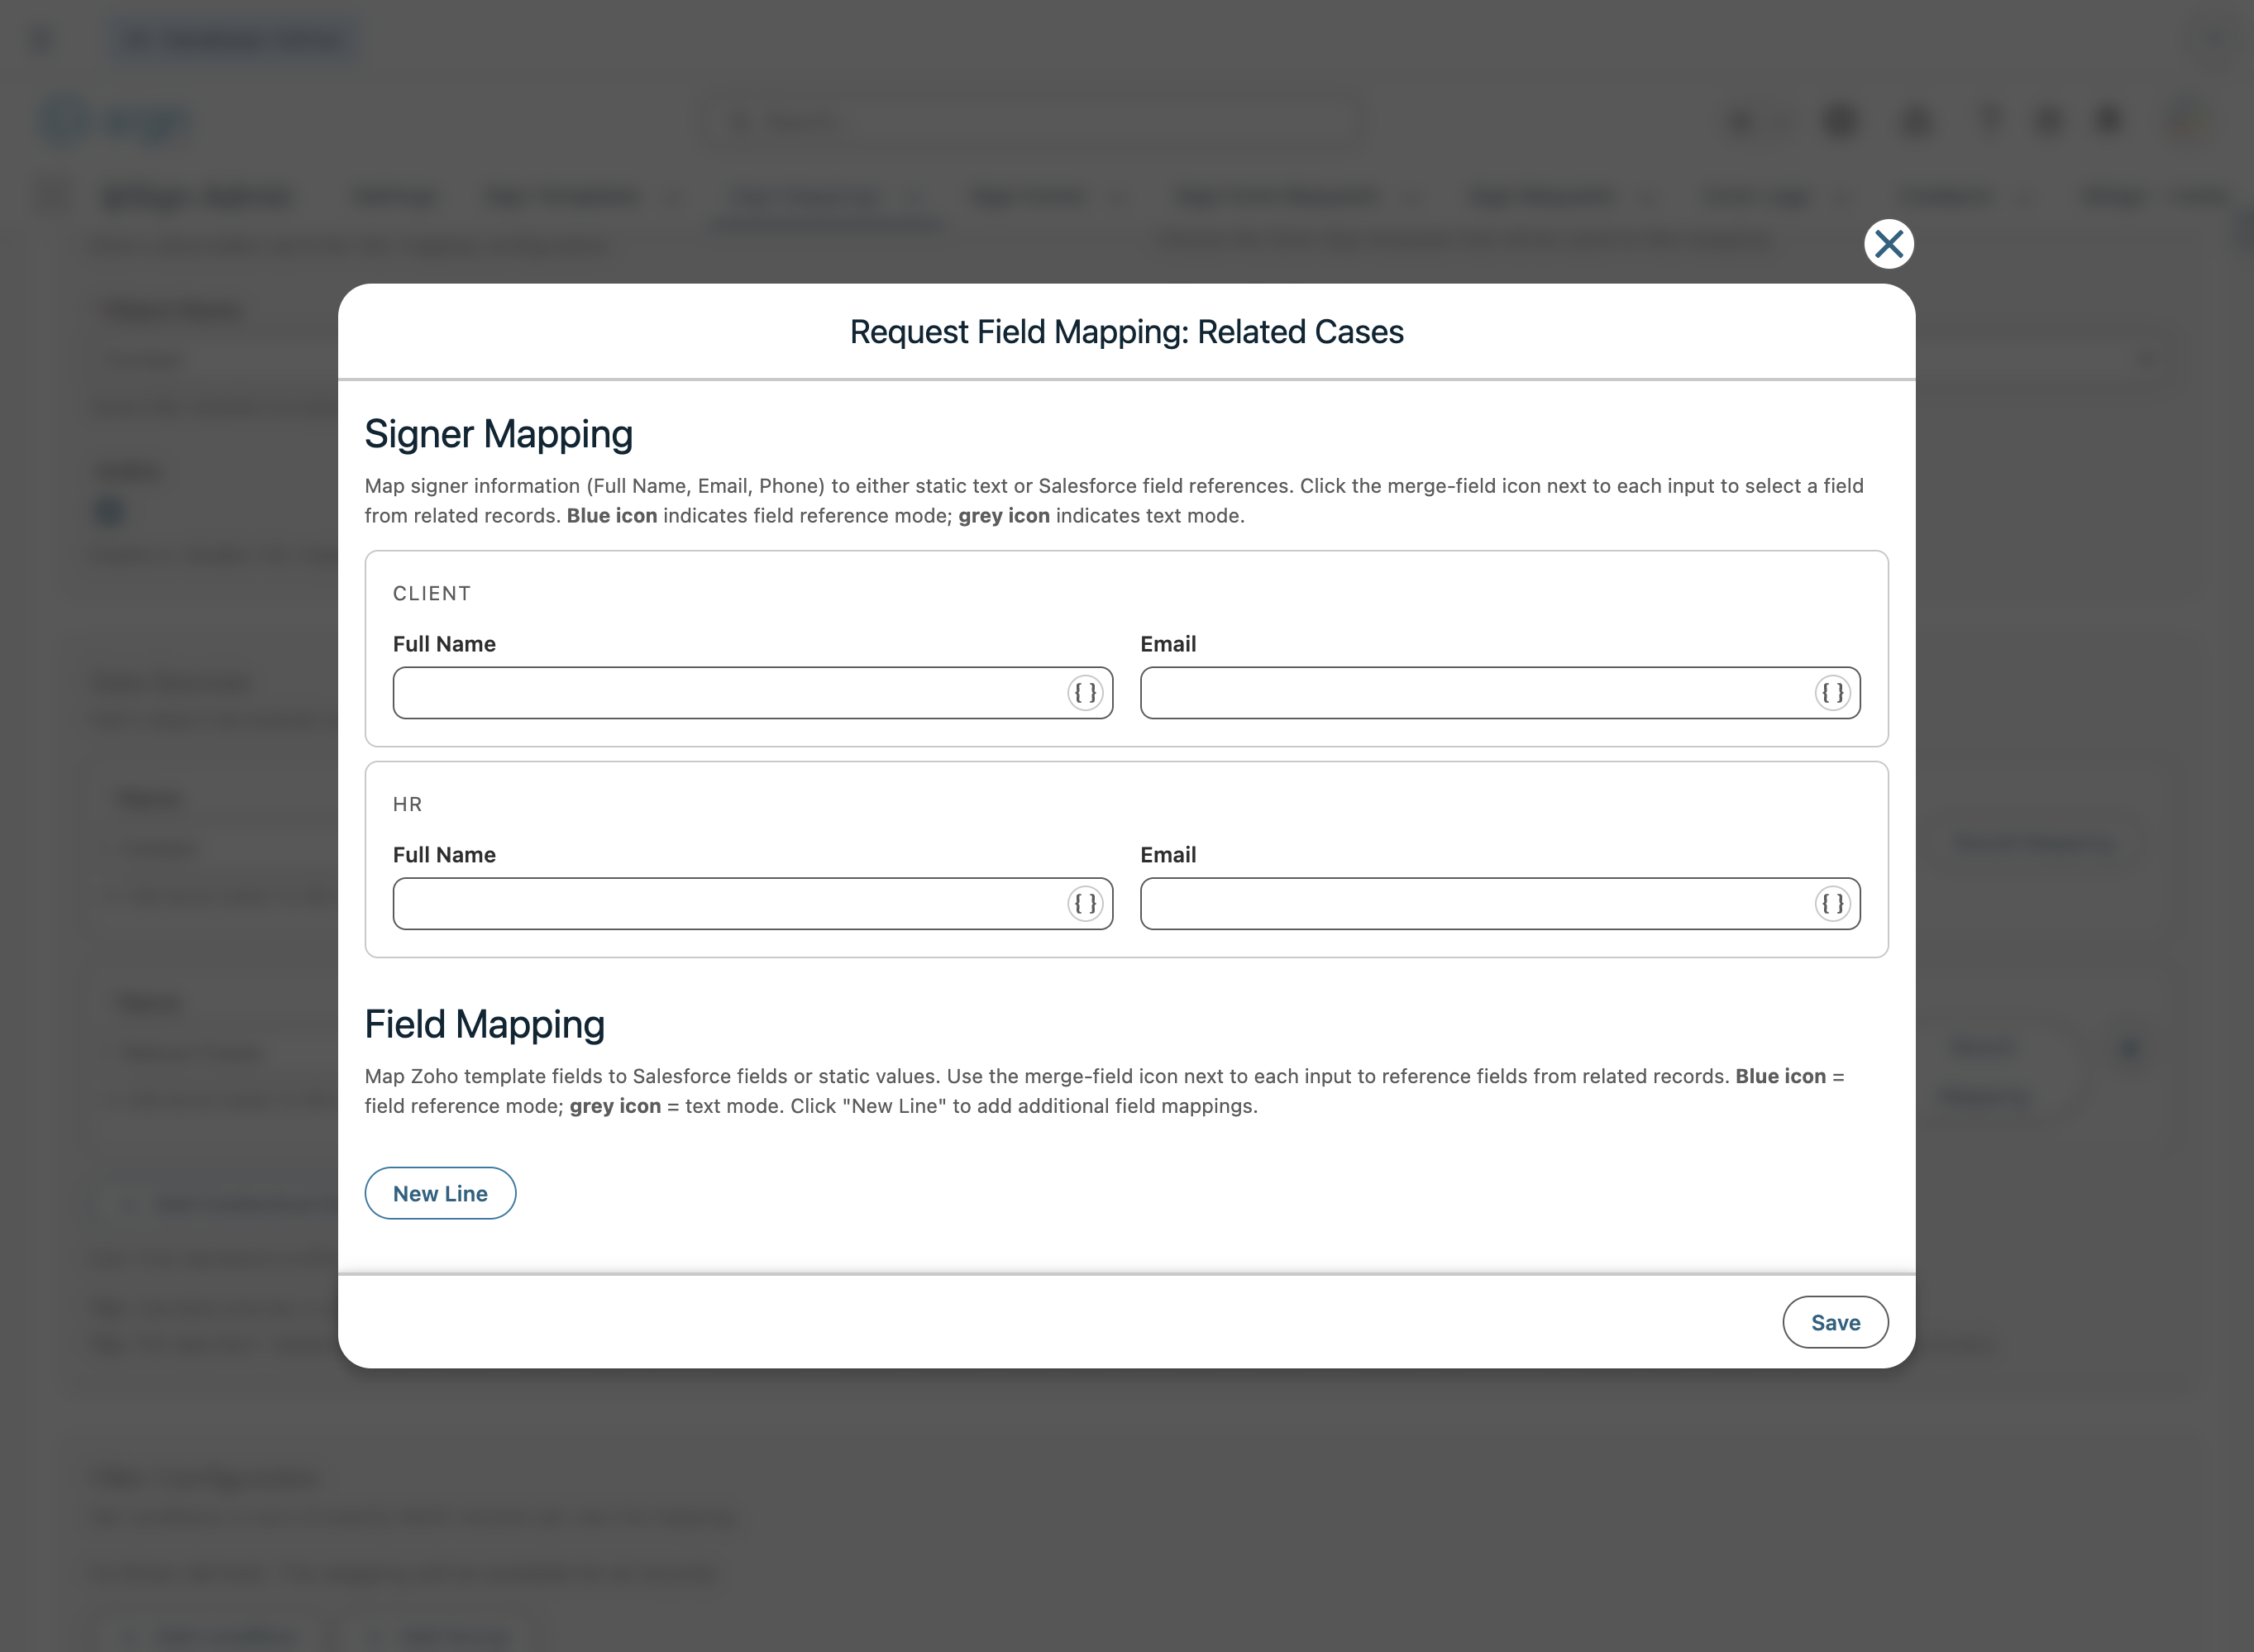
Click 'Request Mapping' to start mapping your template fields. In the Signer Mapping section at the top, fill in the name and email for each role. For each field, you can either type a static value or click the merge-field icon (blue = field reference from the object, grey = plain text mode).
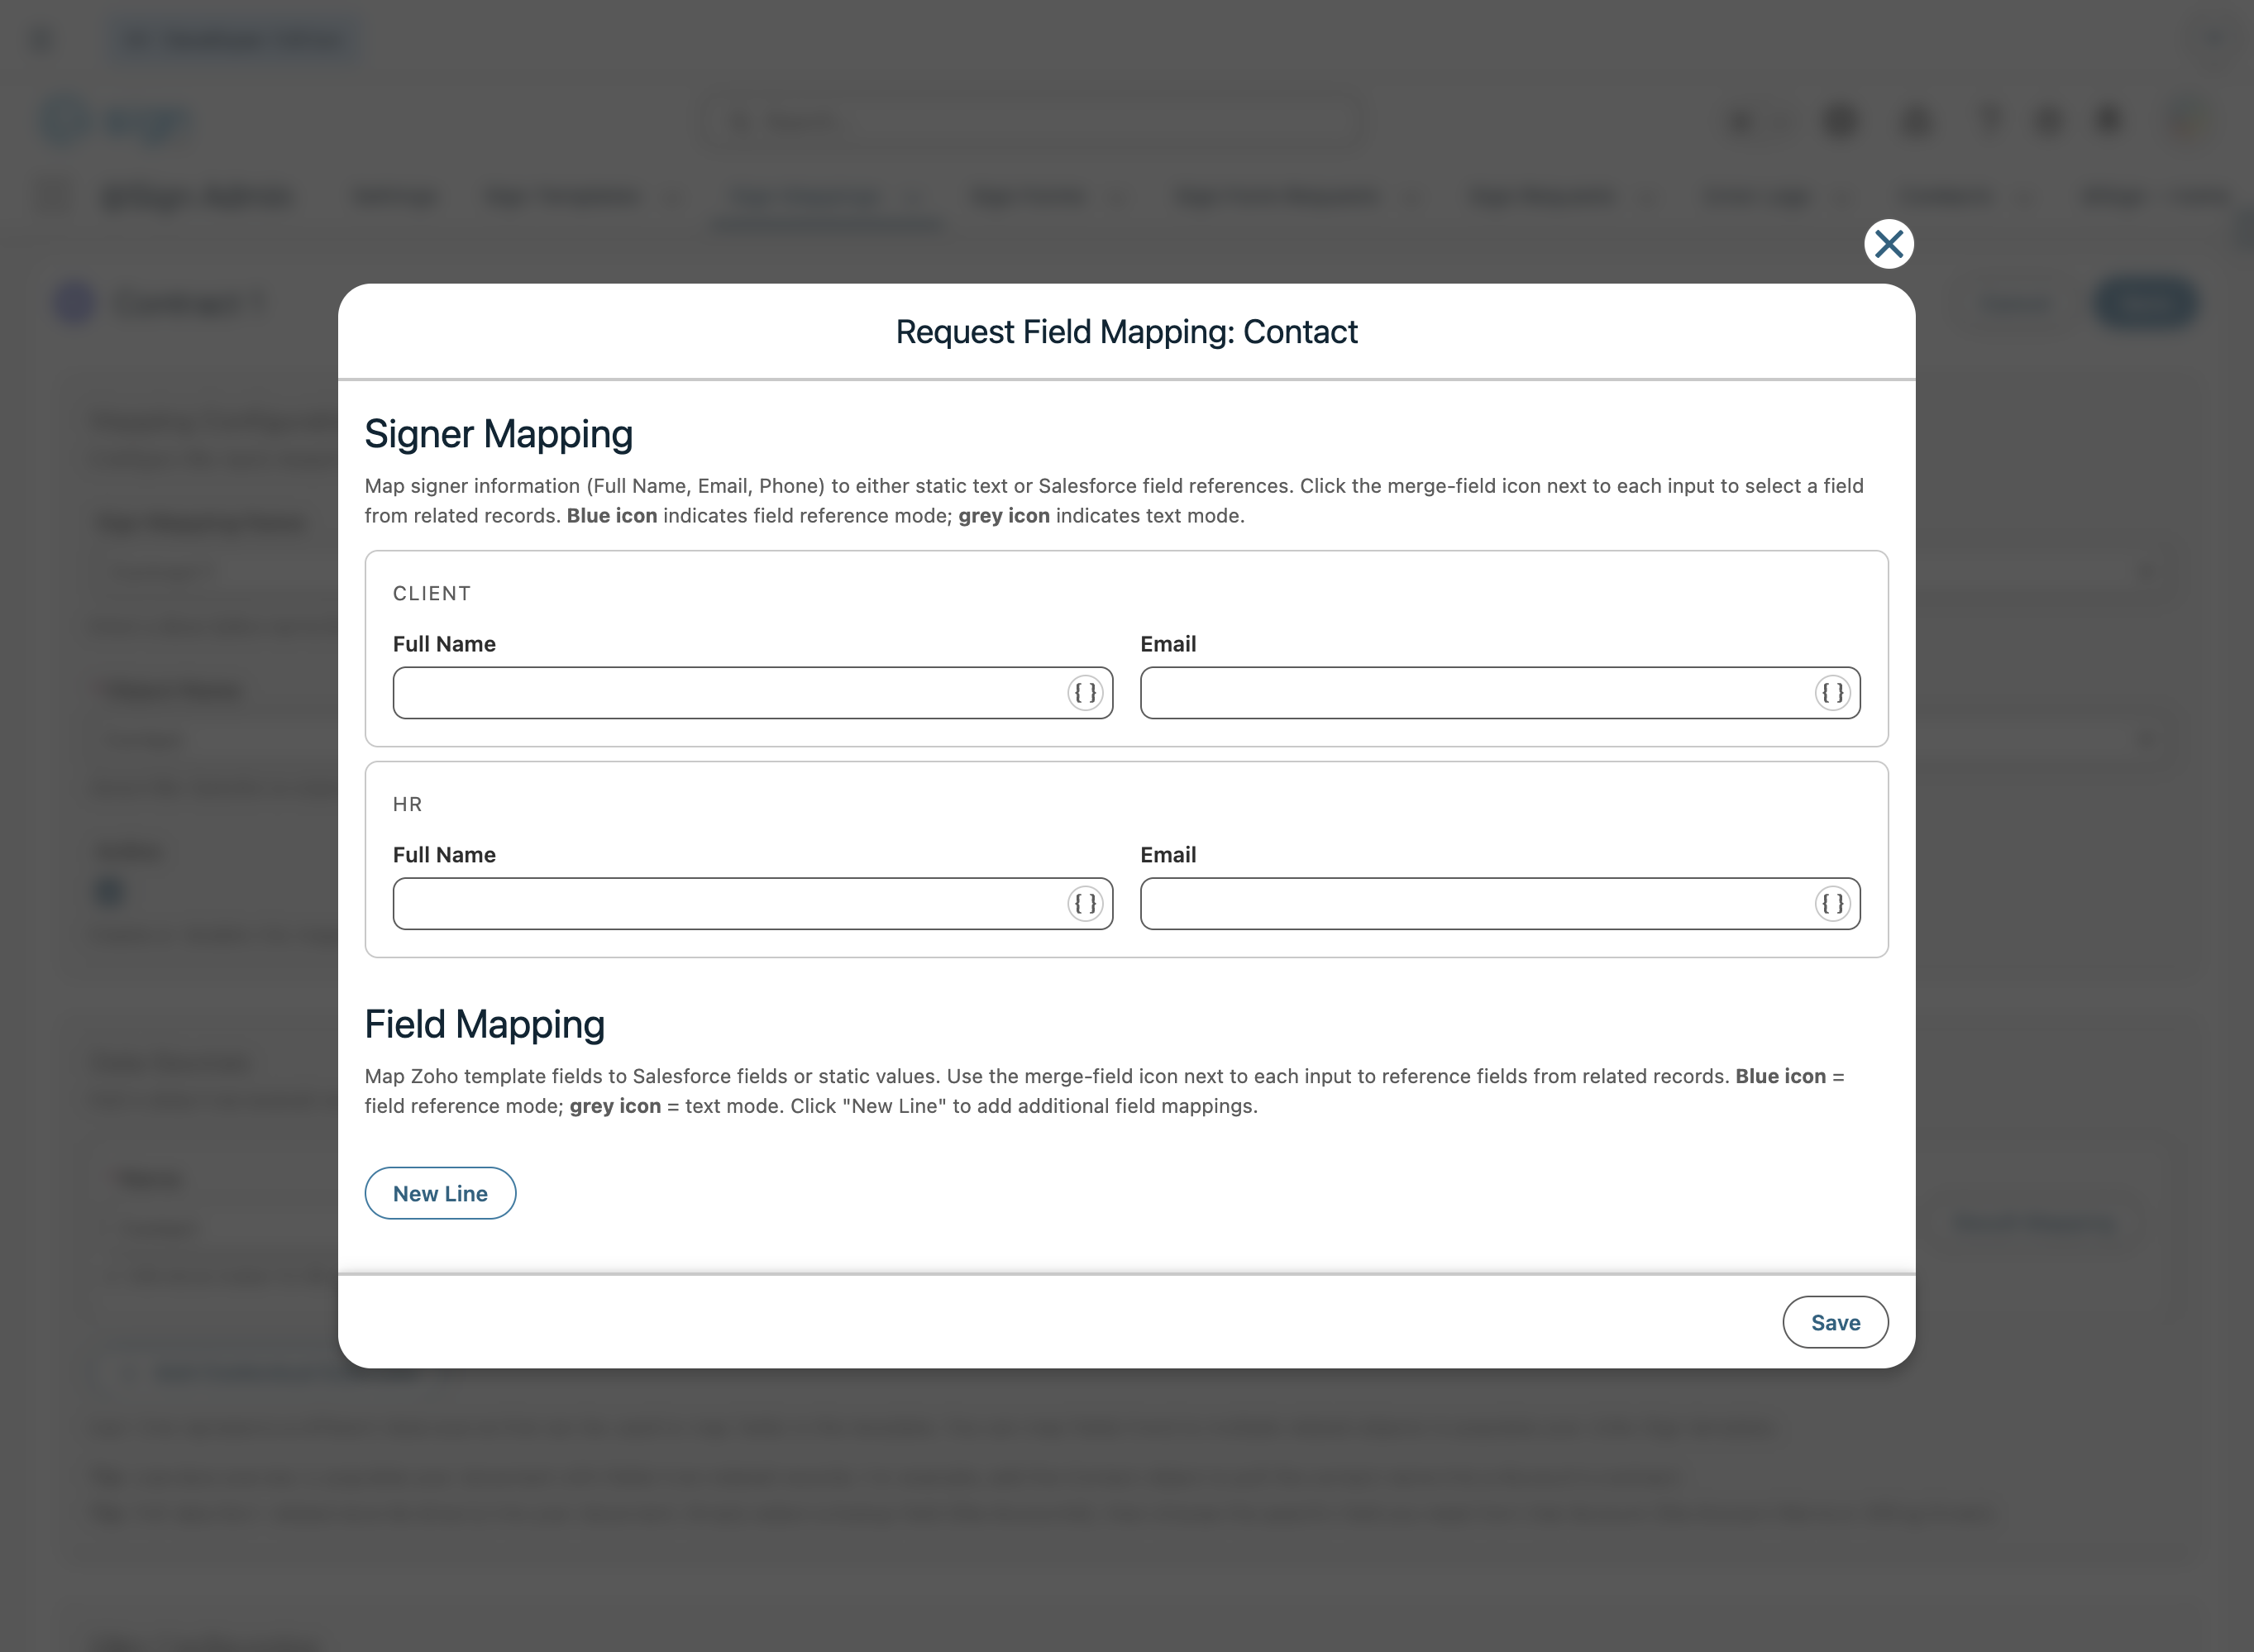
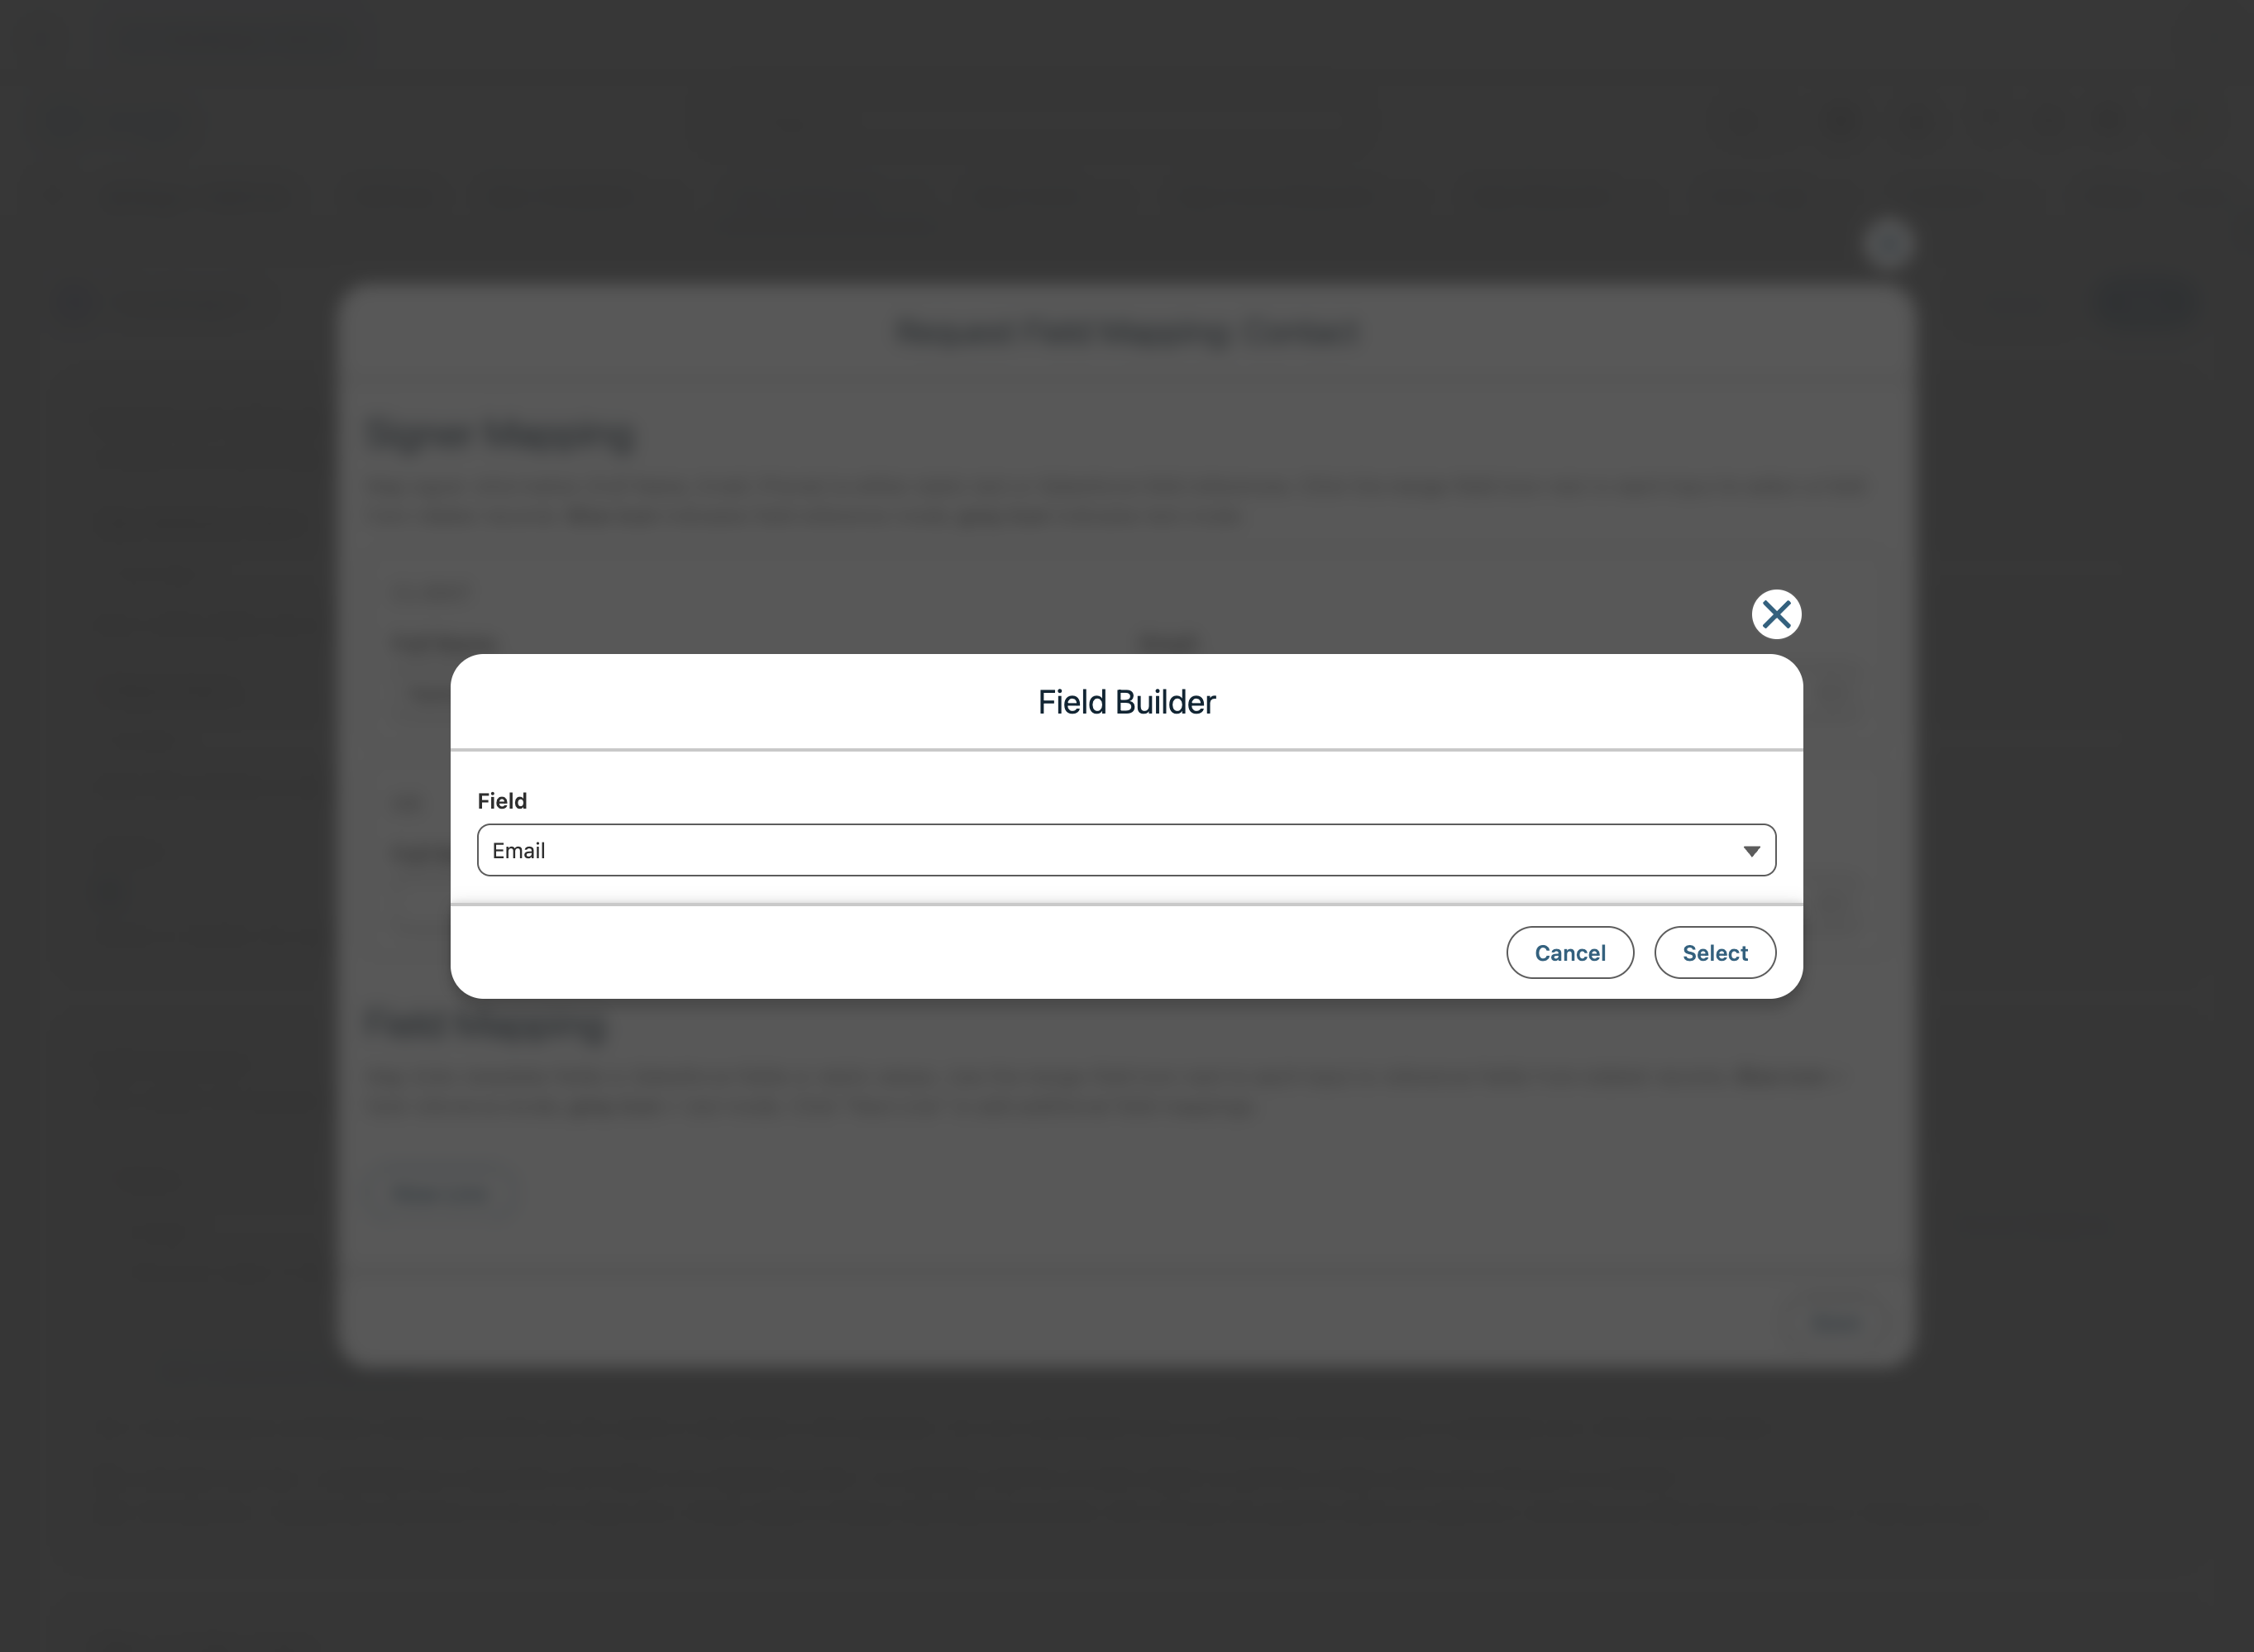
When you click the merge-field icon, a Field Builder modal appears. Use the dropdown to select the Salesforce field you want to reference for that input, then click 'Select' to confirm.
In the Field Mapping section below, map each Zoho template field to either a Salesforce field reference (blue icon) or a static value (grey icon). For example, map 'Company Name' to Account.Name or set 'Location' to a fixed value like 'Ghent'. Click 'New Line' to add more field mappings.
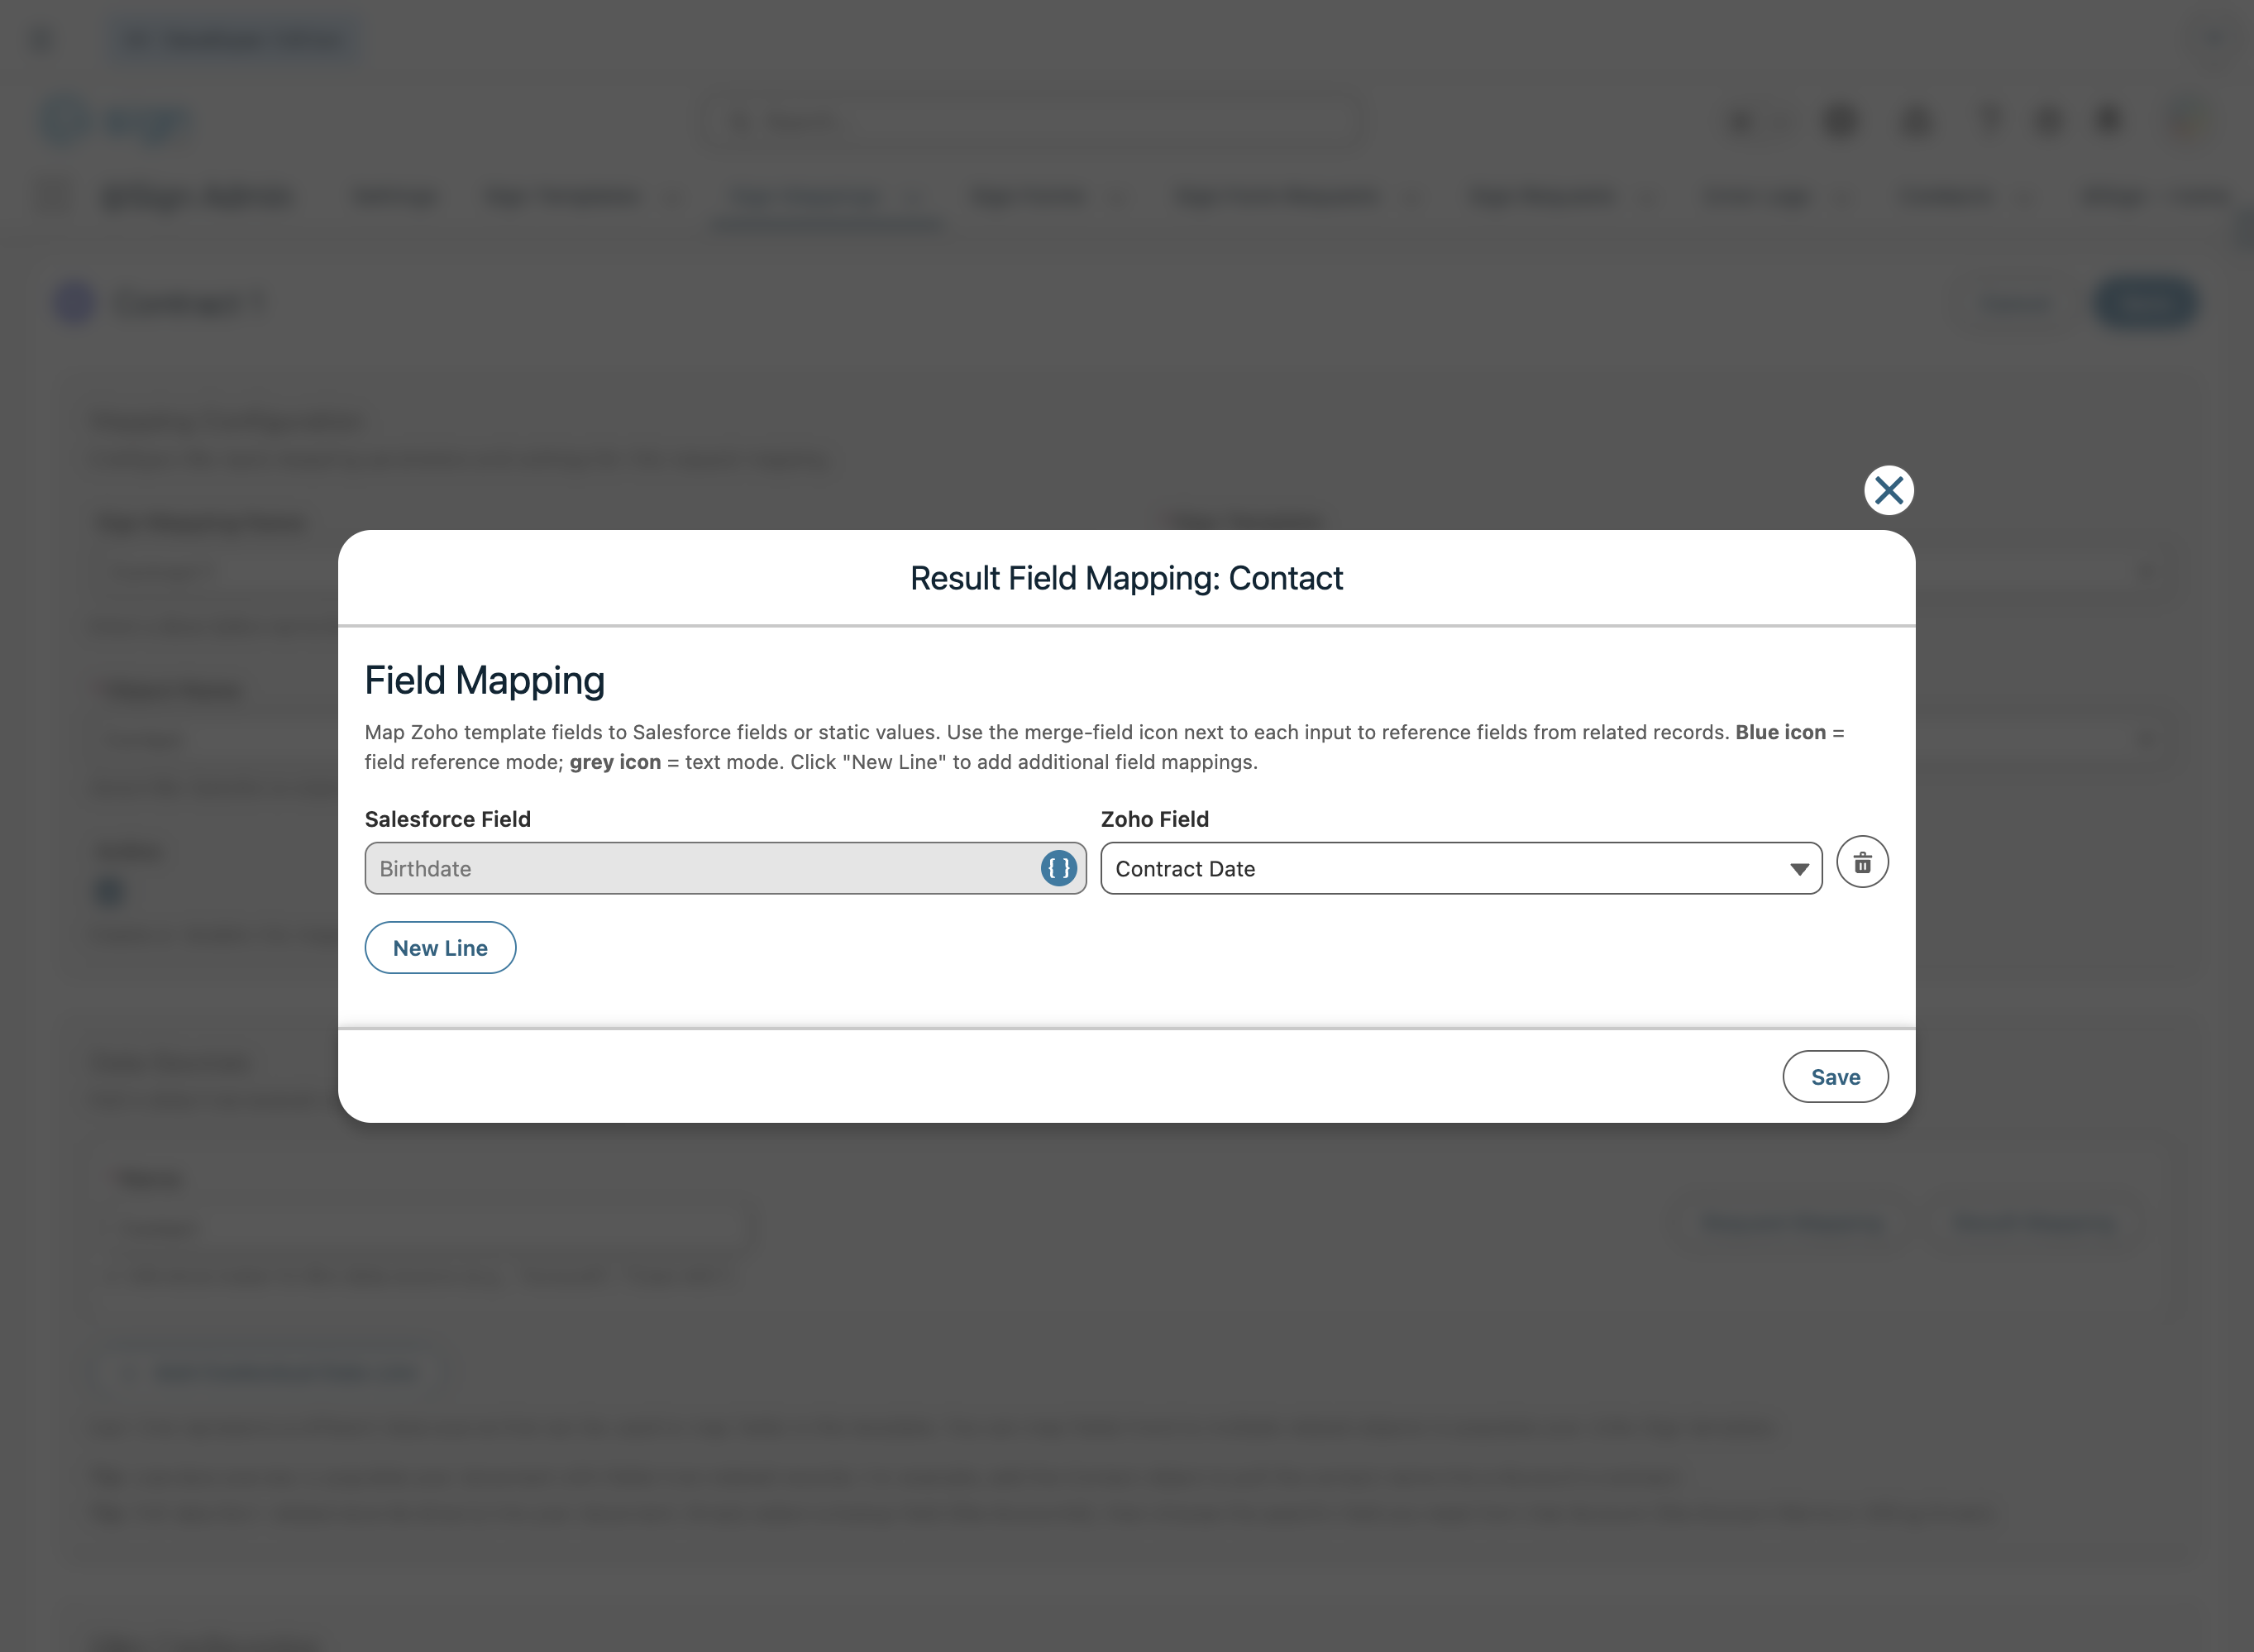
Click 'Result Mapping' to define which data should be written back to the Salesforce record after the document is signed. Select the Salesforce field to save to on the left, and the corresponding Zoho Sign field on the right. This lets you capture data filled in during signing — for example, saving the contract date back to the contact record.
By default, the primary object is available as a data source. To pull in data from related objects, click '+ Add Contextual Data Line', give the relation a name, and select the related object. You can also add a filter to narrow down records when multiple related objects exist — for example, filtering Cases by a specific field value.
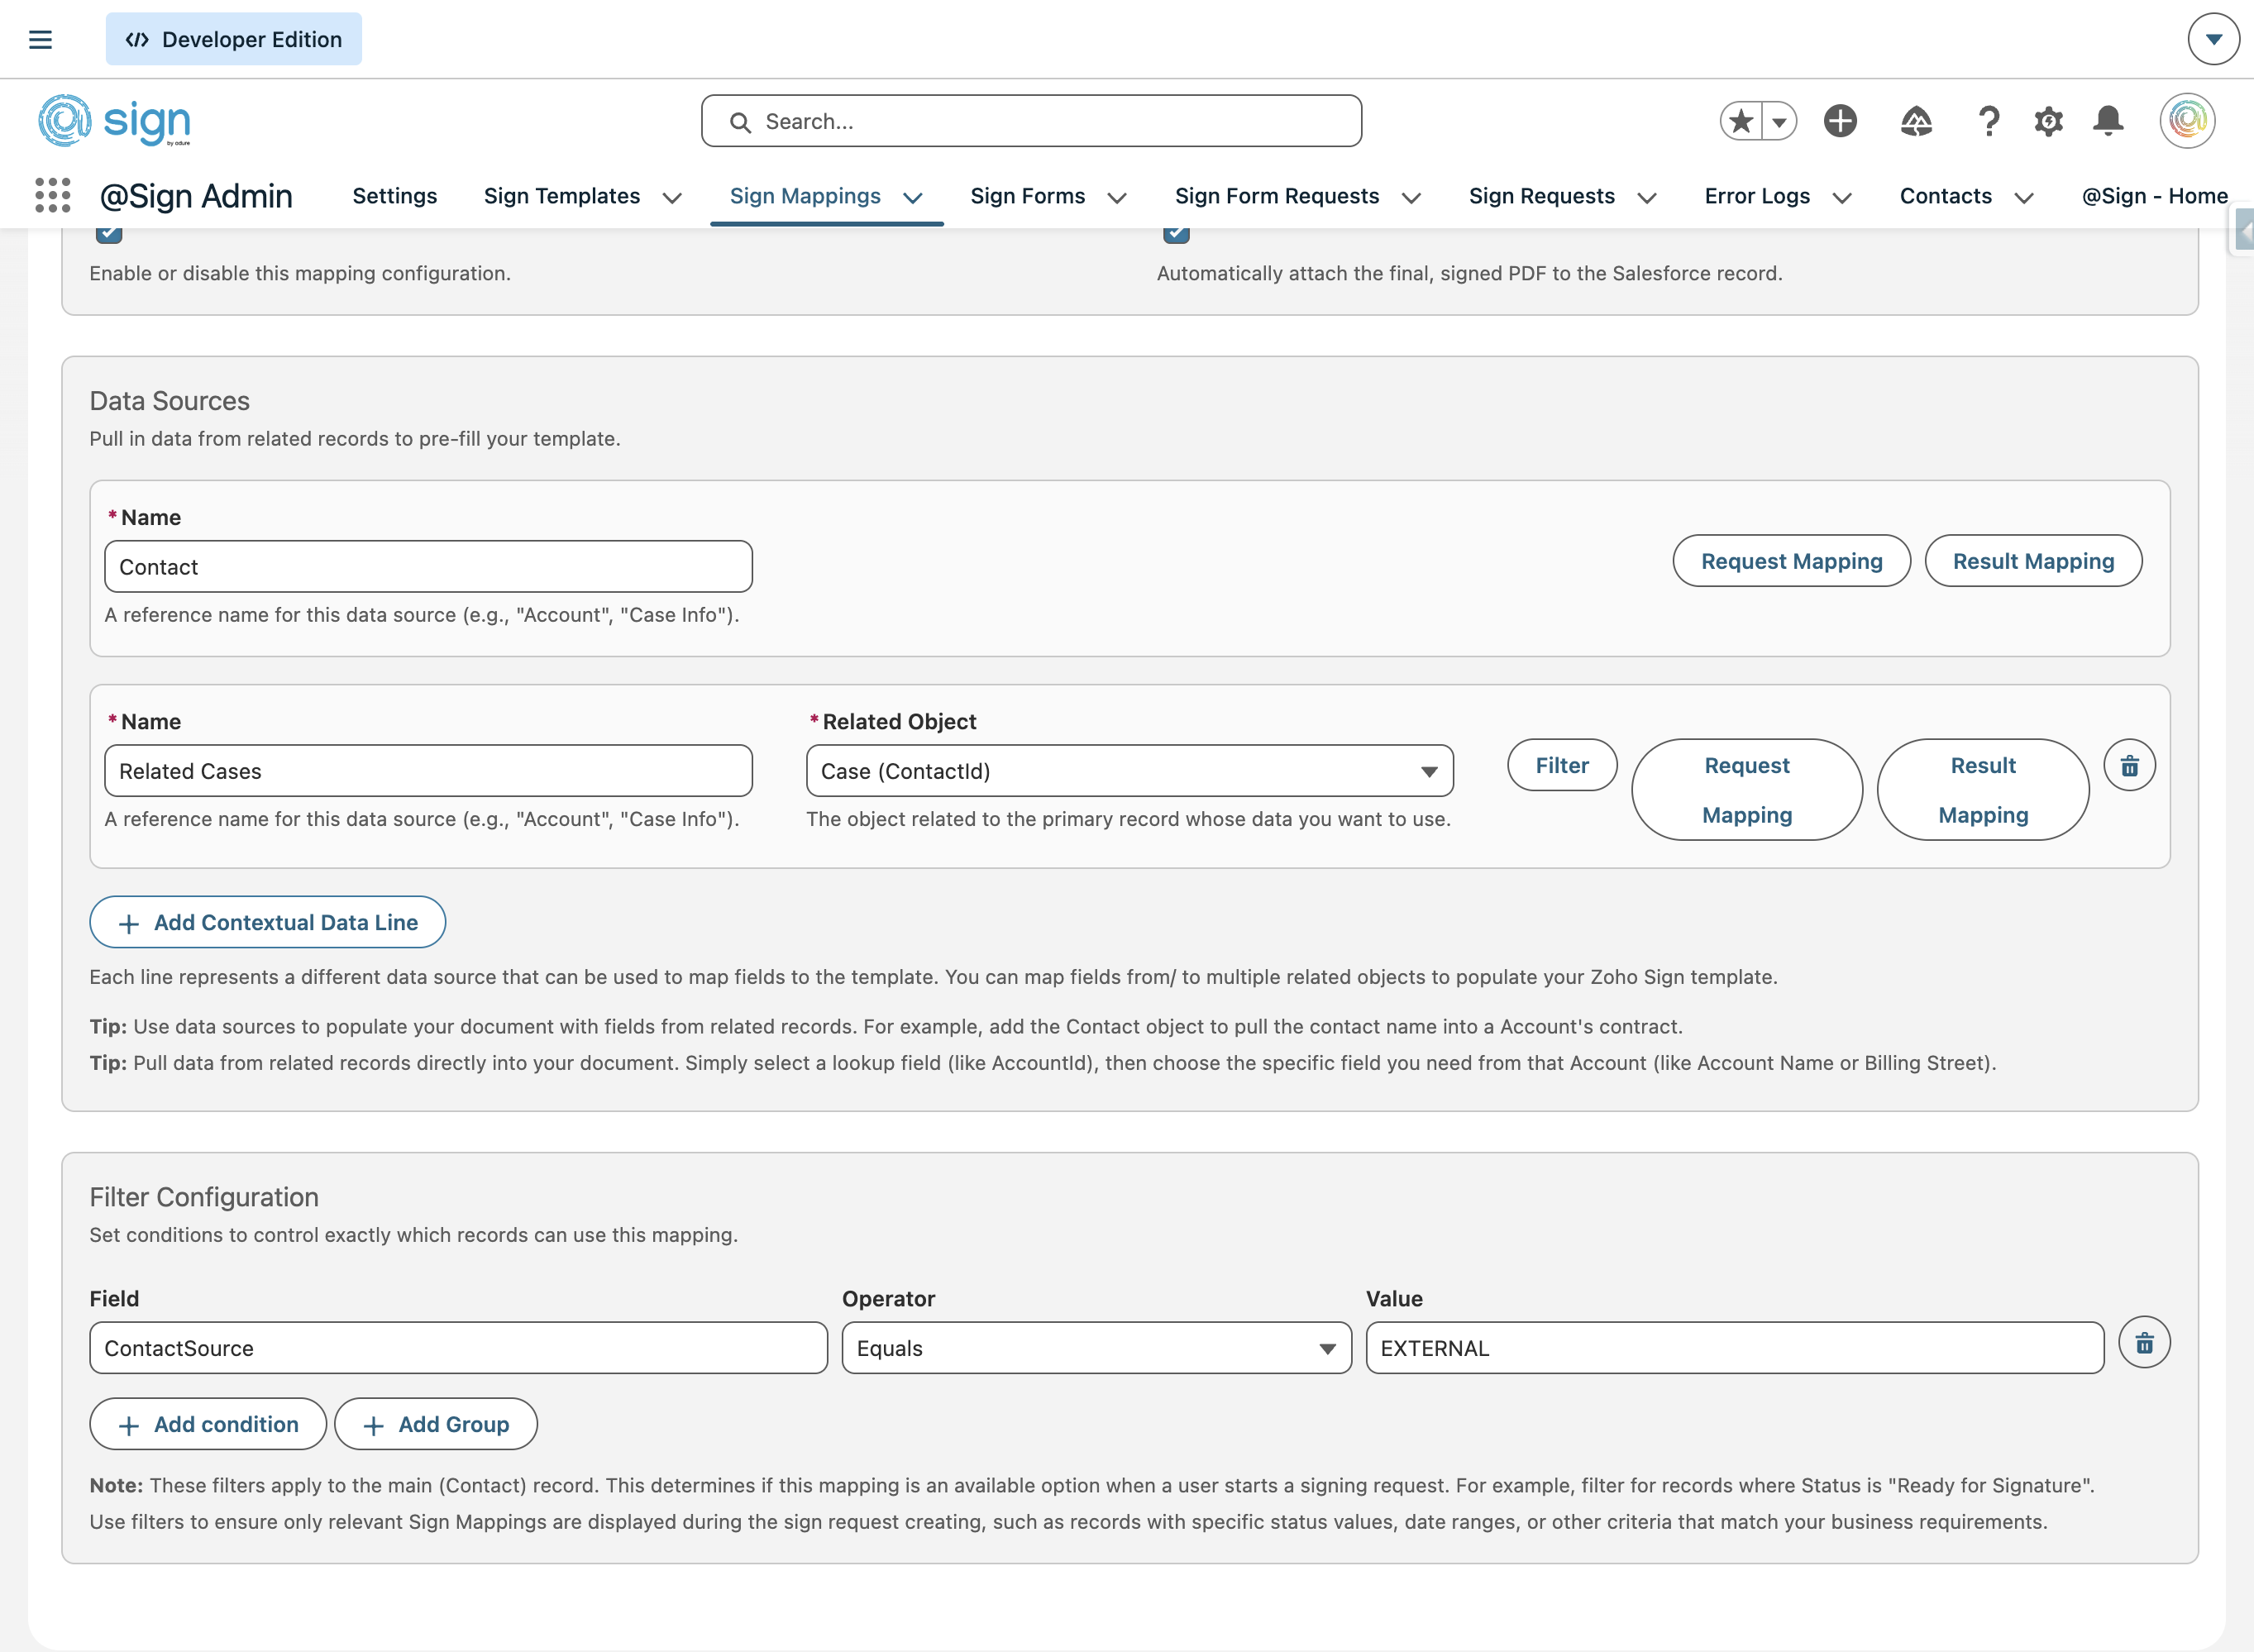
Use the filter modal to add one or more conditions that control exactly which related records are used in the mapping. Set the field, operator, and value — for example, 'Origin Equals WEB'. You can combine multiple conditions using 'Add condition' or group them using 'Add Group'.

Once the related data source is configured, click its 'Request Mapping' button to map its fields exactly like you did for the primary object — signer roles and field values included.
Click 'Save' to store all your mapping configuration. A green 'Mapping saved successfully' confirmation will appear, and your Sign Mapping detail page will show a full summary of all settings including template, object, status, data sources, and any linked Sign Forms.