After installing @Sign and assigning the necessary permissions, the next critical step is to bridge your Salesforce environment with your Zoho Sign account. This connection enables secure, real-time communication between the two platforms, allowing for automated document workflows and instant status updates.
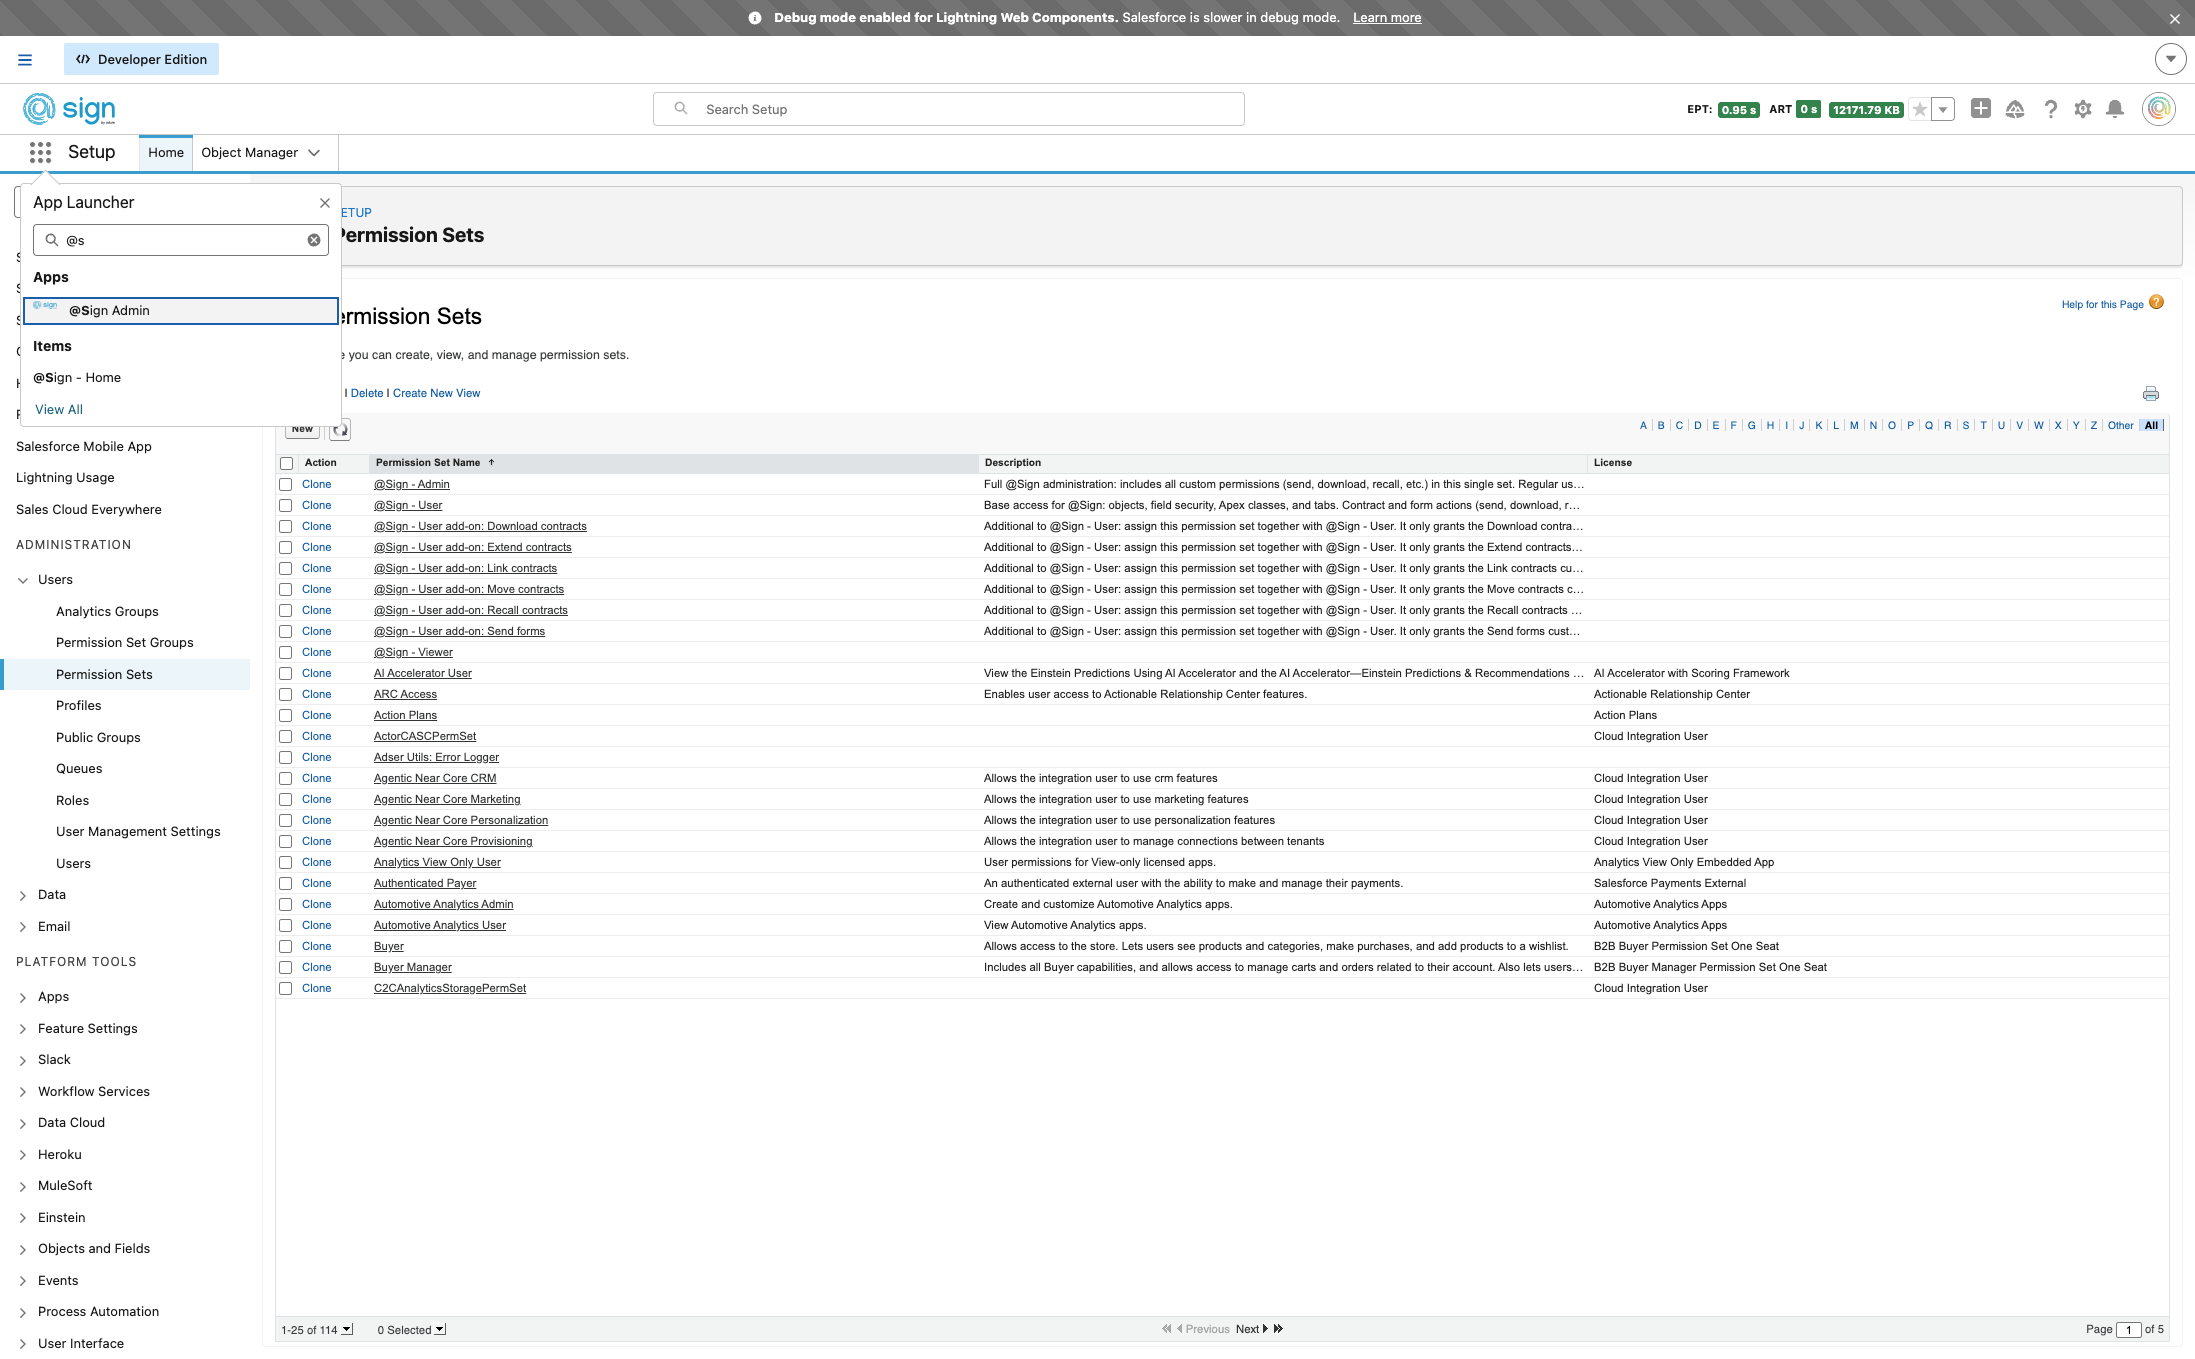
Open the App Launcher in Salesforce to find the @Sign Admin app.
Search for and select '@Sign Admin' to open the @Sign settings panel.
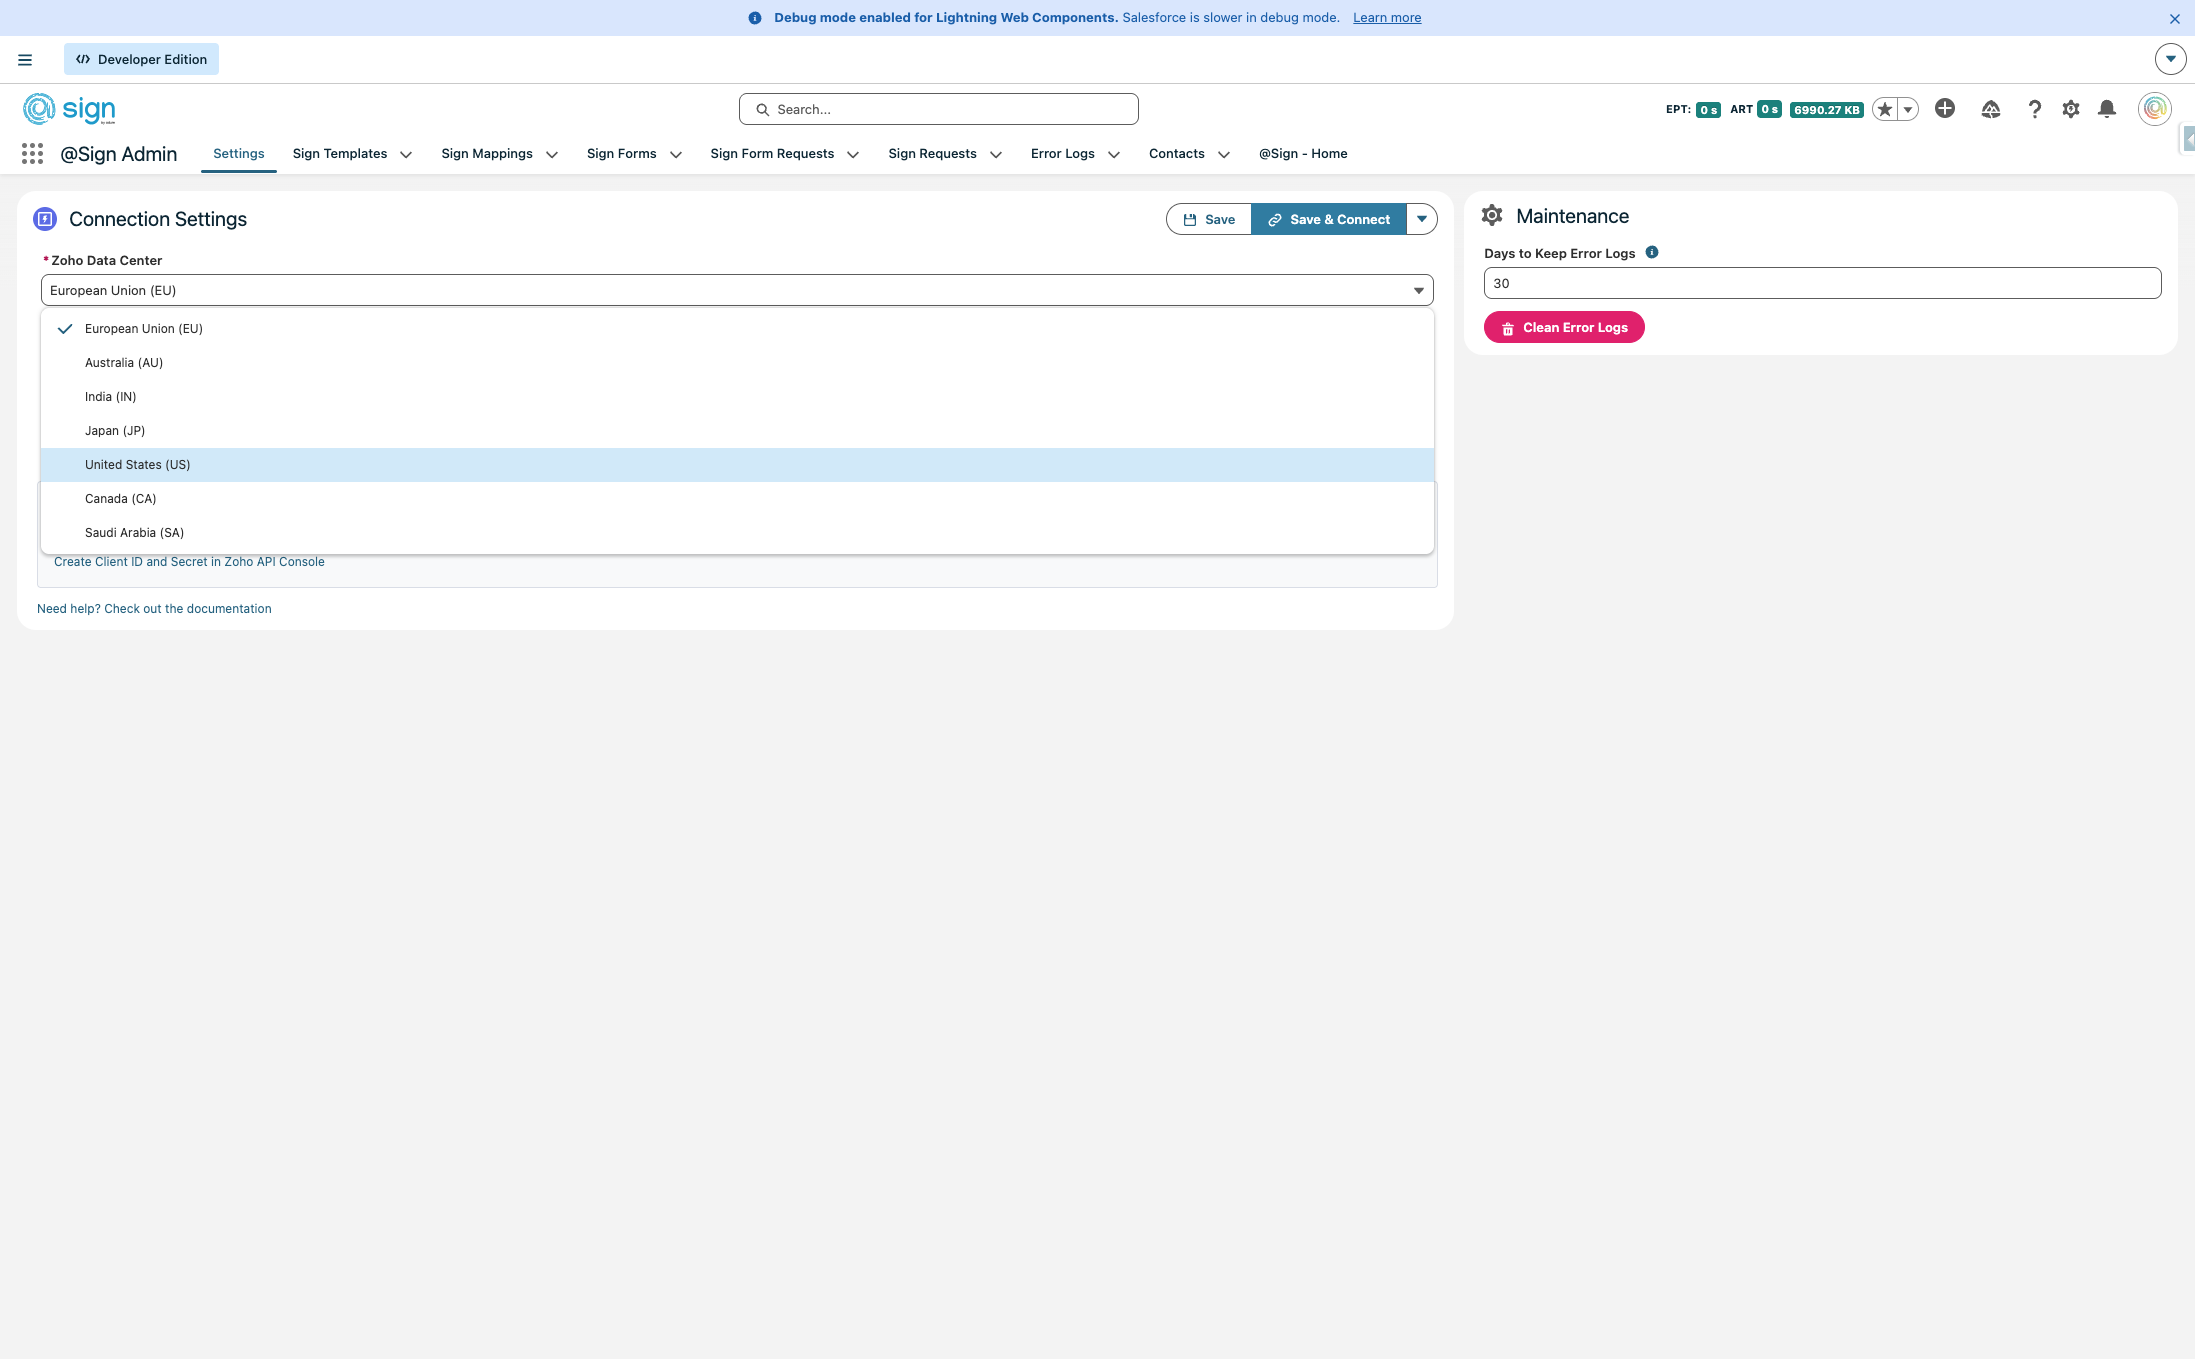
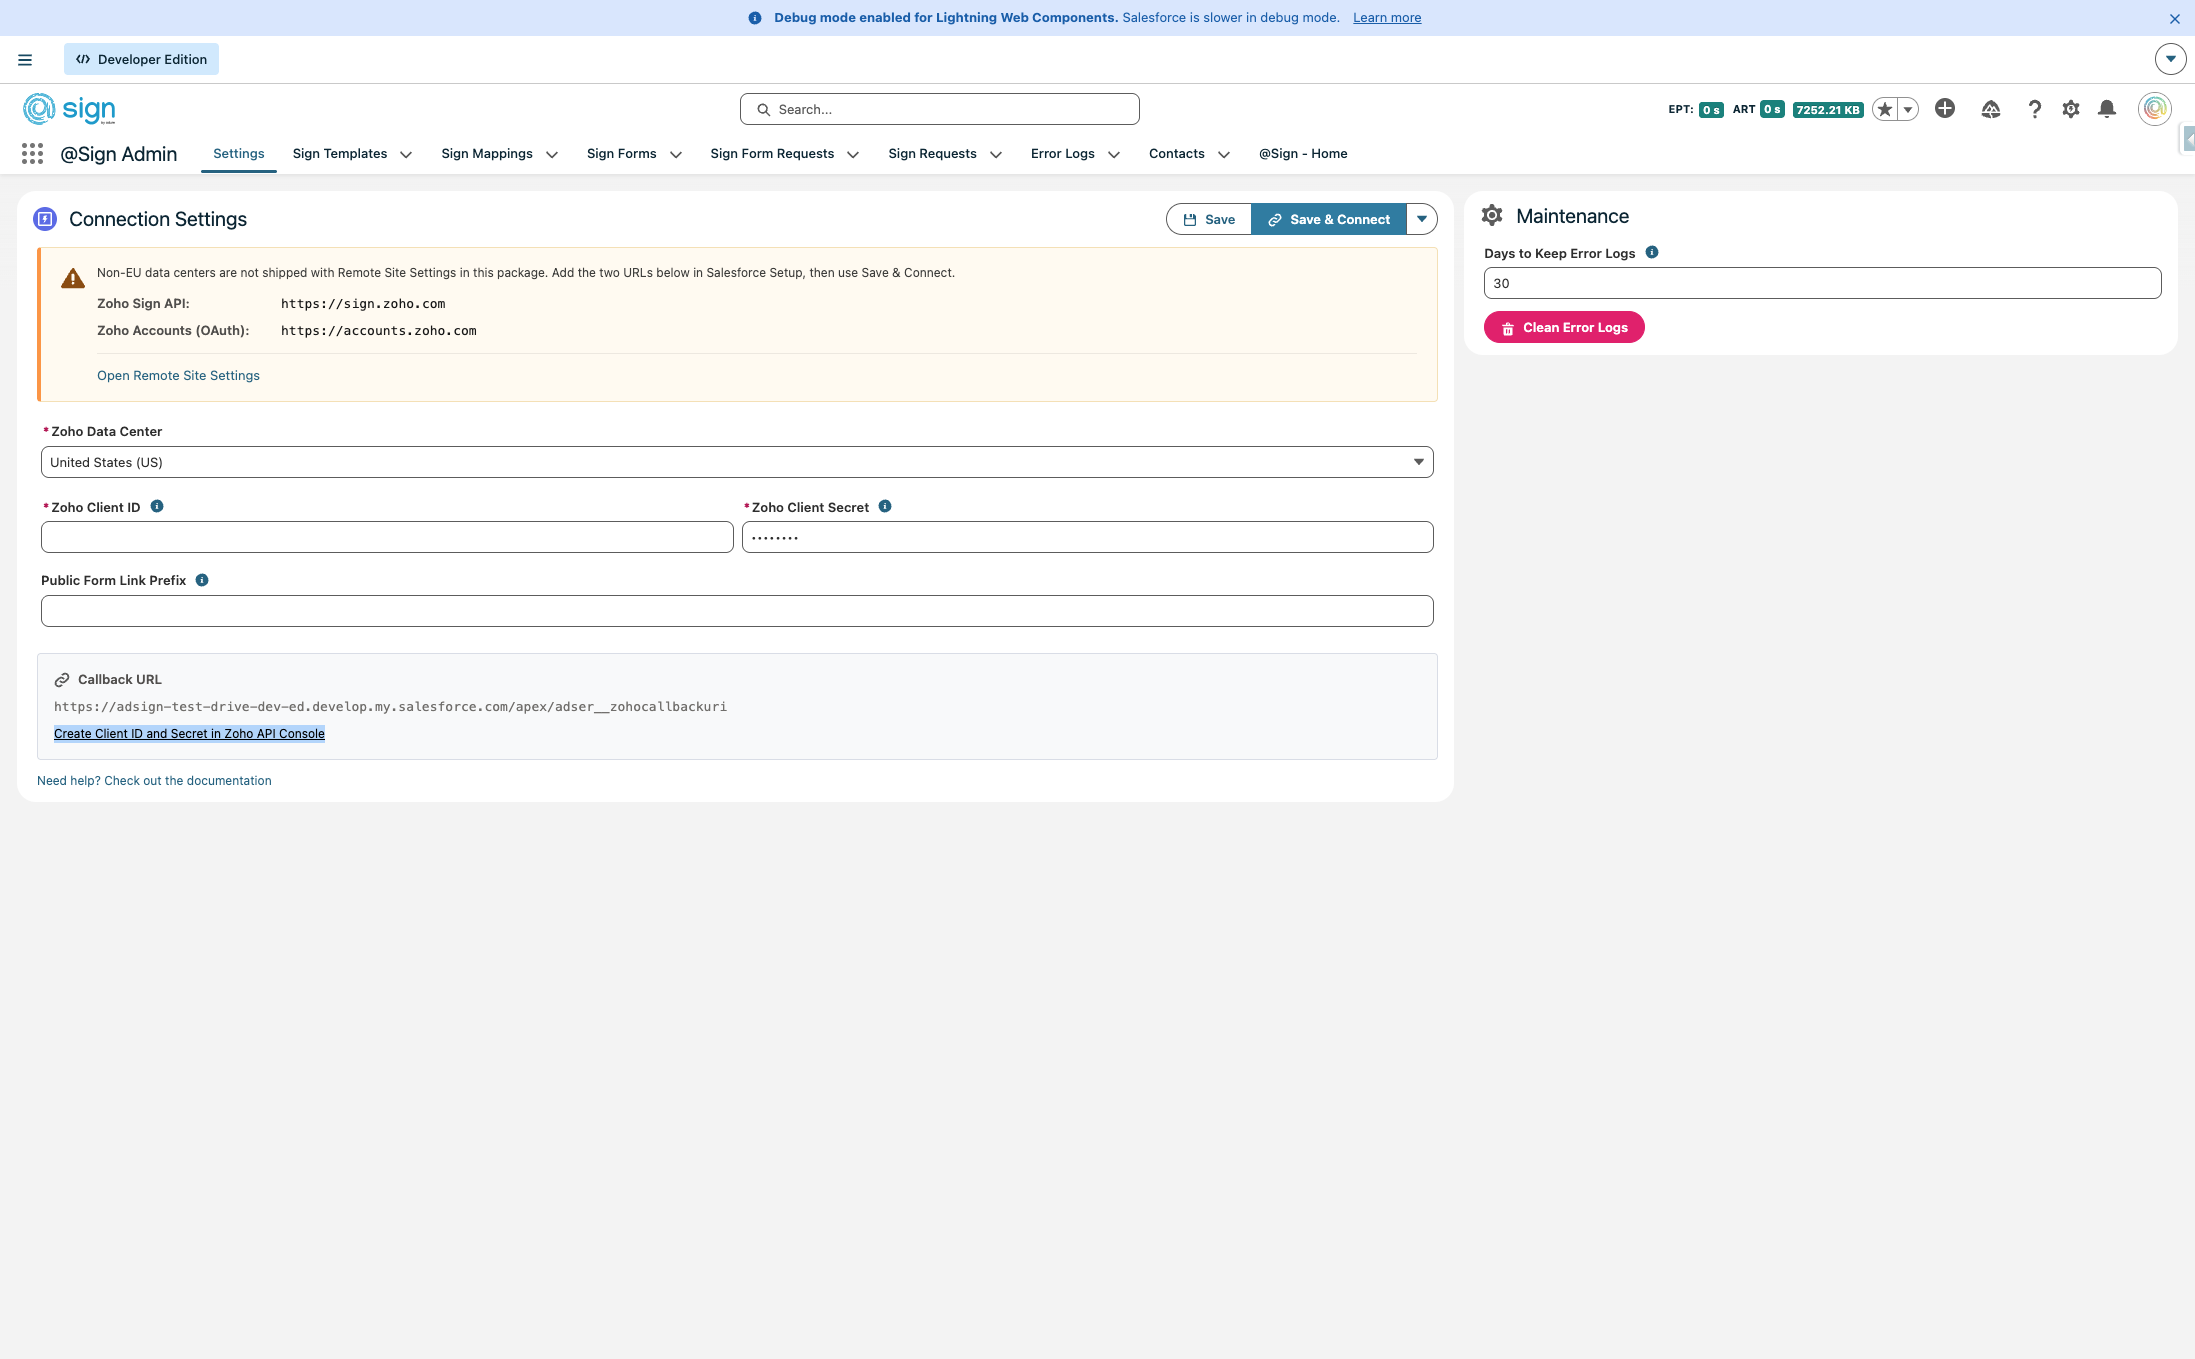
Check your Zoho Sign URL to determine your data center — .eu means Europe, .com means the US, and so on. Take note of the callback URL shown at the bottom of the screen; you'll need it later.
Remote Site Settings (non-EU only)
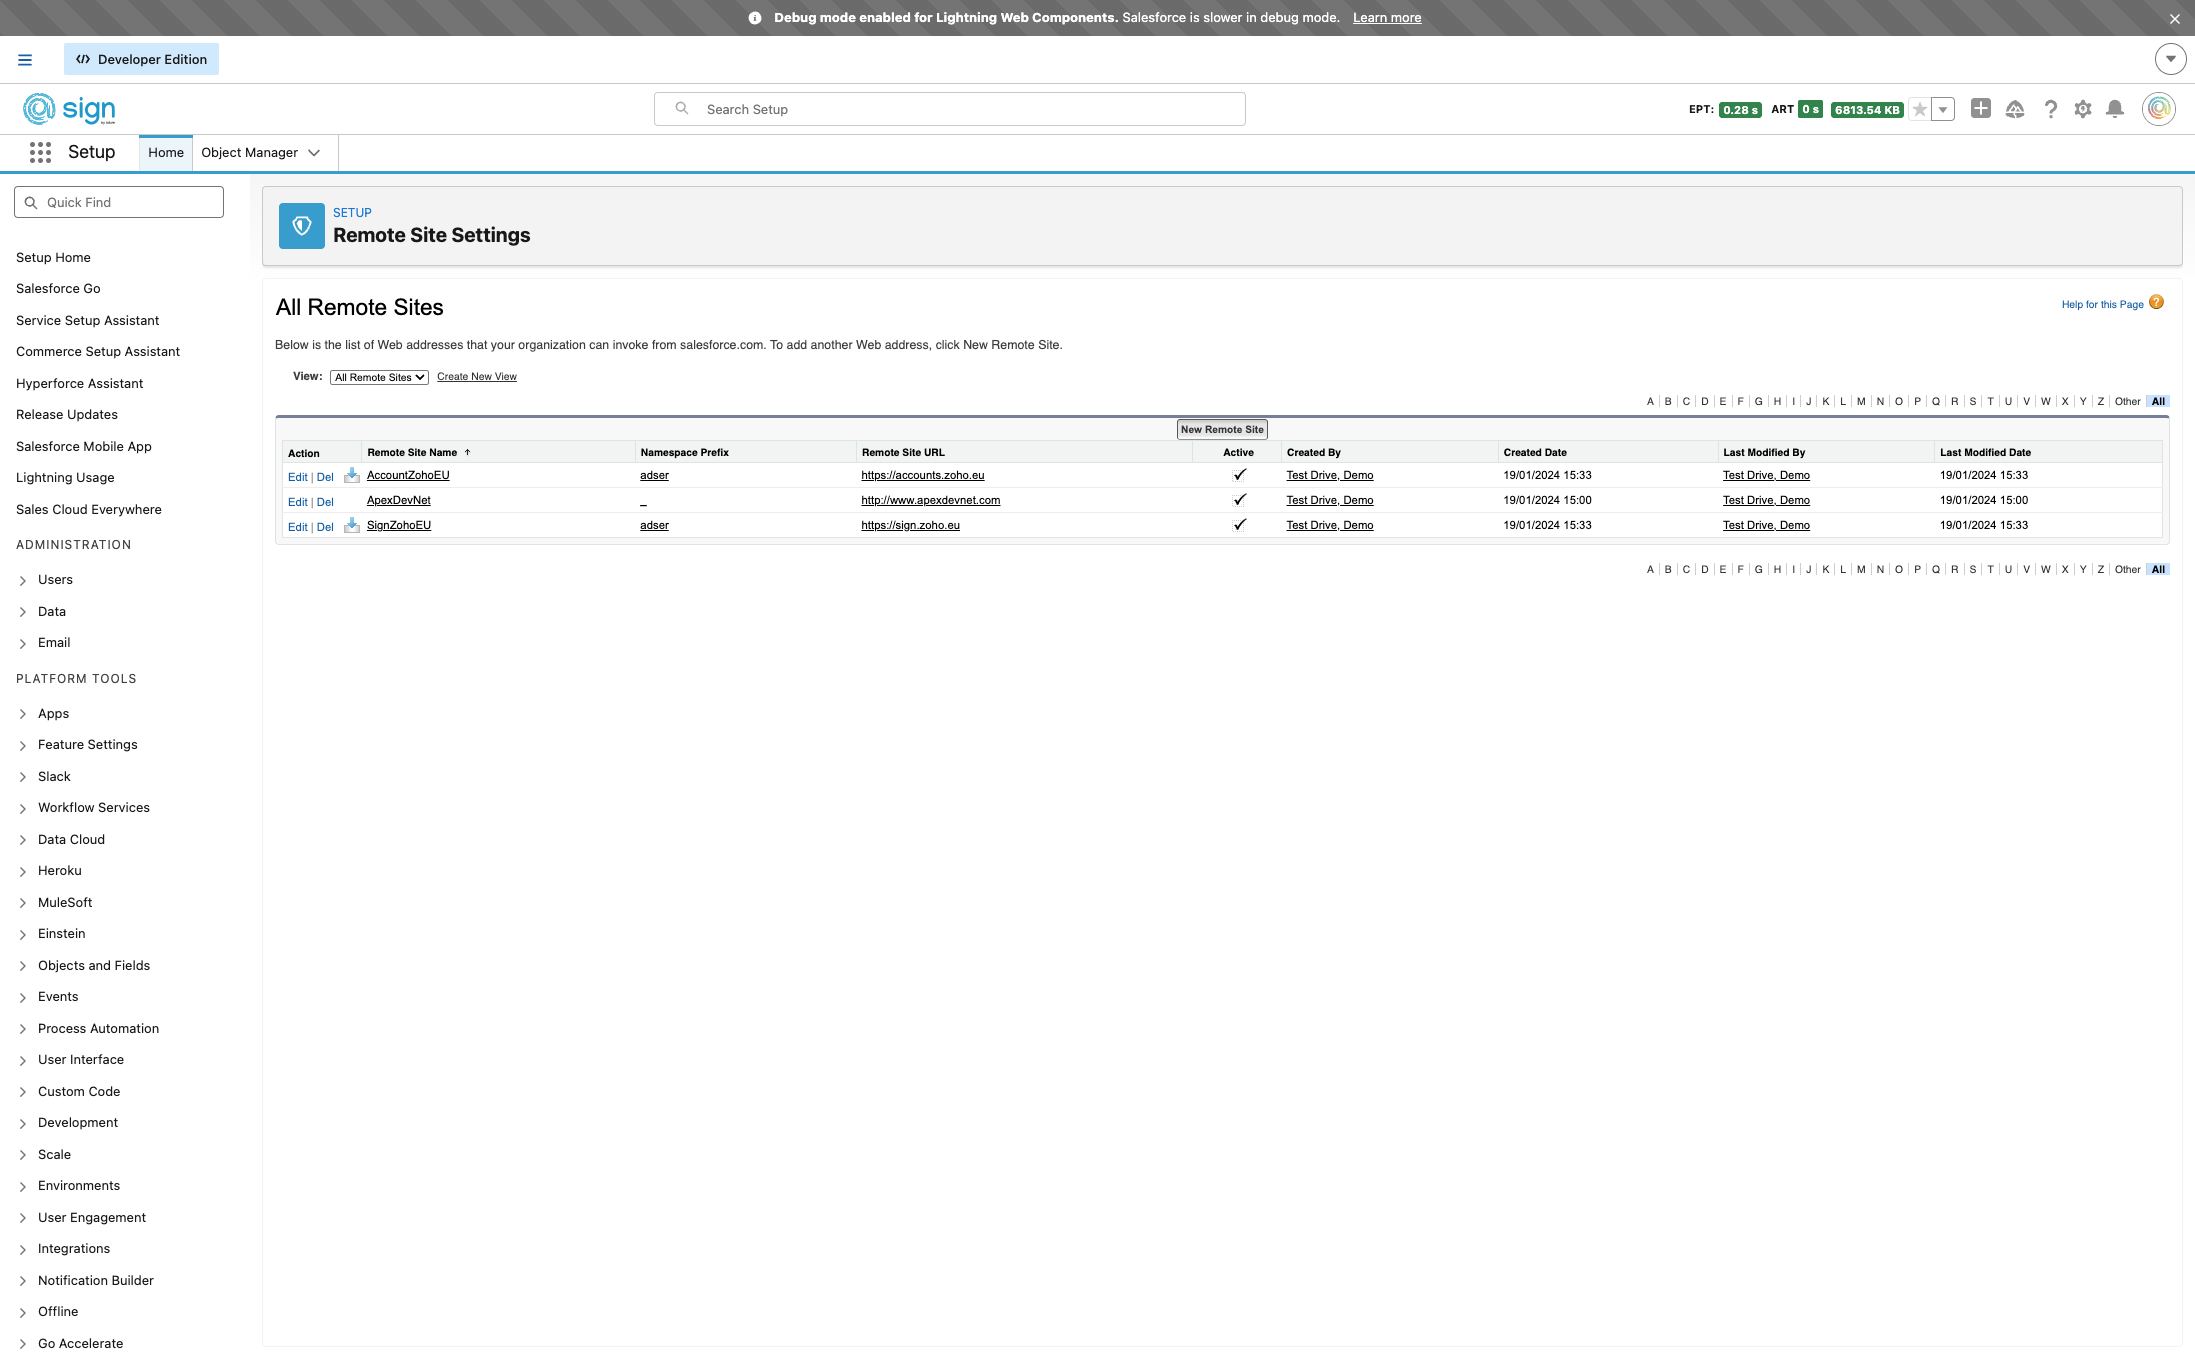
EU users can skip this section — the EU remote site is pre-configured. If you're on a different data center, click the link to open Remote Site Settings in a new tab.

Copy the first URL (https://sign.zoho.com) — this is the Zoho Sign API endpoint for your region.
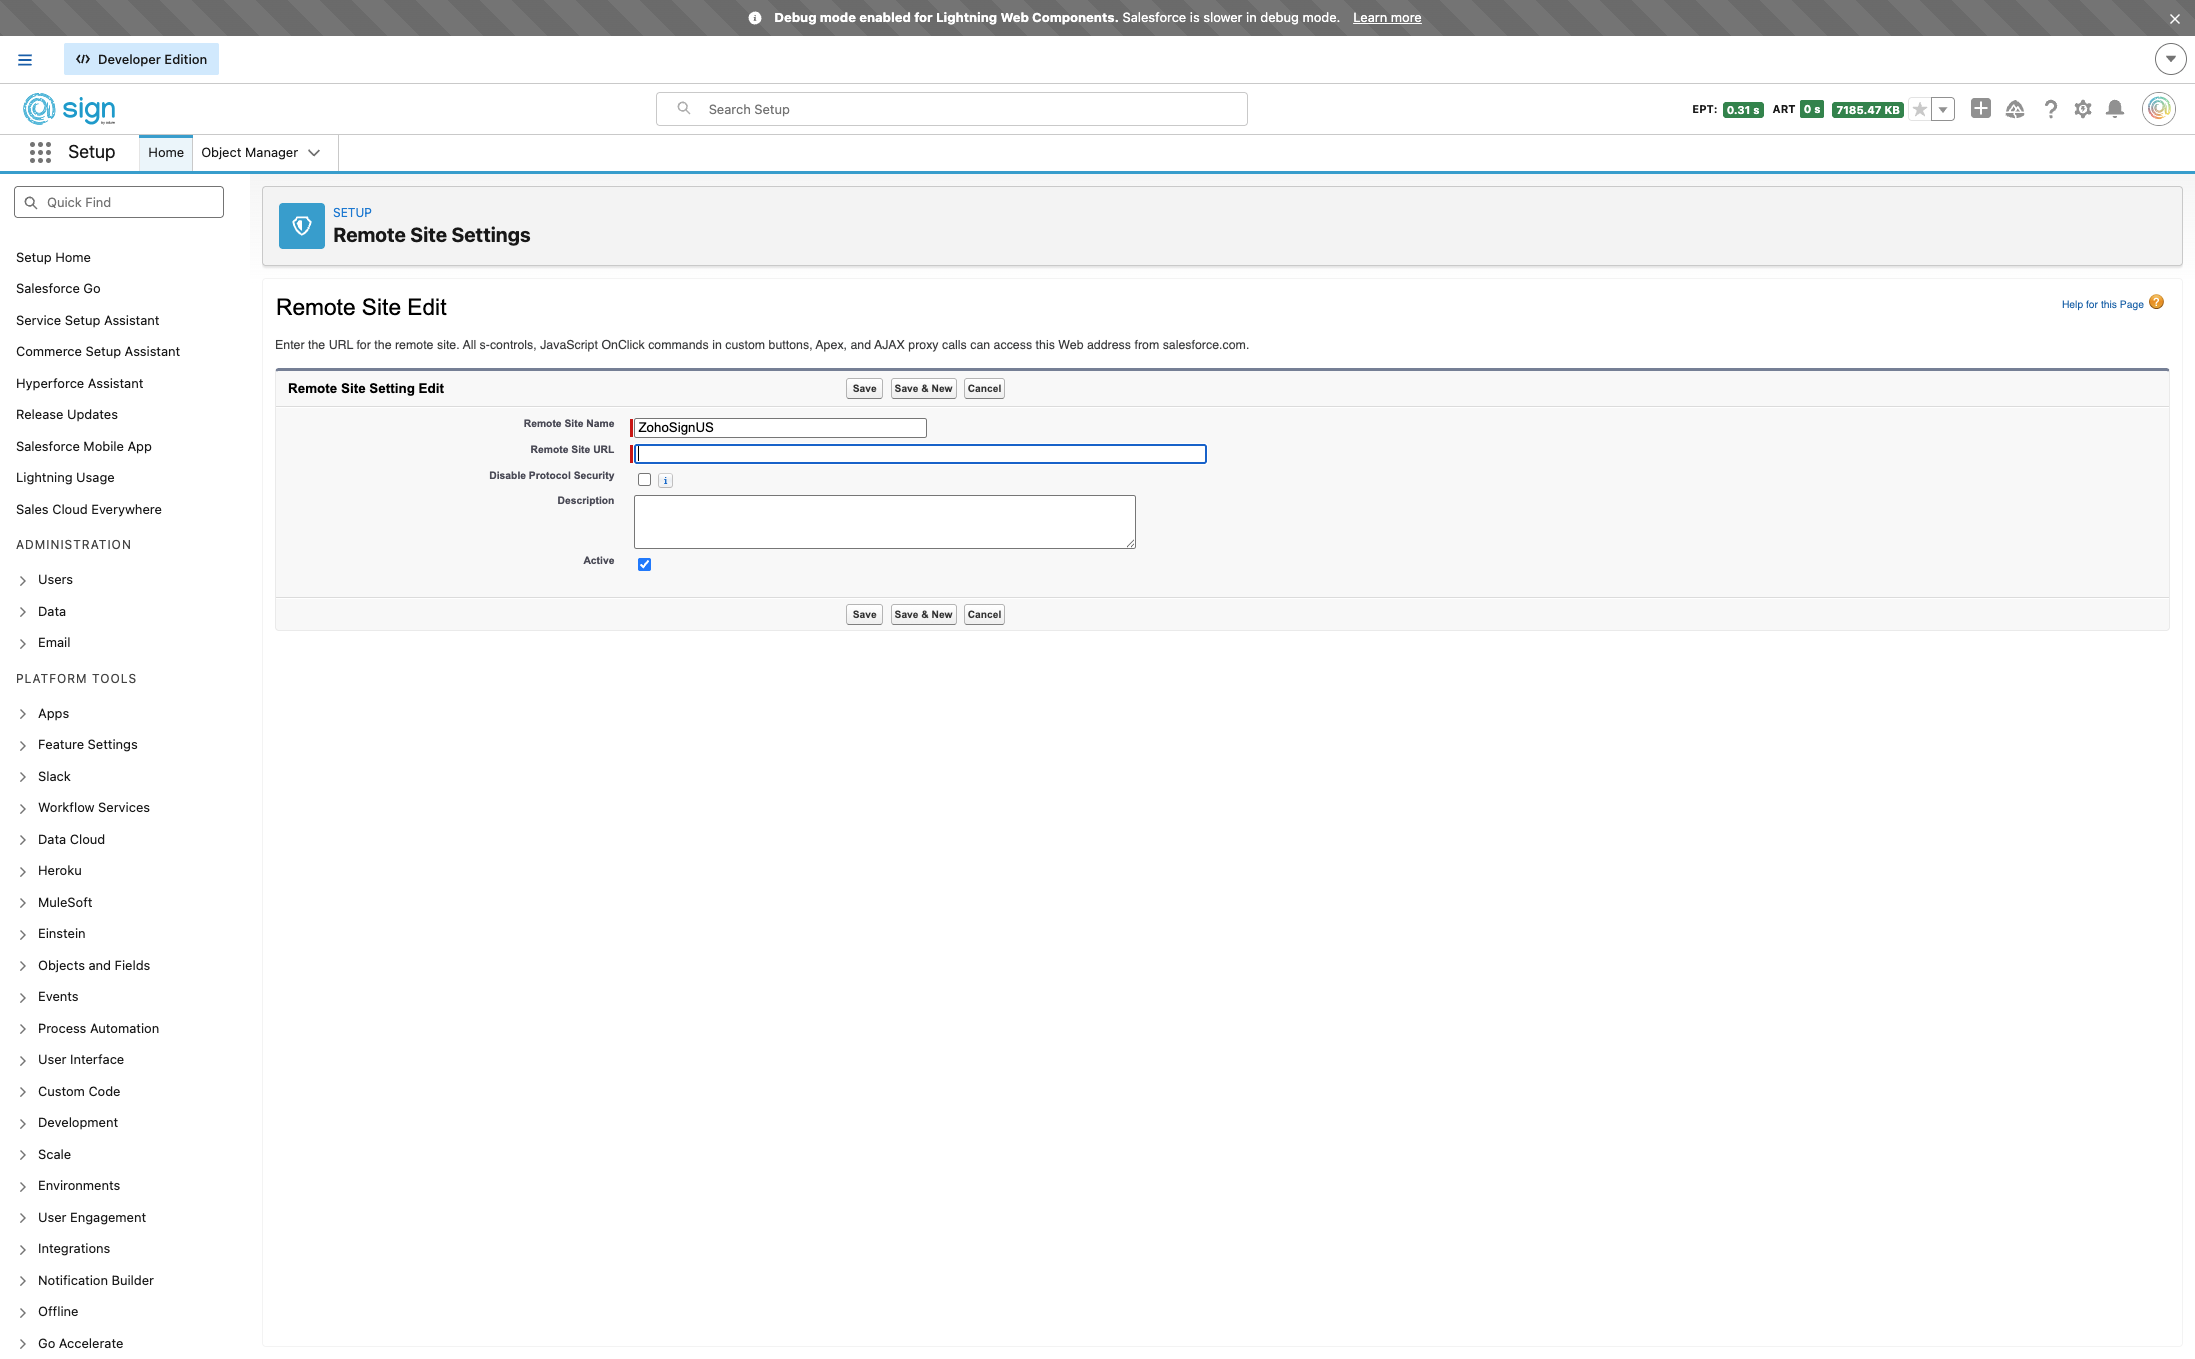
In the Remote Site Settings tab, click 'New Remote Site' to add a new entry.
Give the setting a recognisable name without spaces, for example ZohoSignUS.
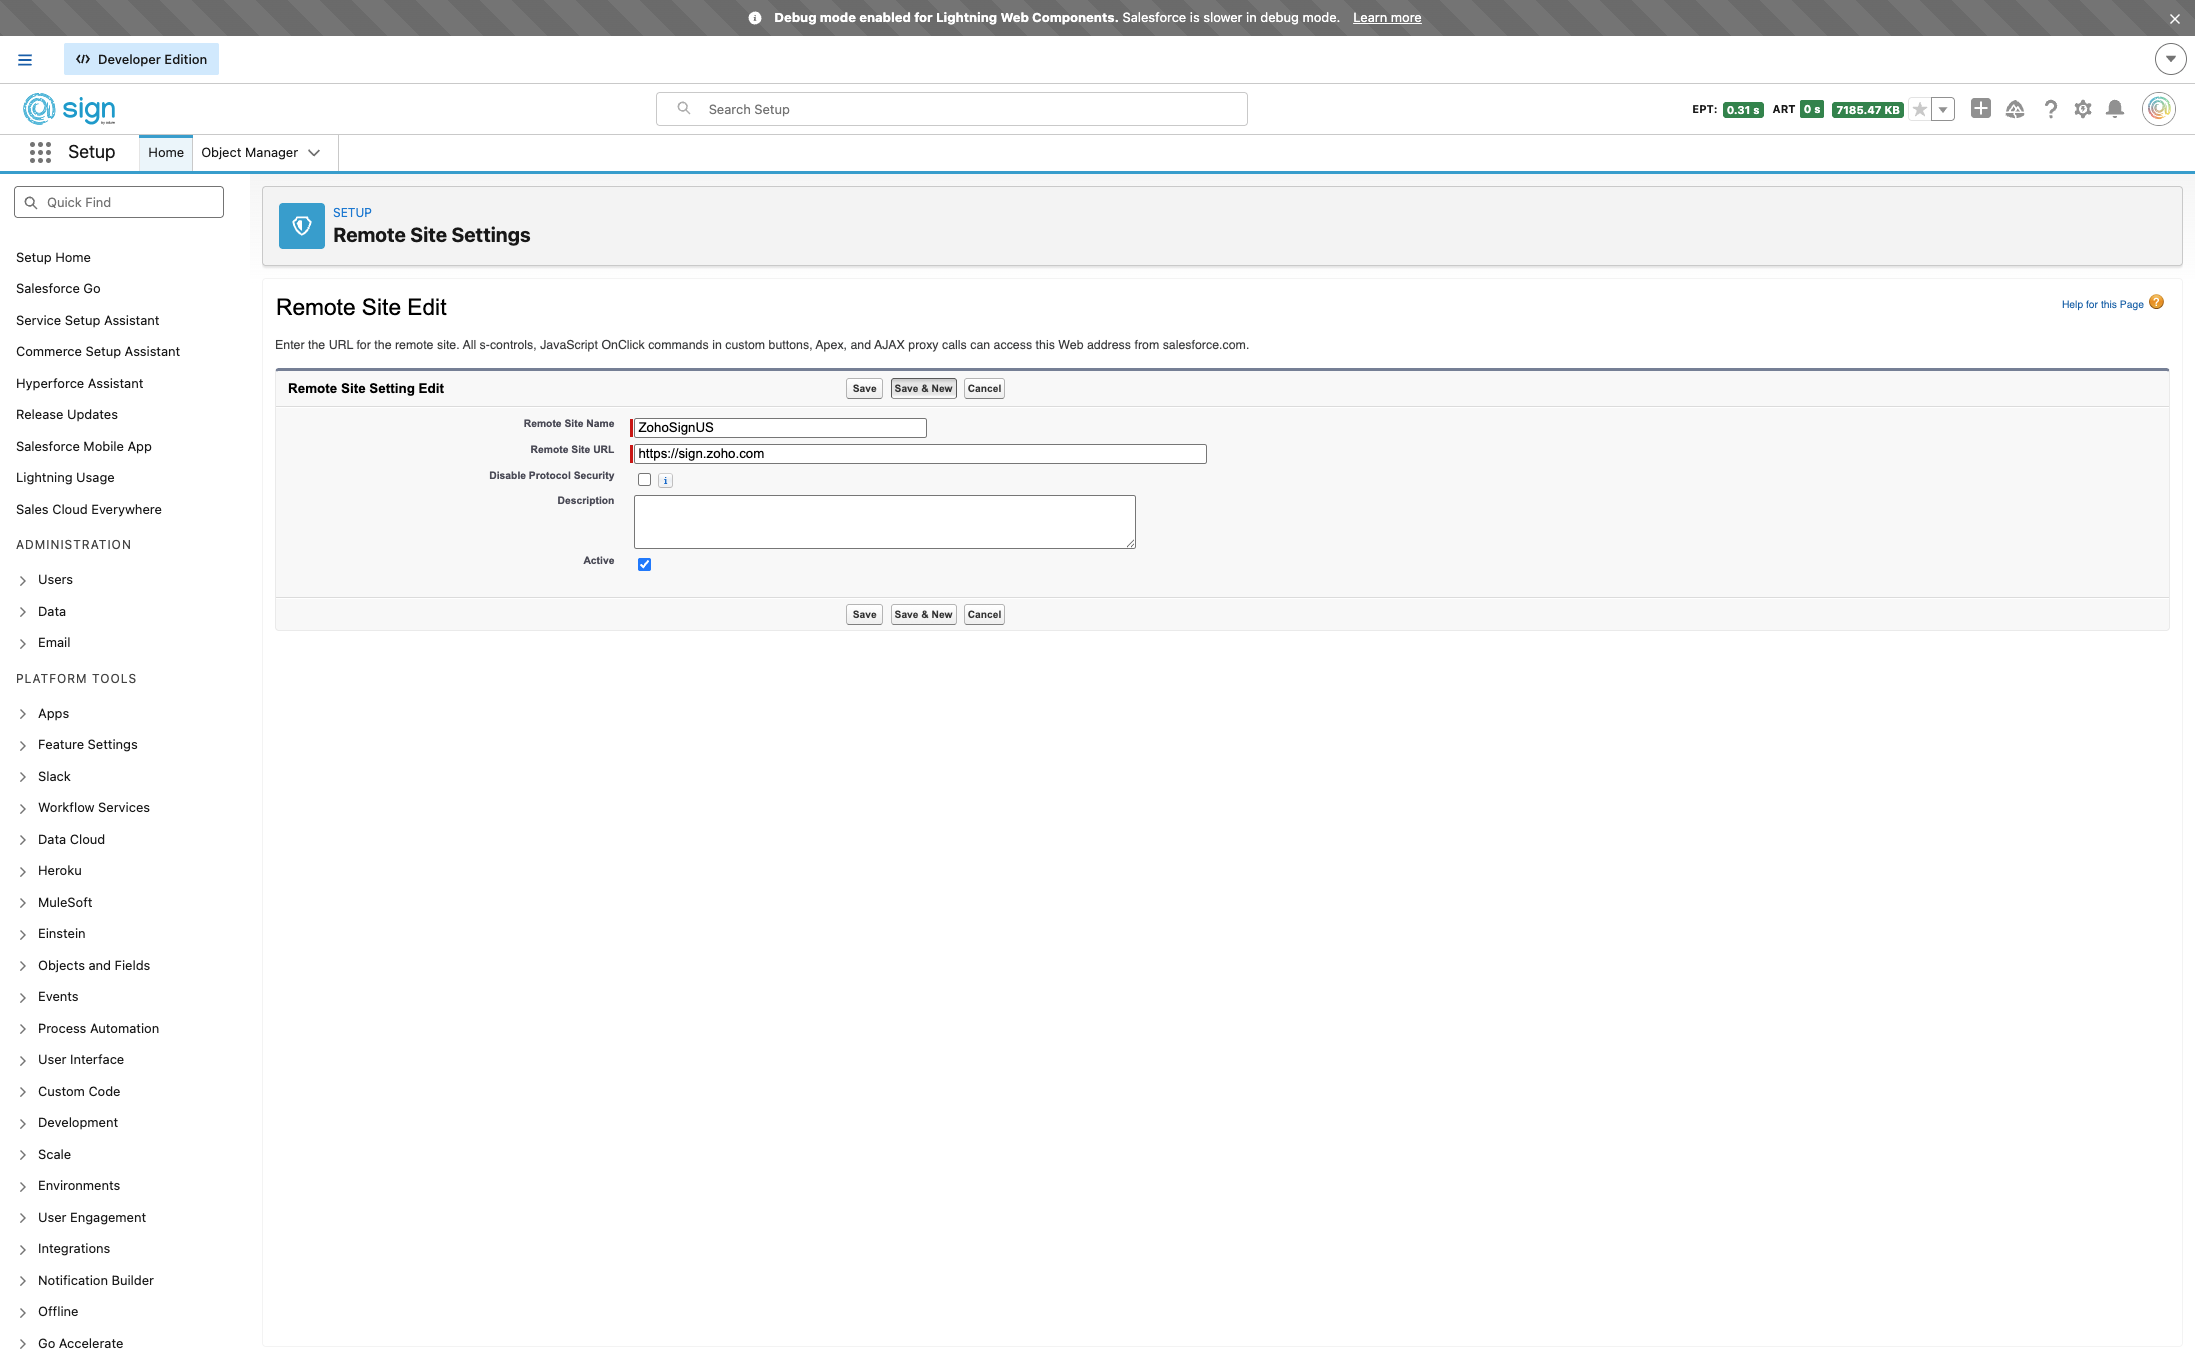
Paste https://sign.zoho.com into the Remote Site URL field.
Save this entry and immediately create a second one for the accounts domain.
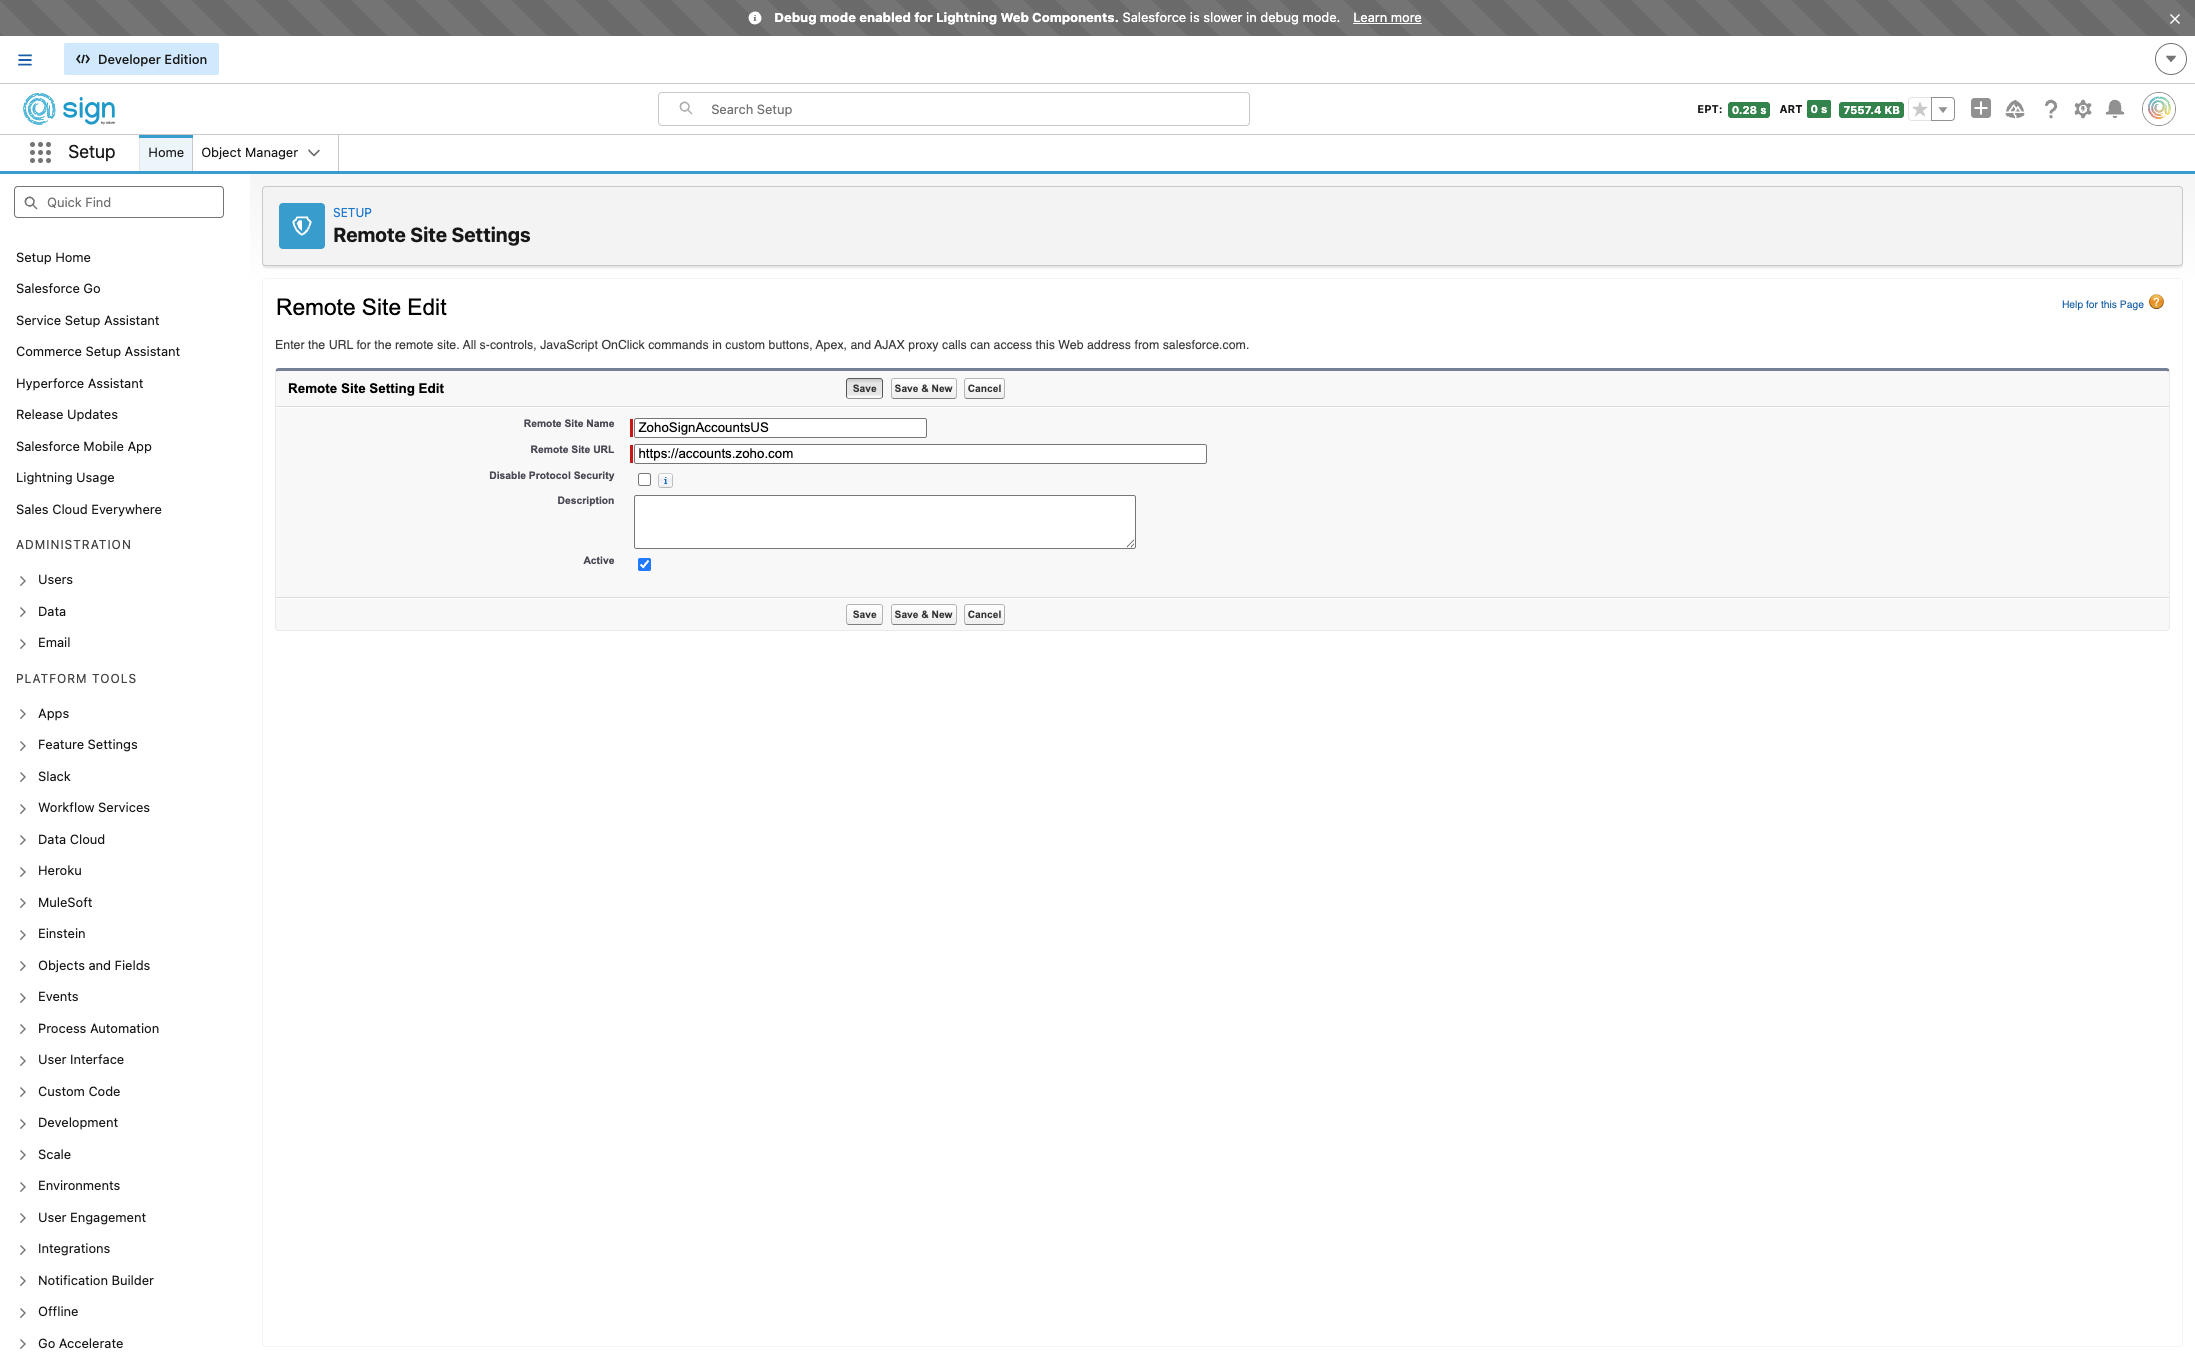
Copy the second URL: https://accounts.zoho.com — this is needed for the OAuth authentication flow.

Give this second setting a name (e.g. ZohoAccountsUS), paste https://accounts.zoho.com, and click Save.
OAuth App Creation
Back on the @Sign settings page, click this button to open the Zoho API Console where you'll create the OAuth app.
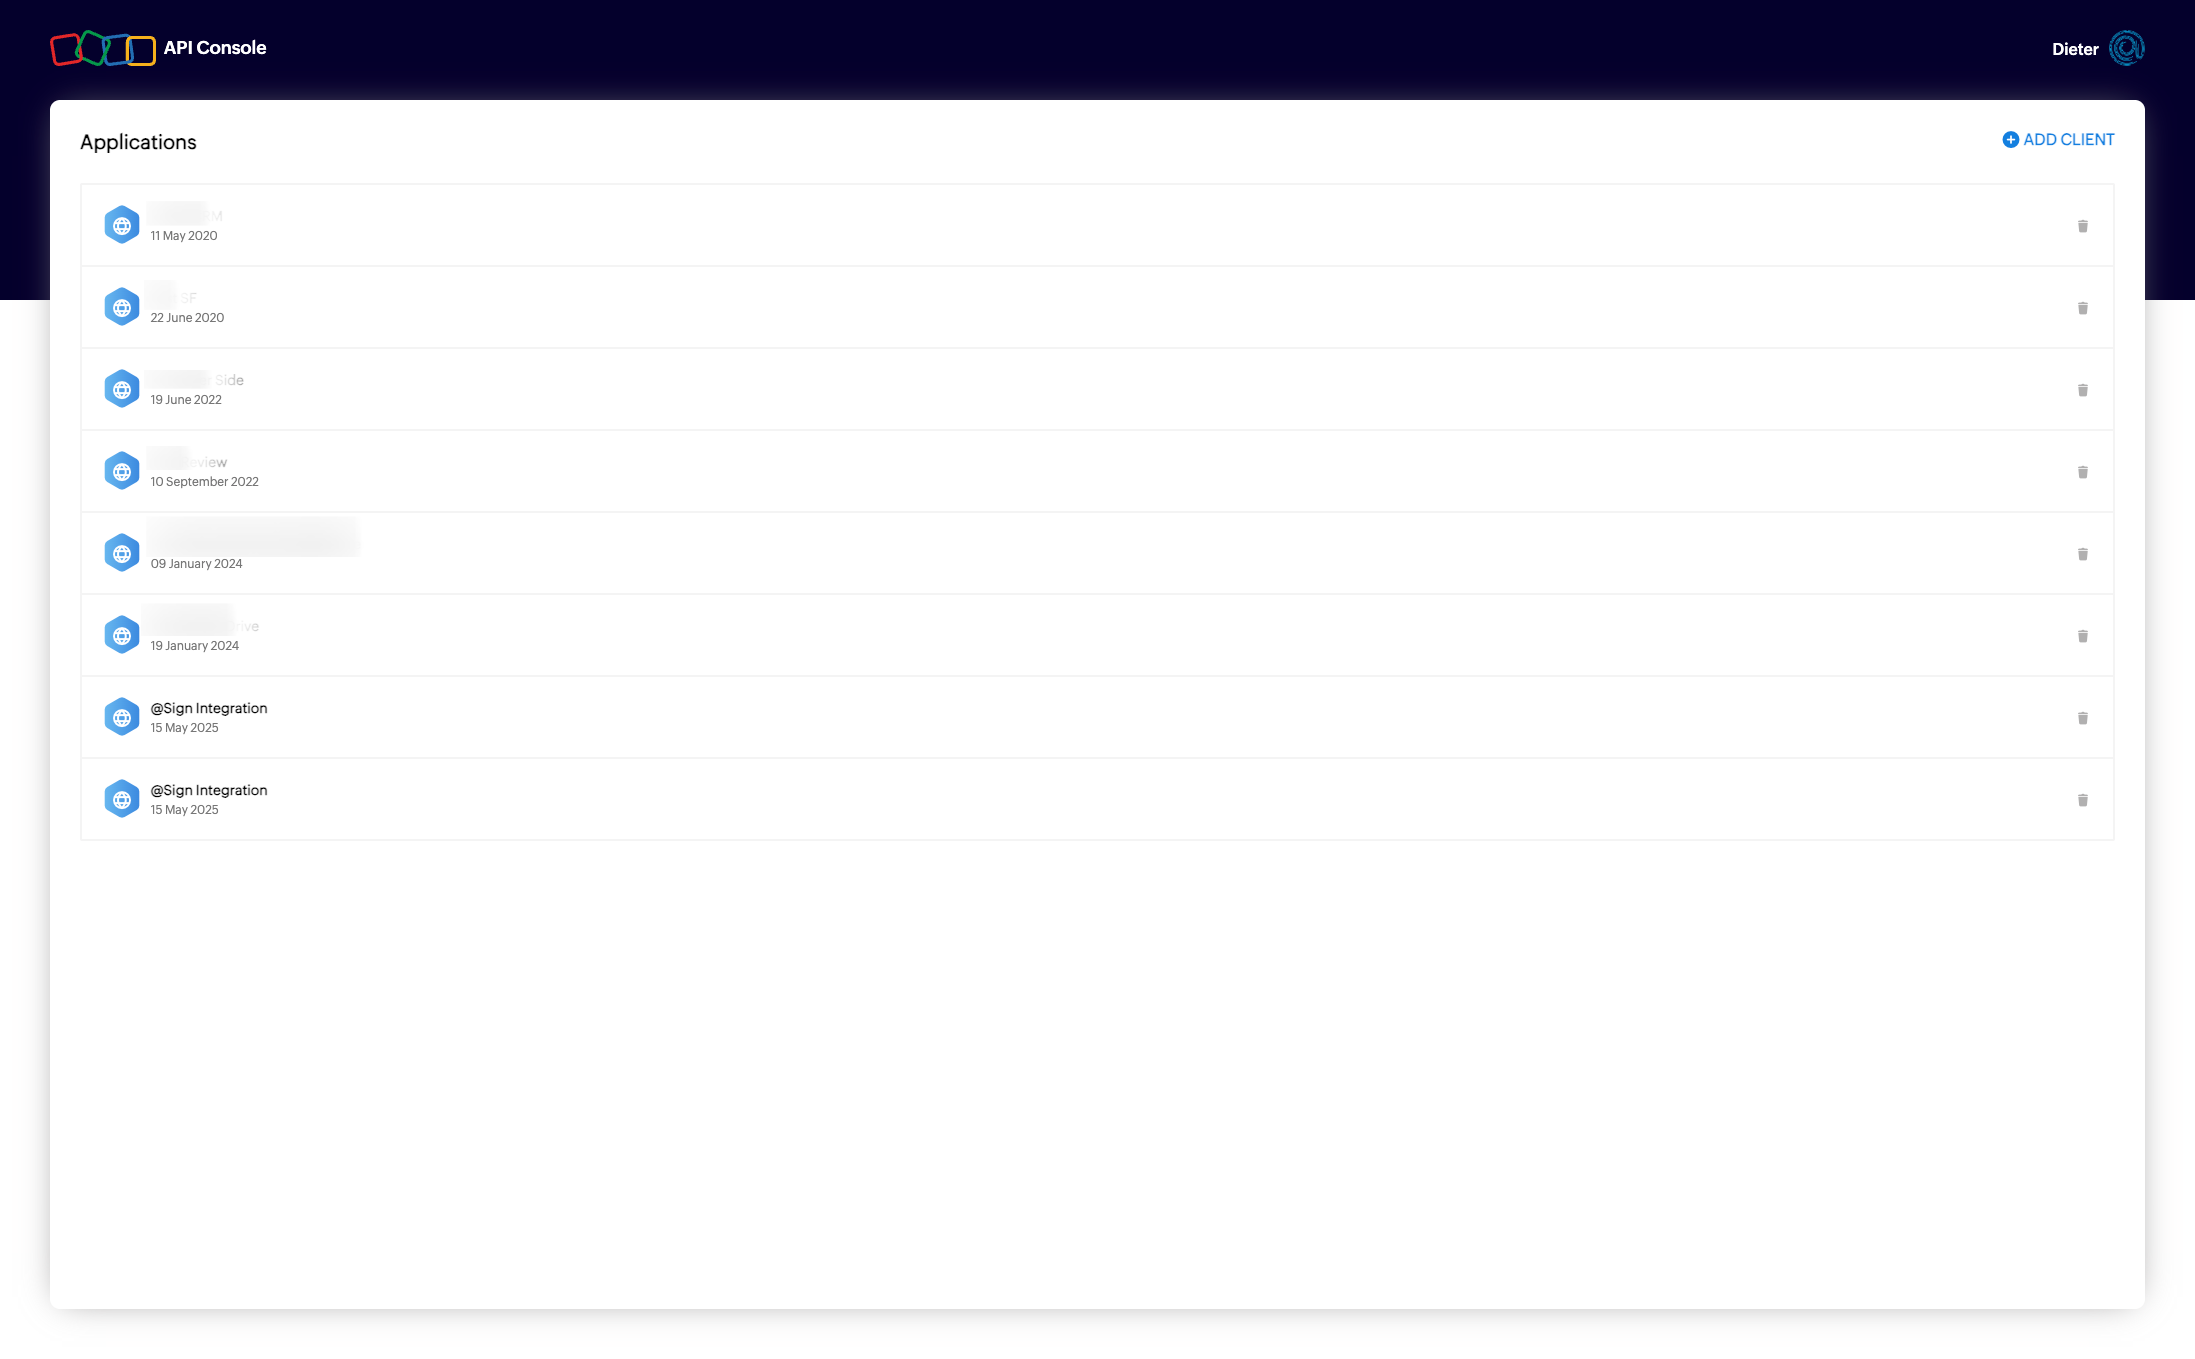
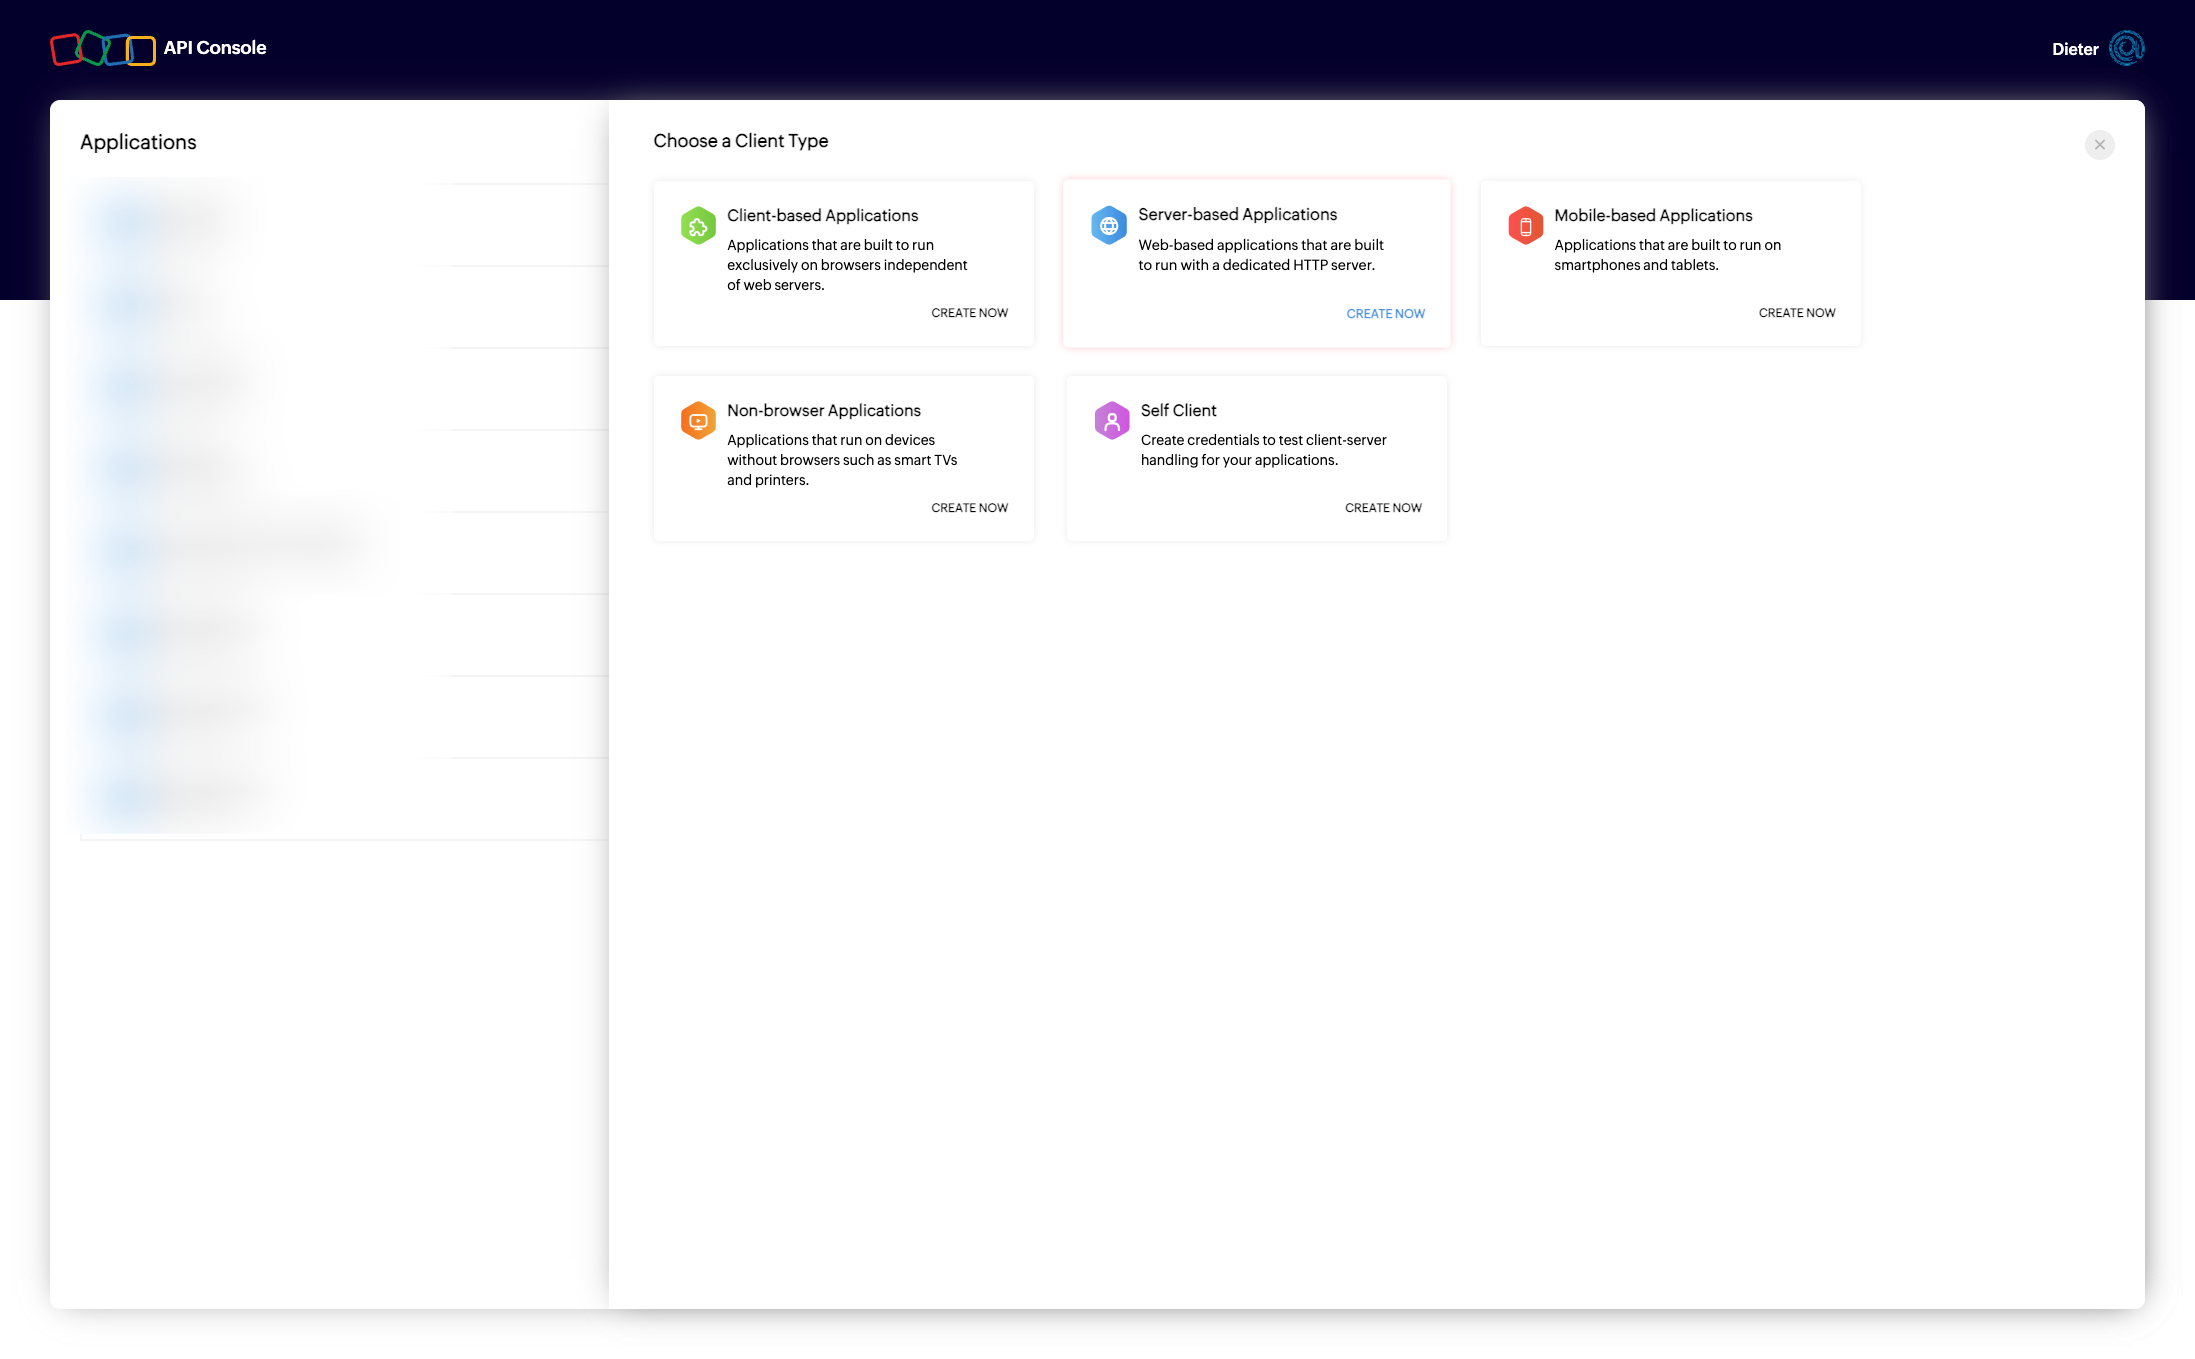
In the Zoho API Console, click 'ADD CLIENT' to start creating a new OAuth application.
Choose 'Server based Application' as the client type — this is the correct option for a Salesforce server-to-server integration.
Go back to the @Sign settings page and copy the full callback URL shown there.
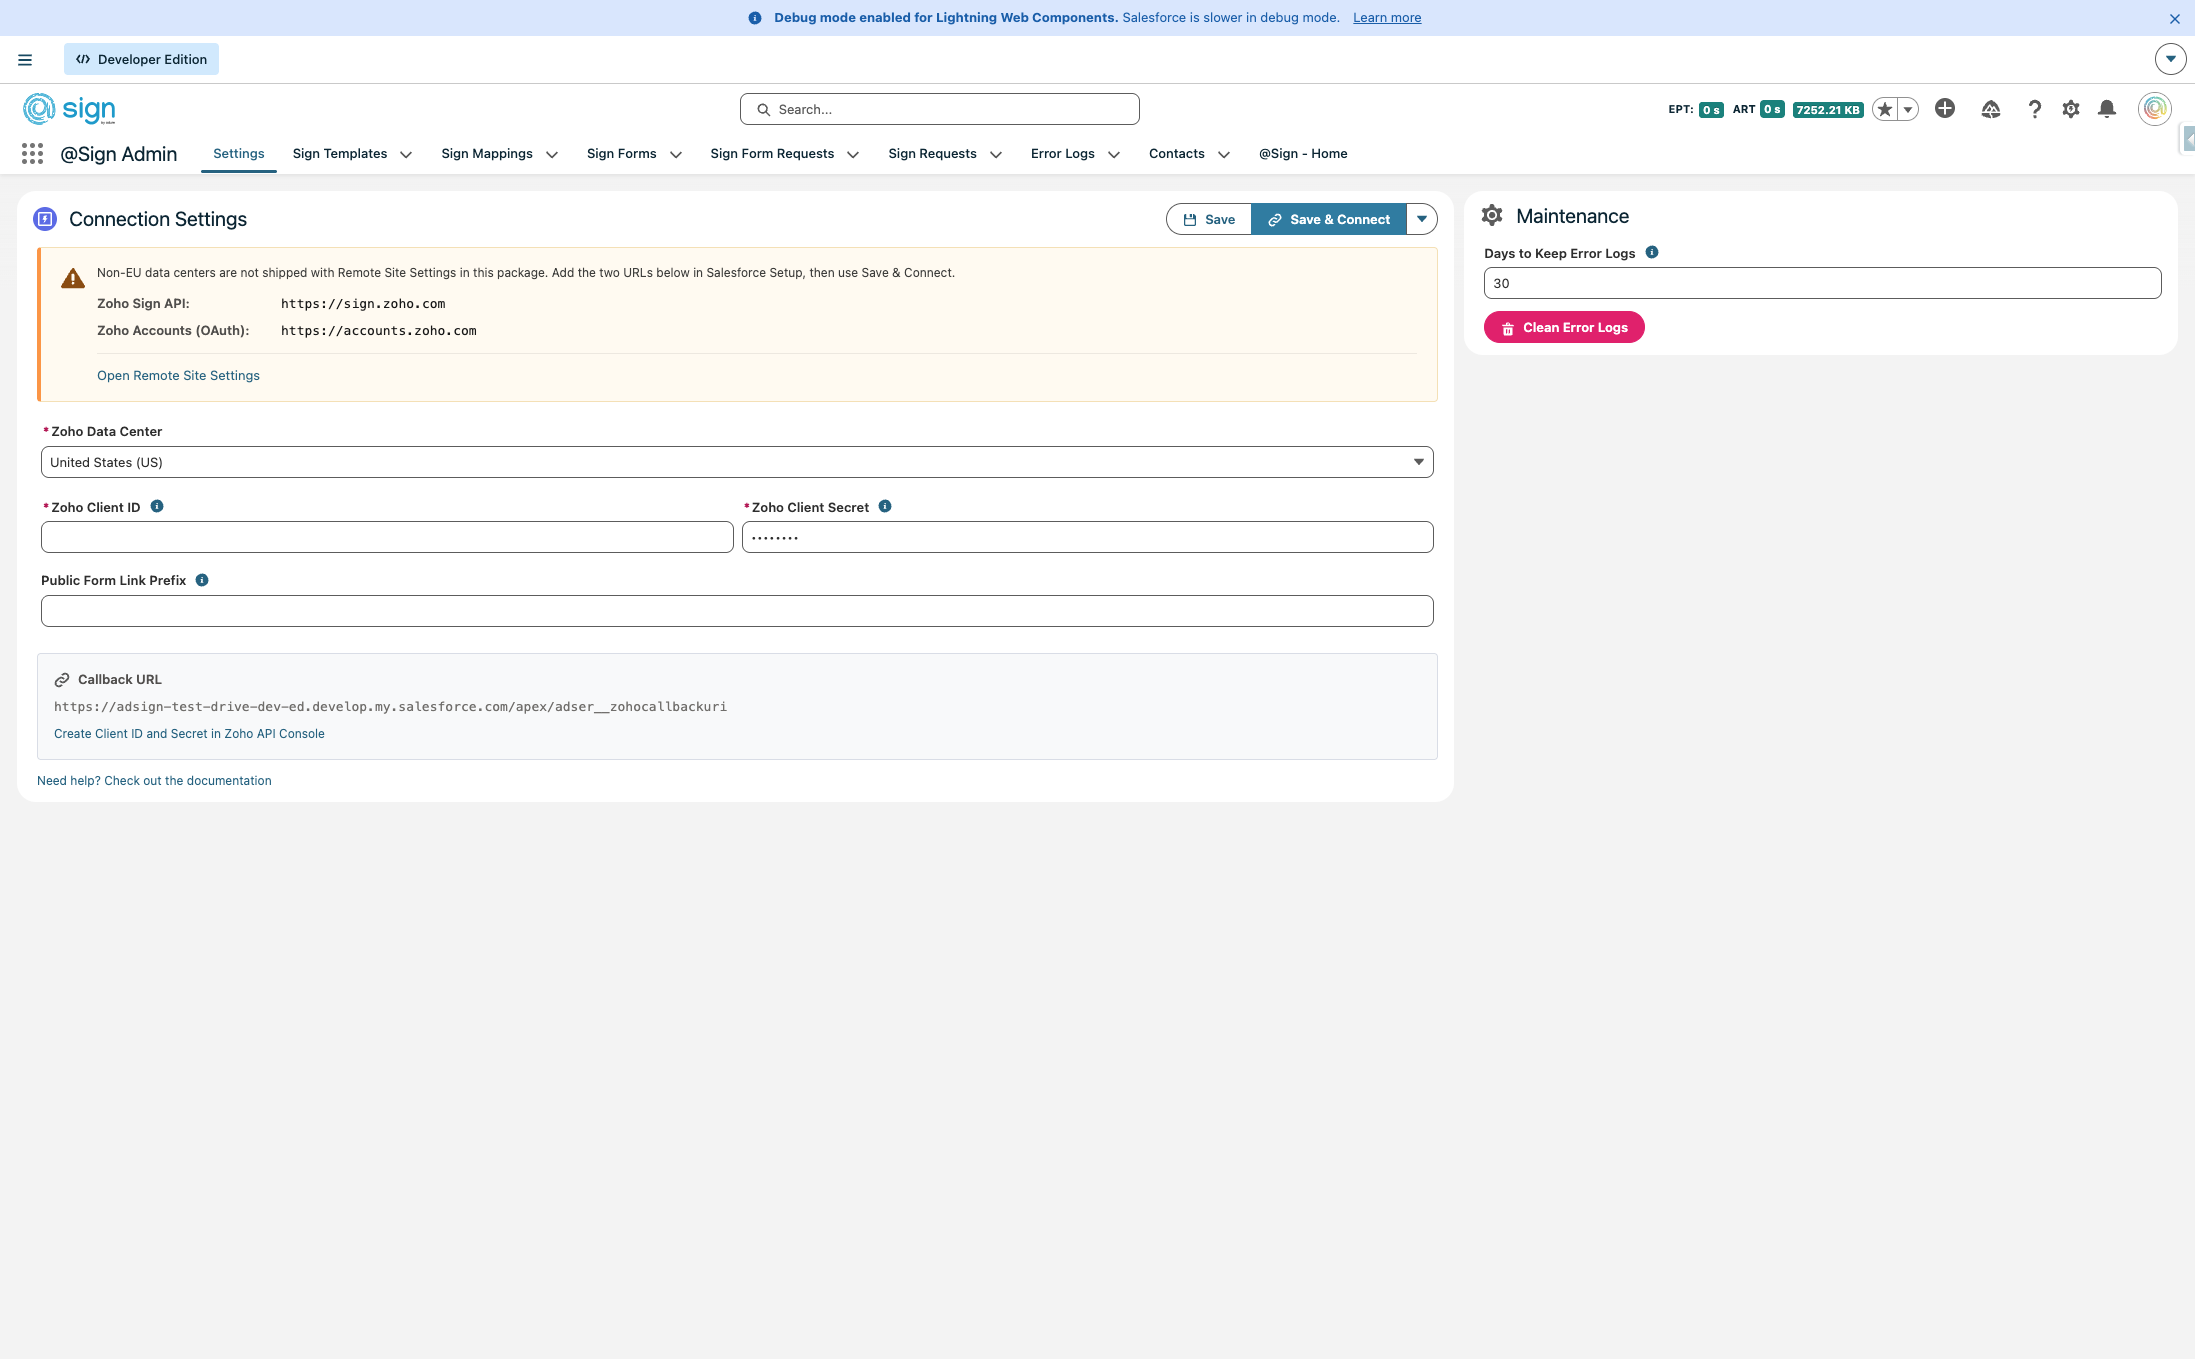
Paste the full callback URL into the 'Authorized Redirect URI' field. For the Homepage URL, use only the domain portion of your Salesforce org: https://YOURDOMAIN.my.salesforce.com.
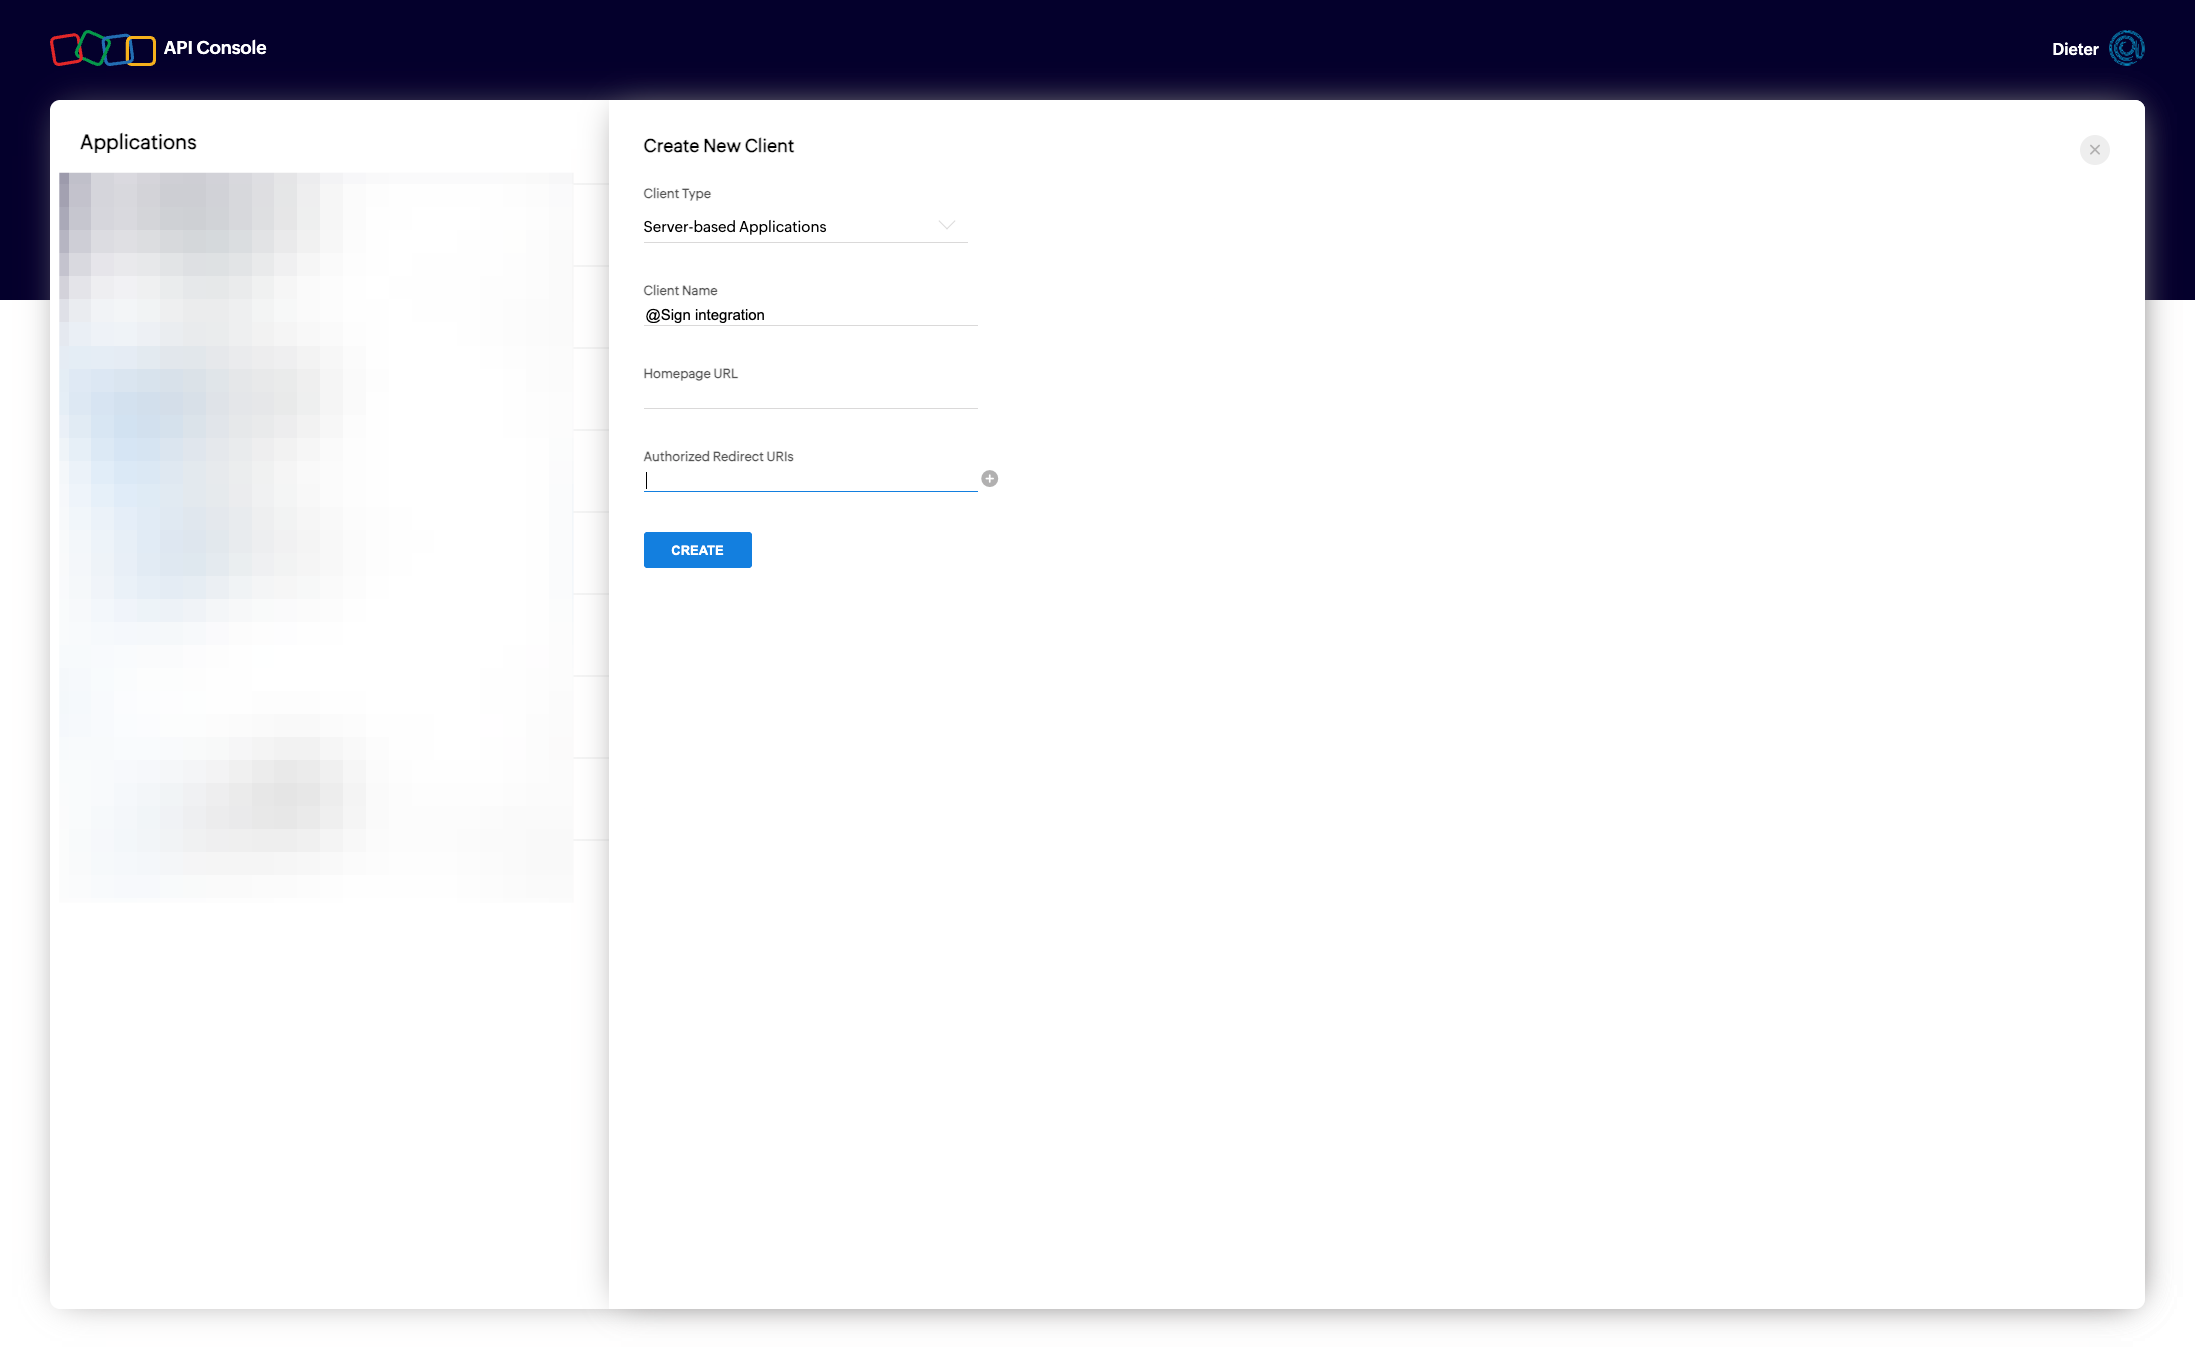
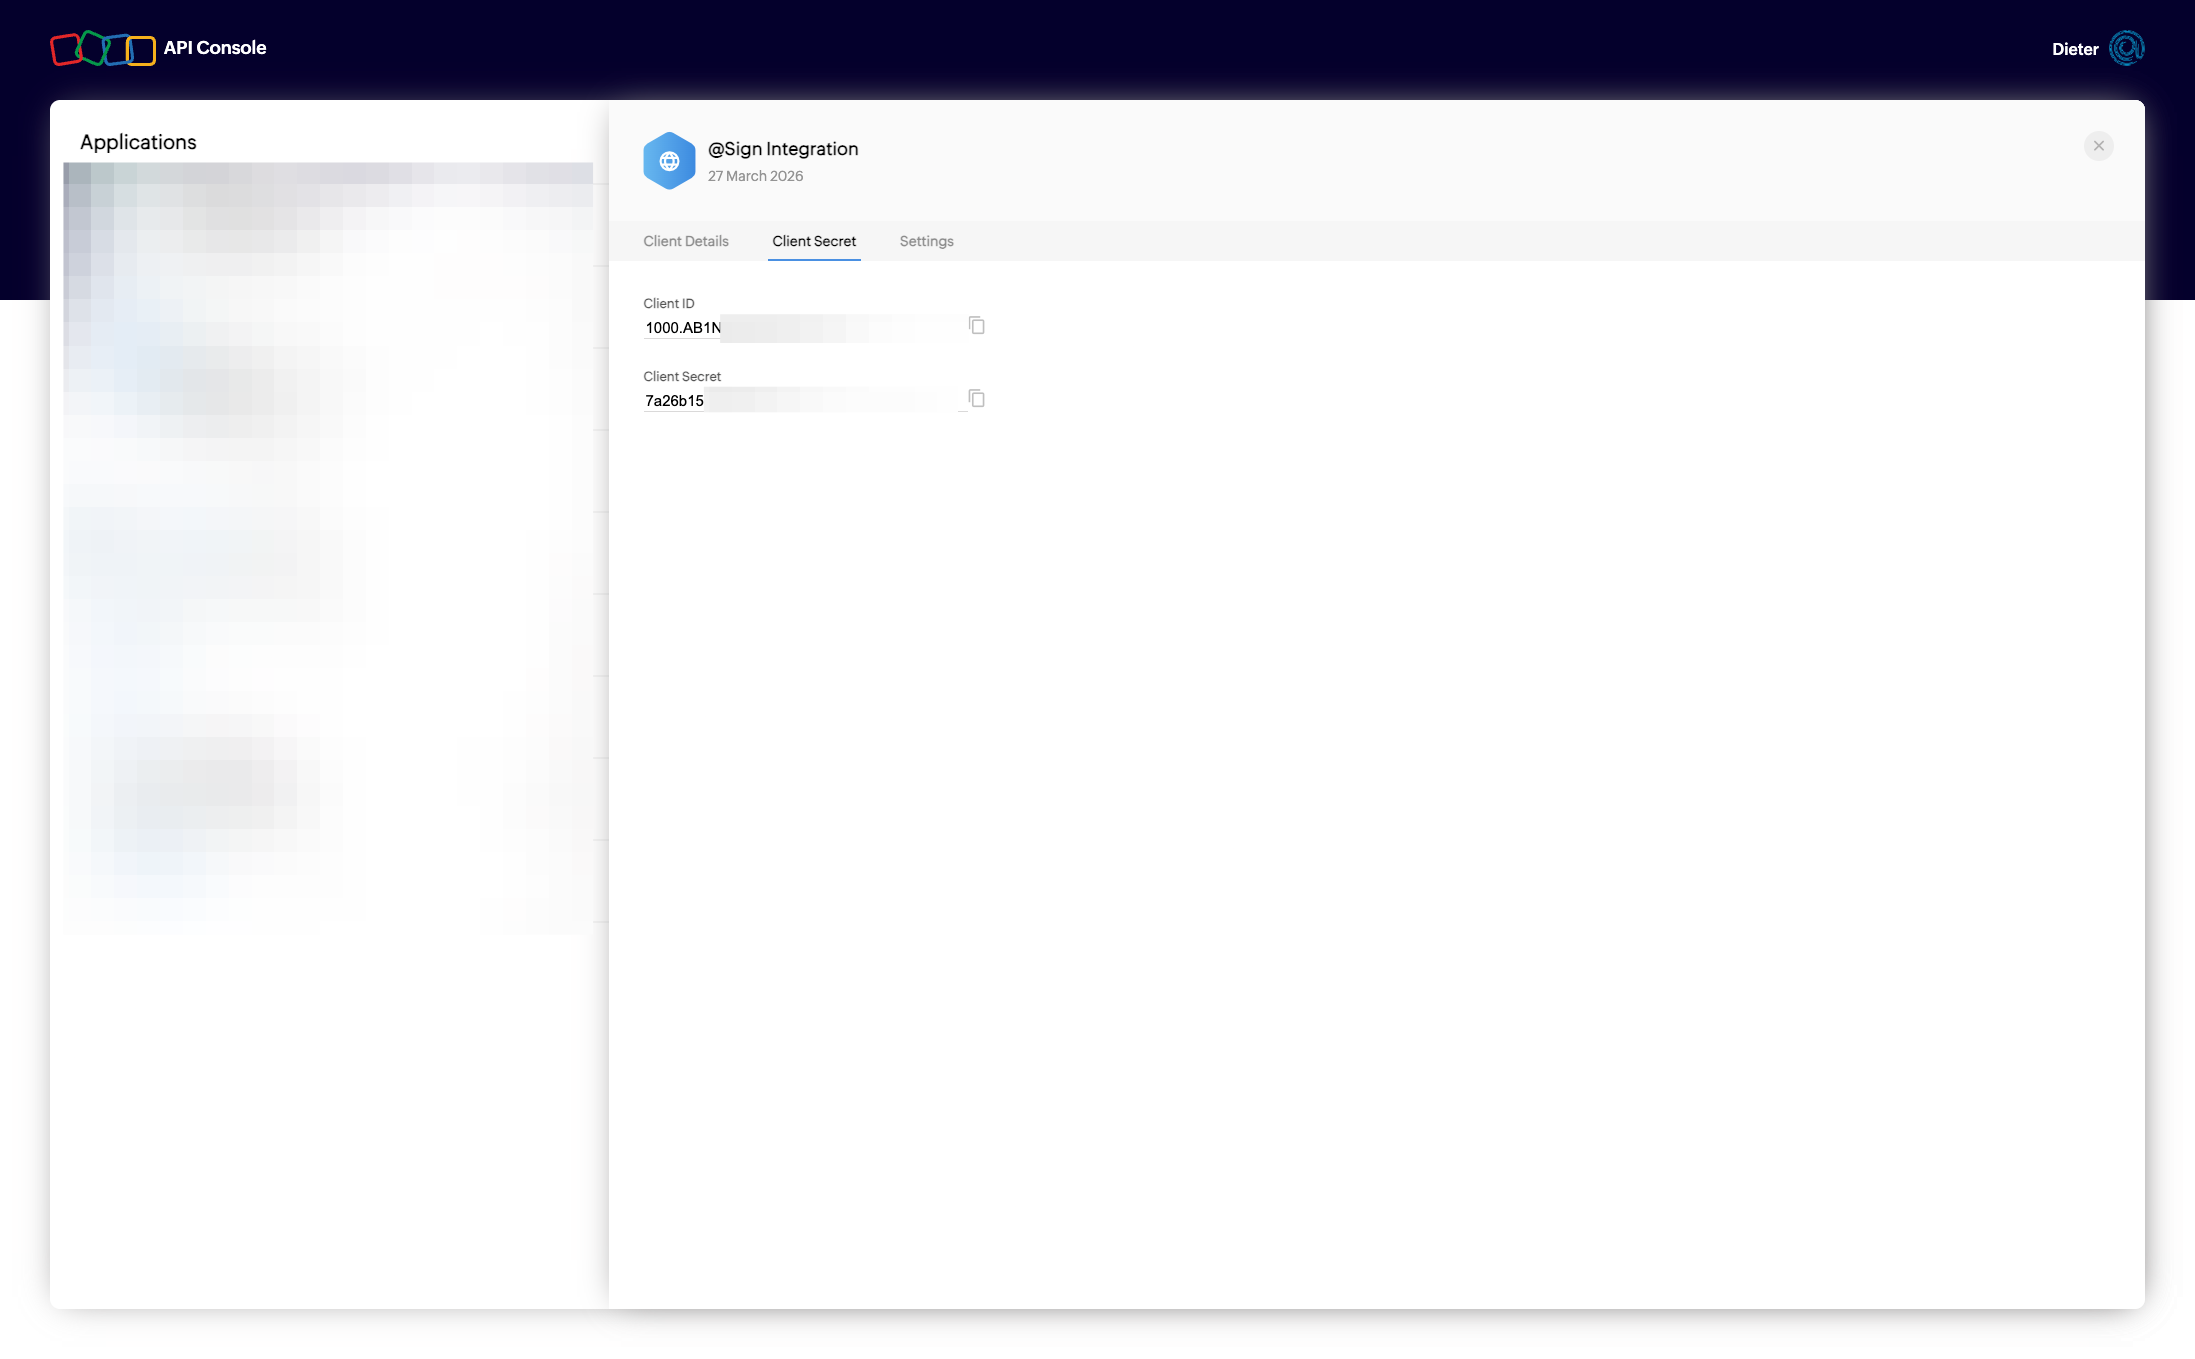
Save the OAuth app. Zoho will now generate a Client ID and Client Secret for you.
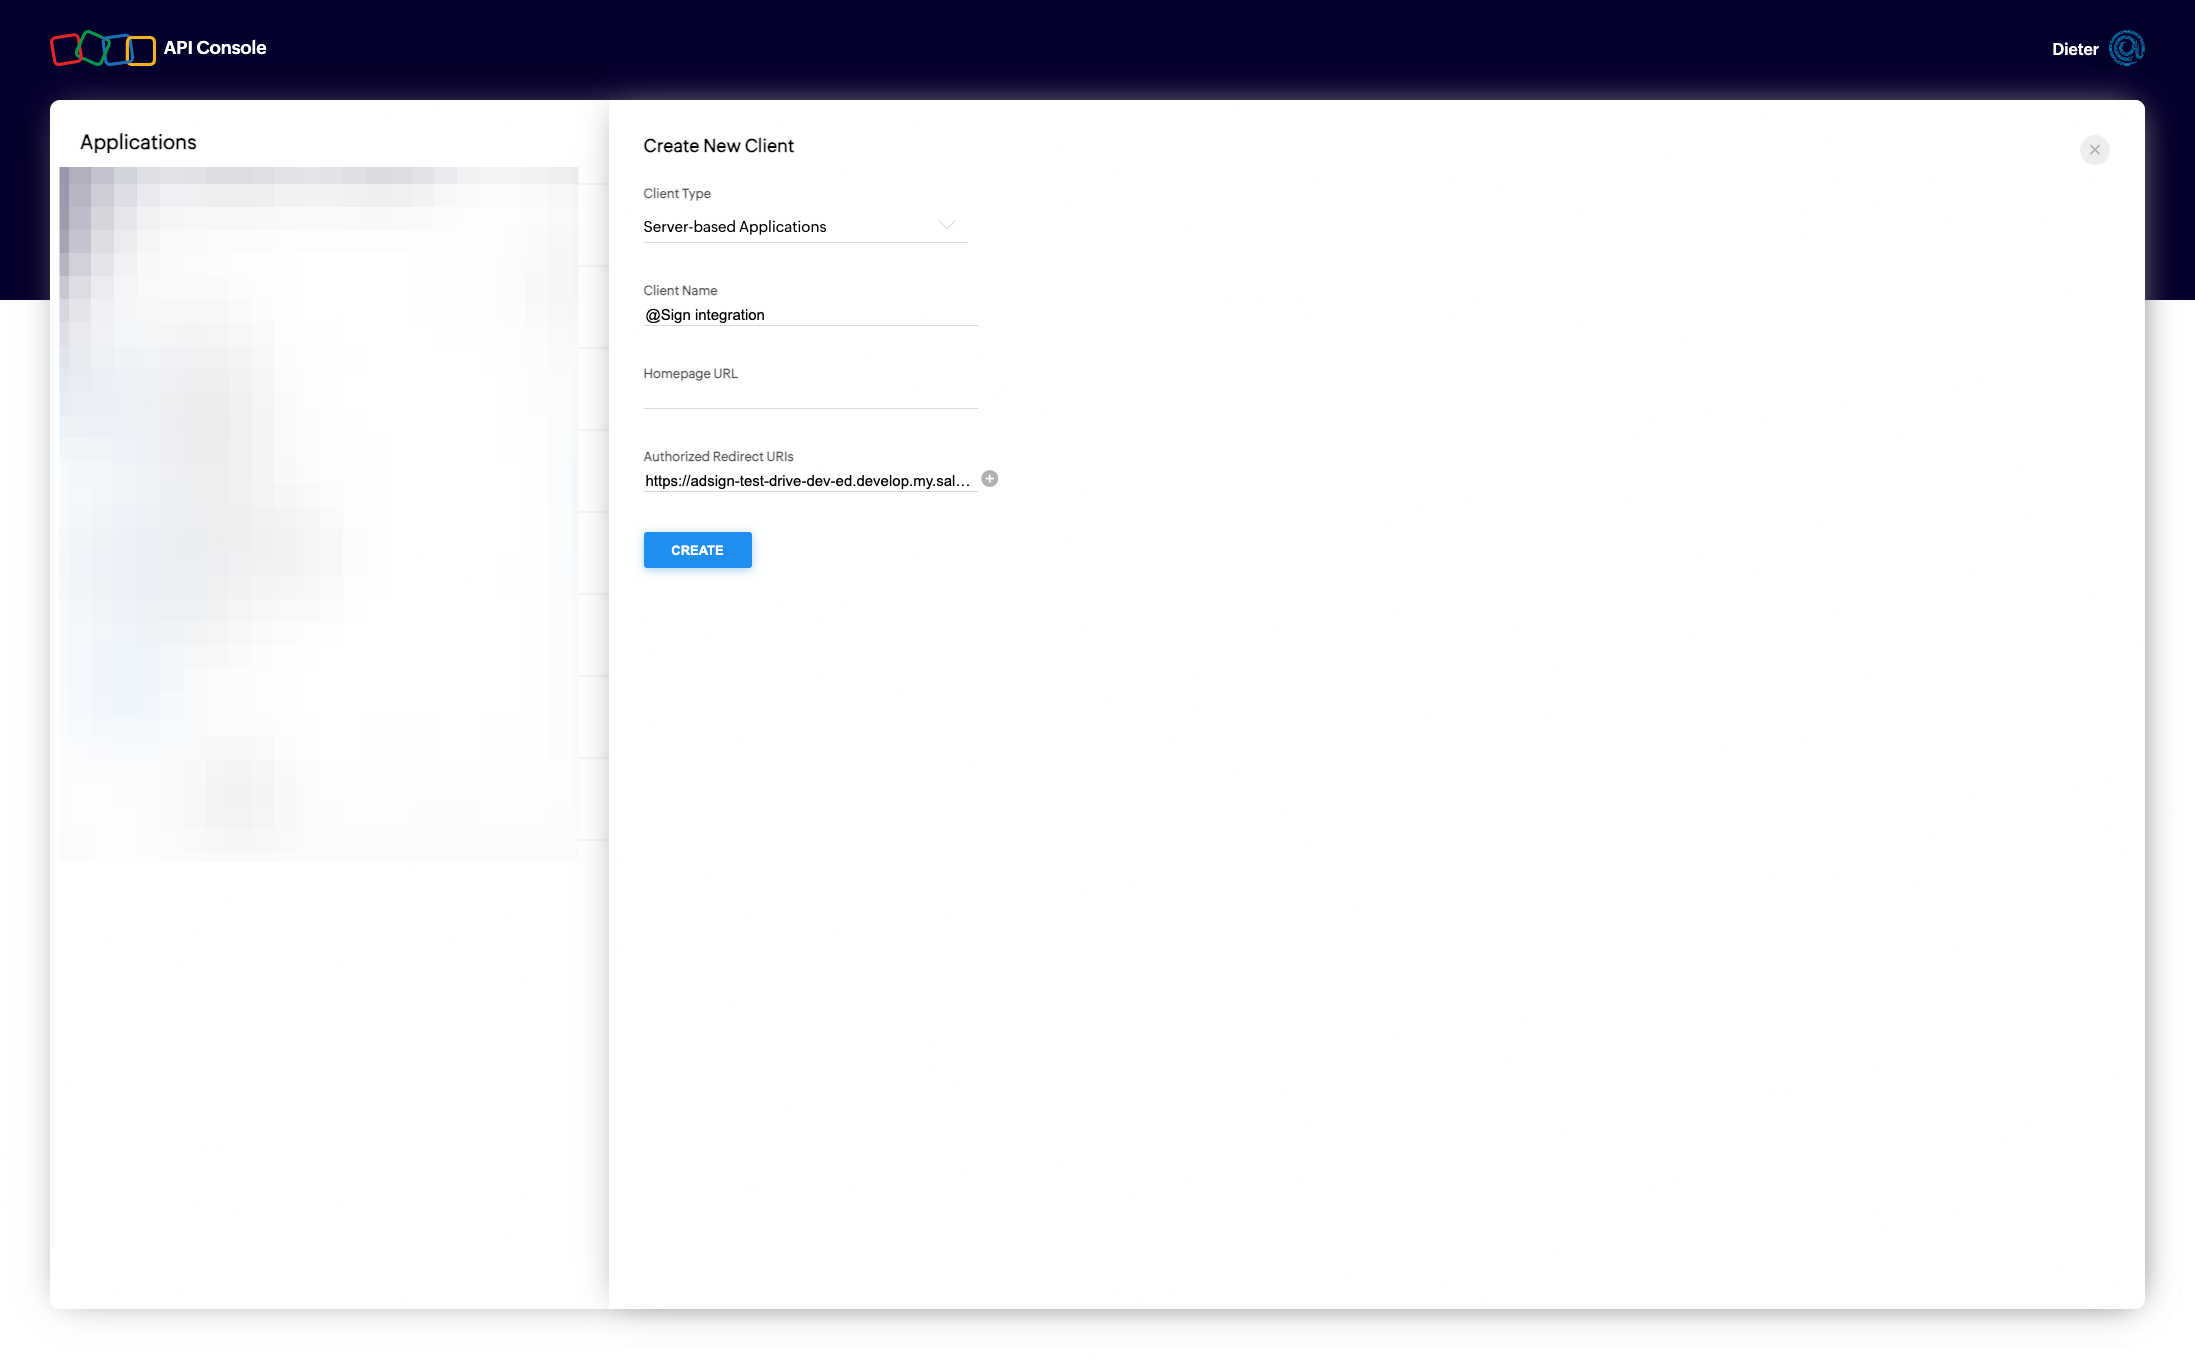
Copy both the Client ID and the Client Secret — you'll paste these into @Sign in the next step.
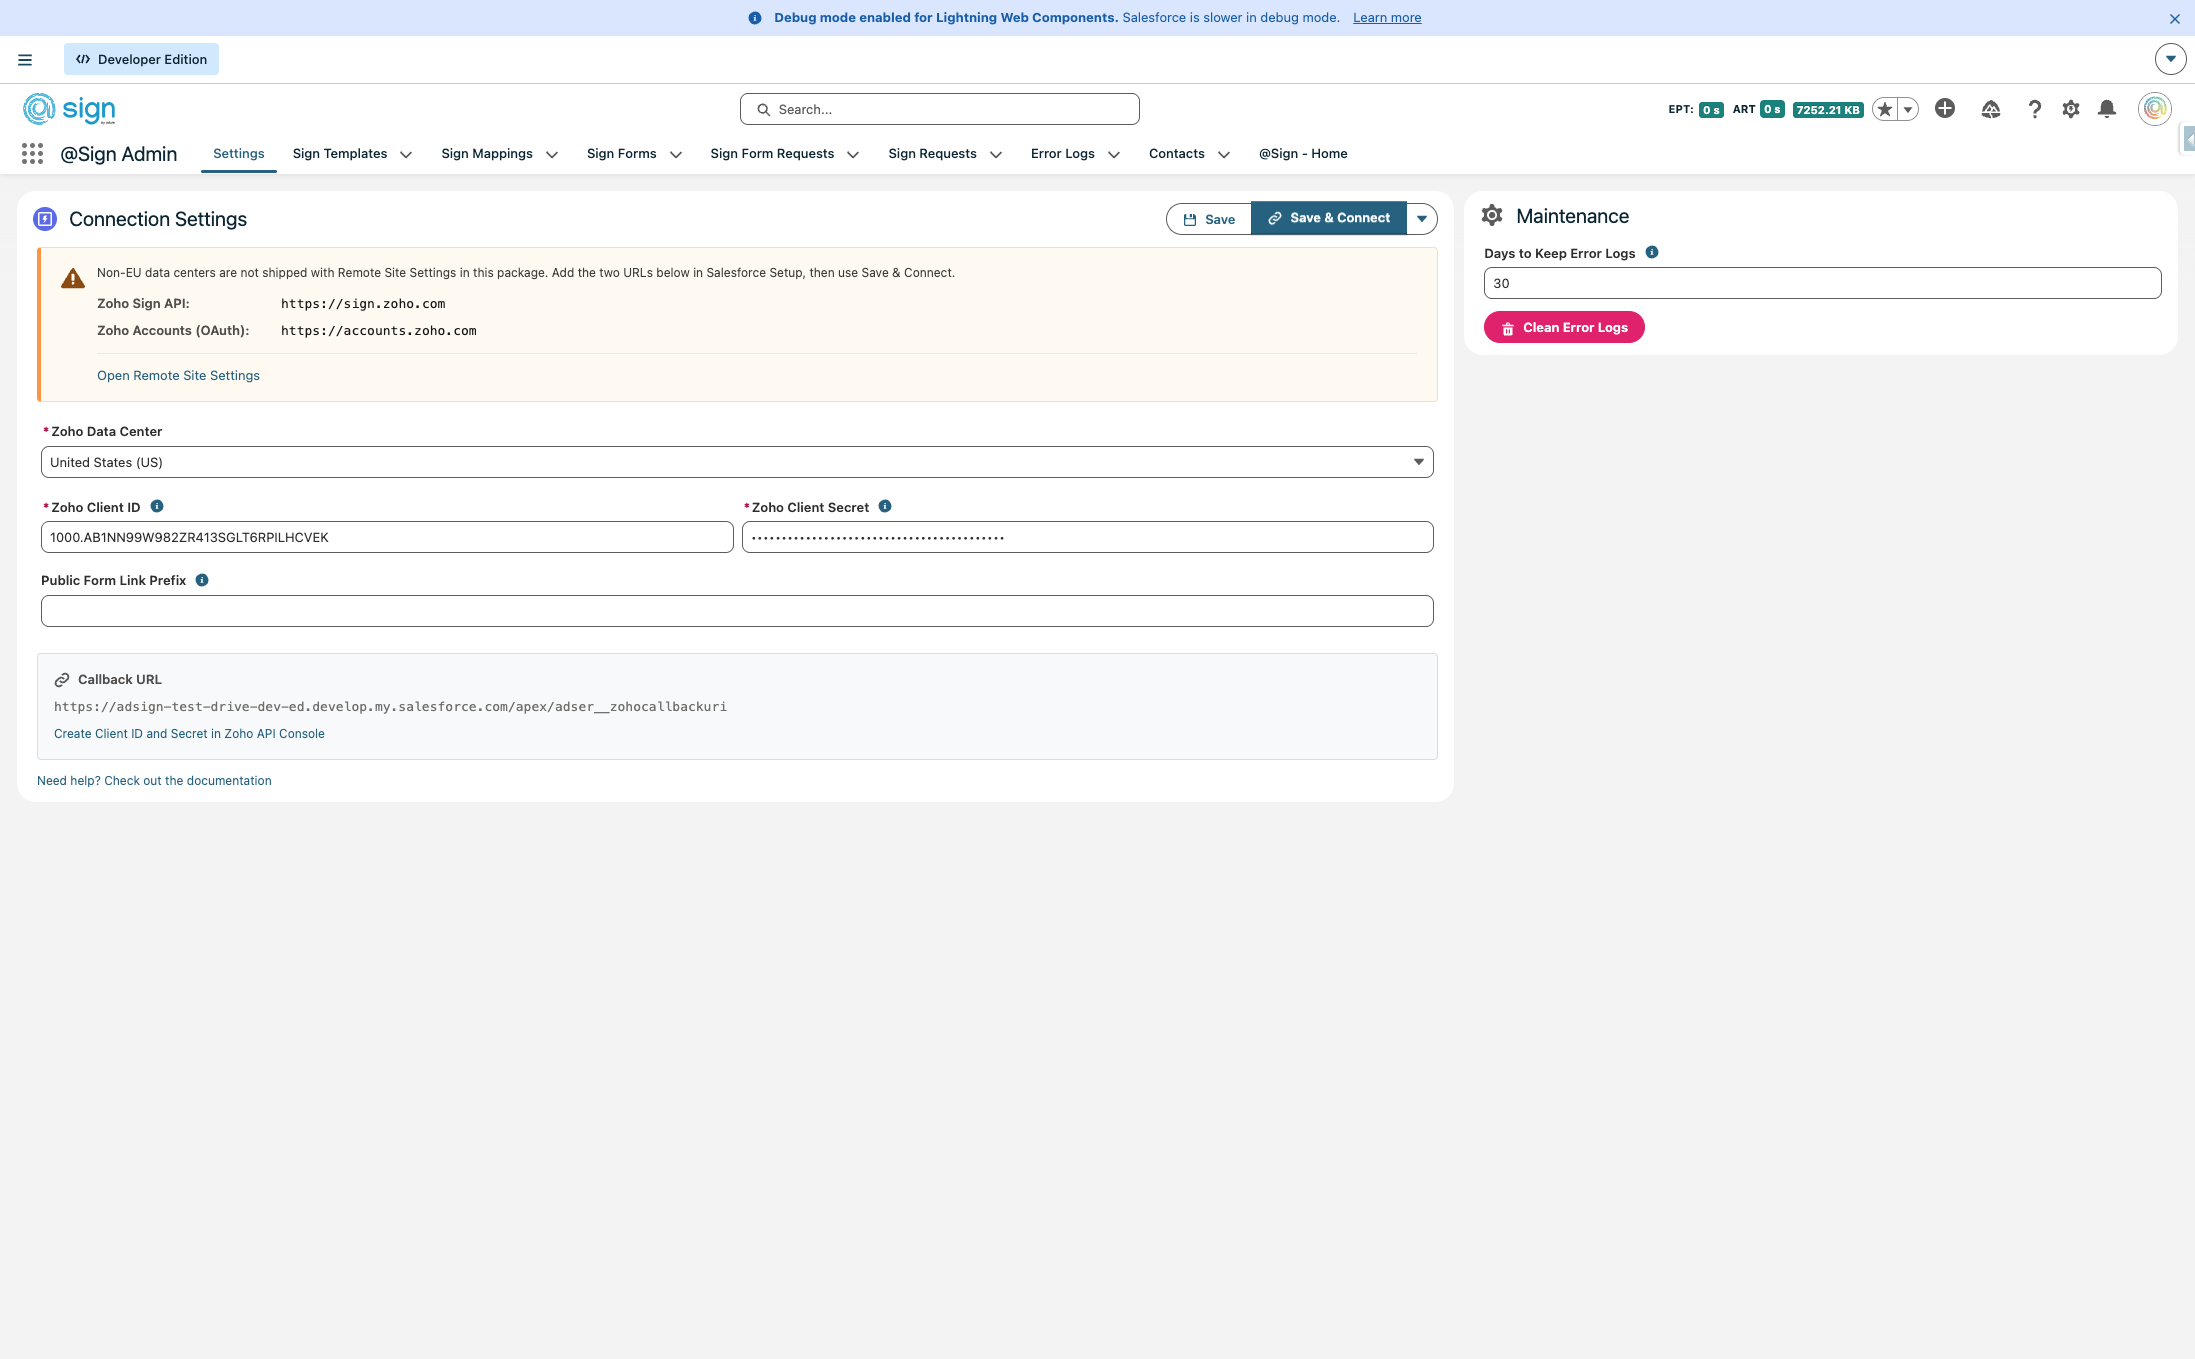
Zoho Sign Connection
Head back to the @Sign Admin settings page in Salesforce.
Paste your Client ID and Client Secret into the corresponding fields, then click 'Save & Connect' to initiate the OAuth flow.
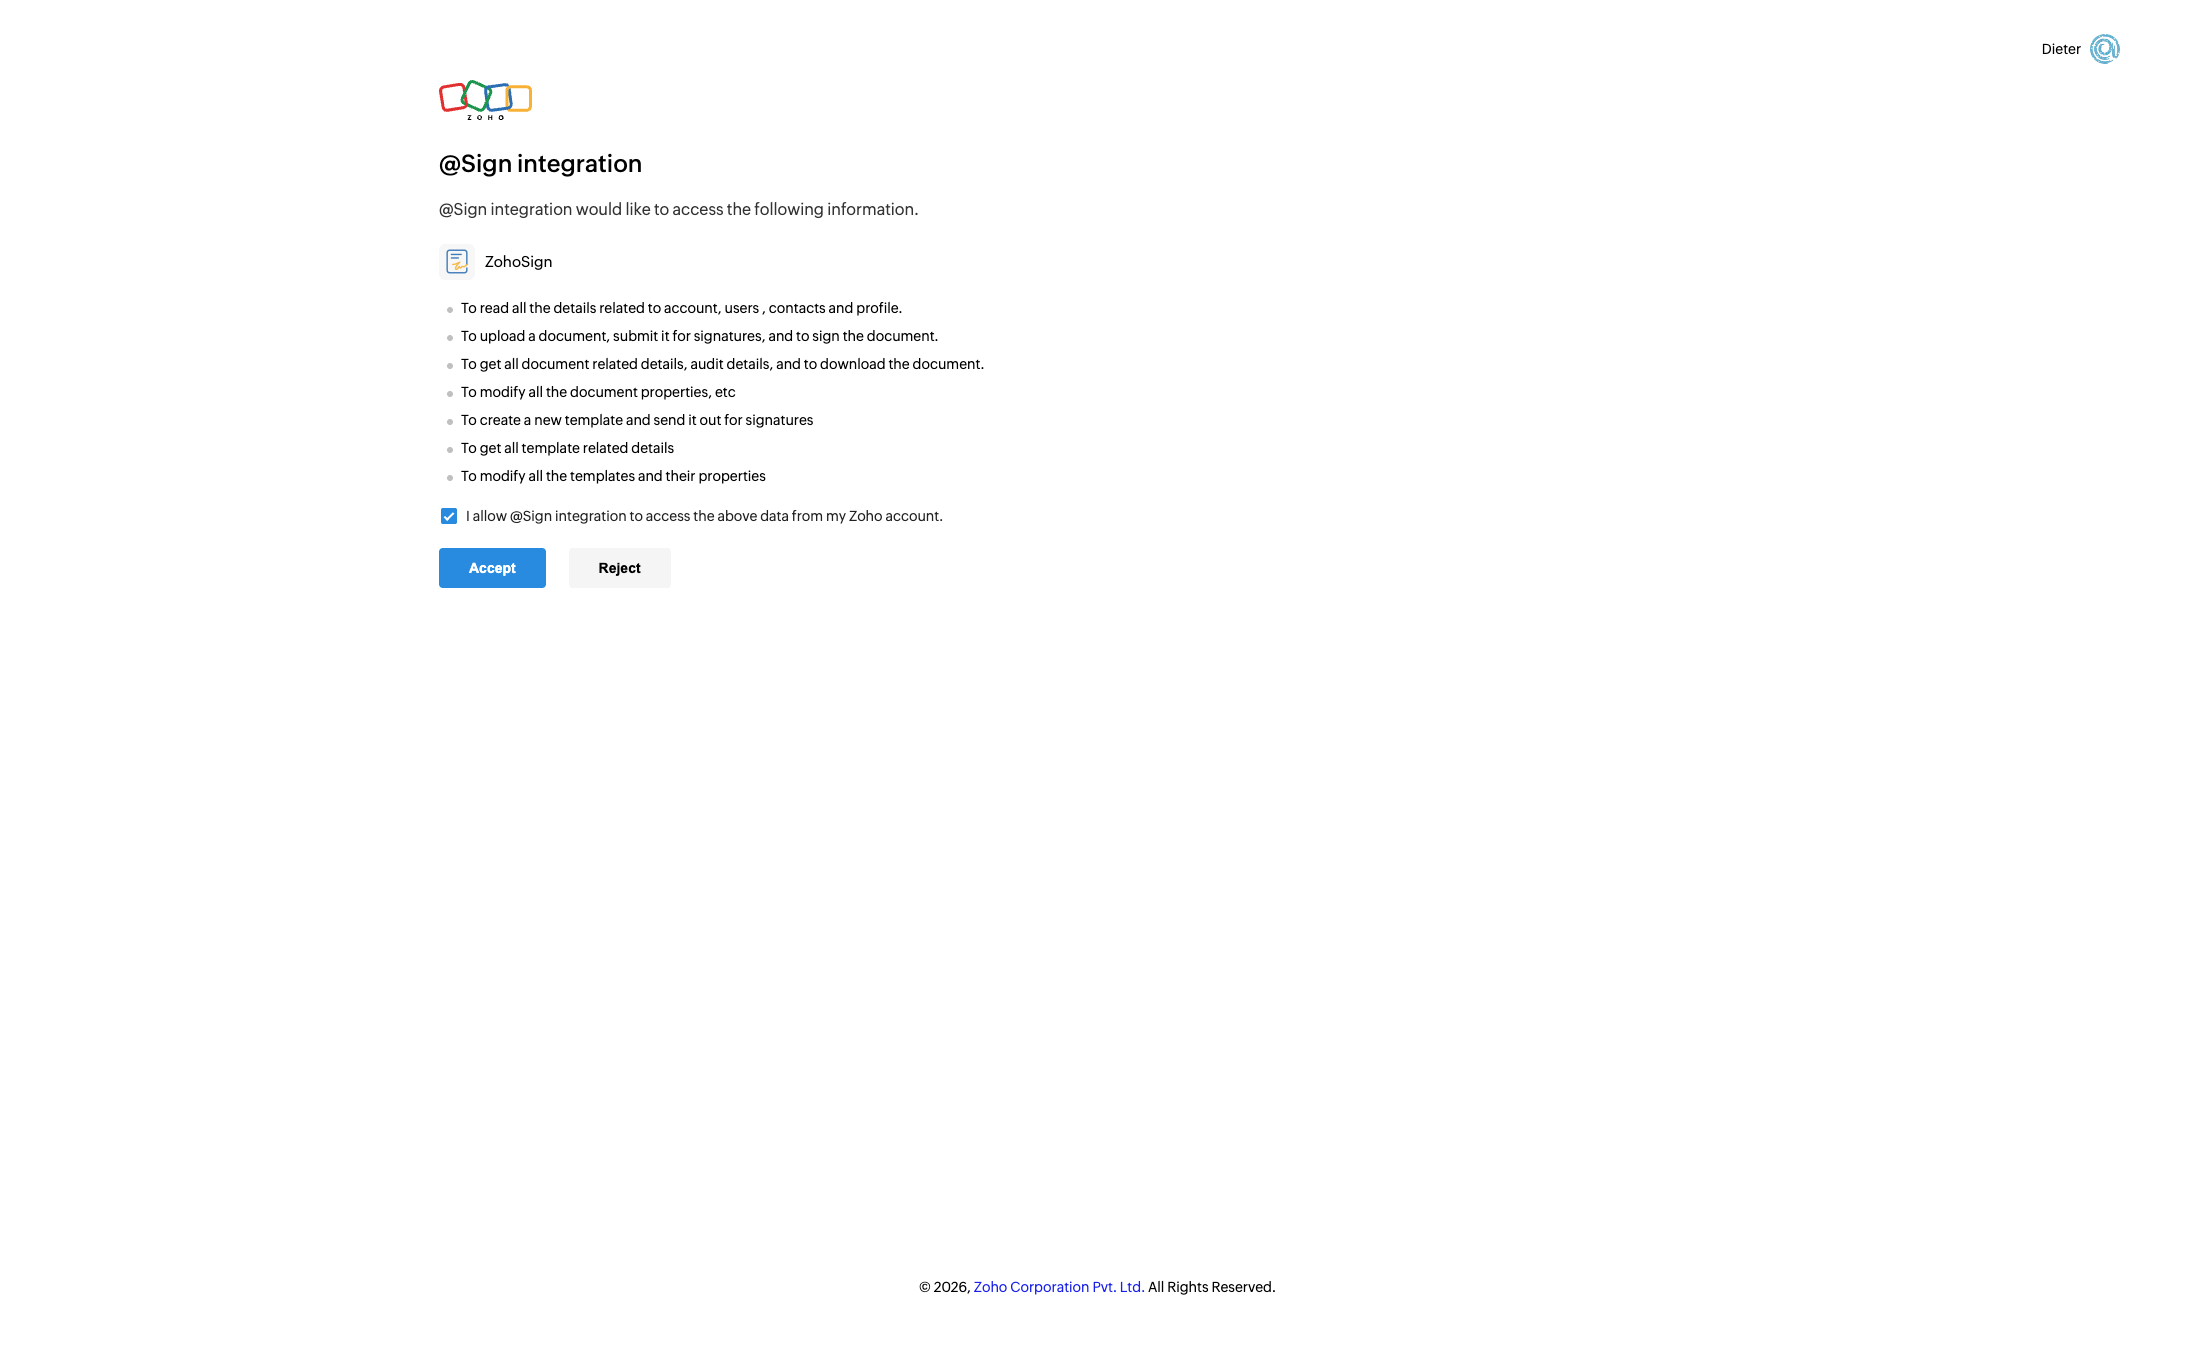
You'll be redirected to Zoho Sign. Log in with the account you want to connect to @Sign.
Check the box to allow @Sign to access your Zoho account data.

Click 'Accept' to complete the OAuth authorization and finalize the connection.
@Sign - Settings & Controls
A green confirmation popup means the connection was successful. Your Salesforce org is now linked to Zoho Sign.
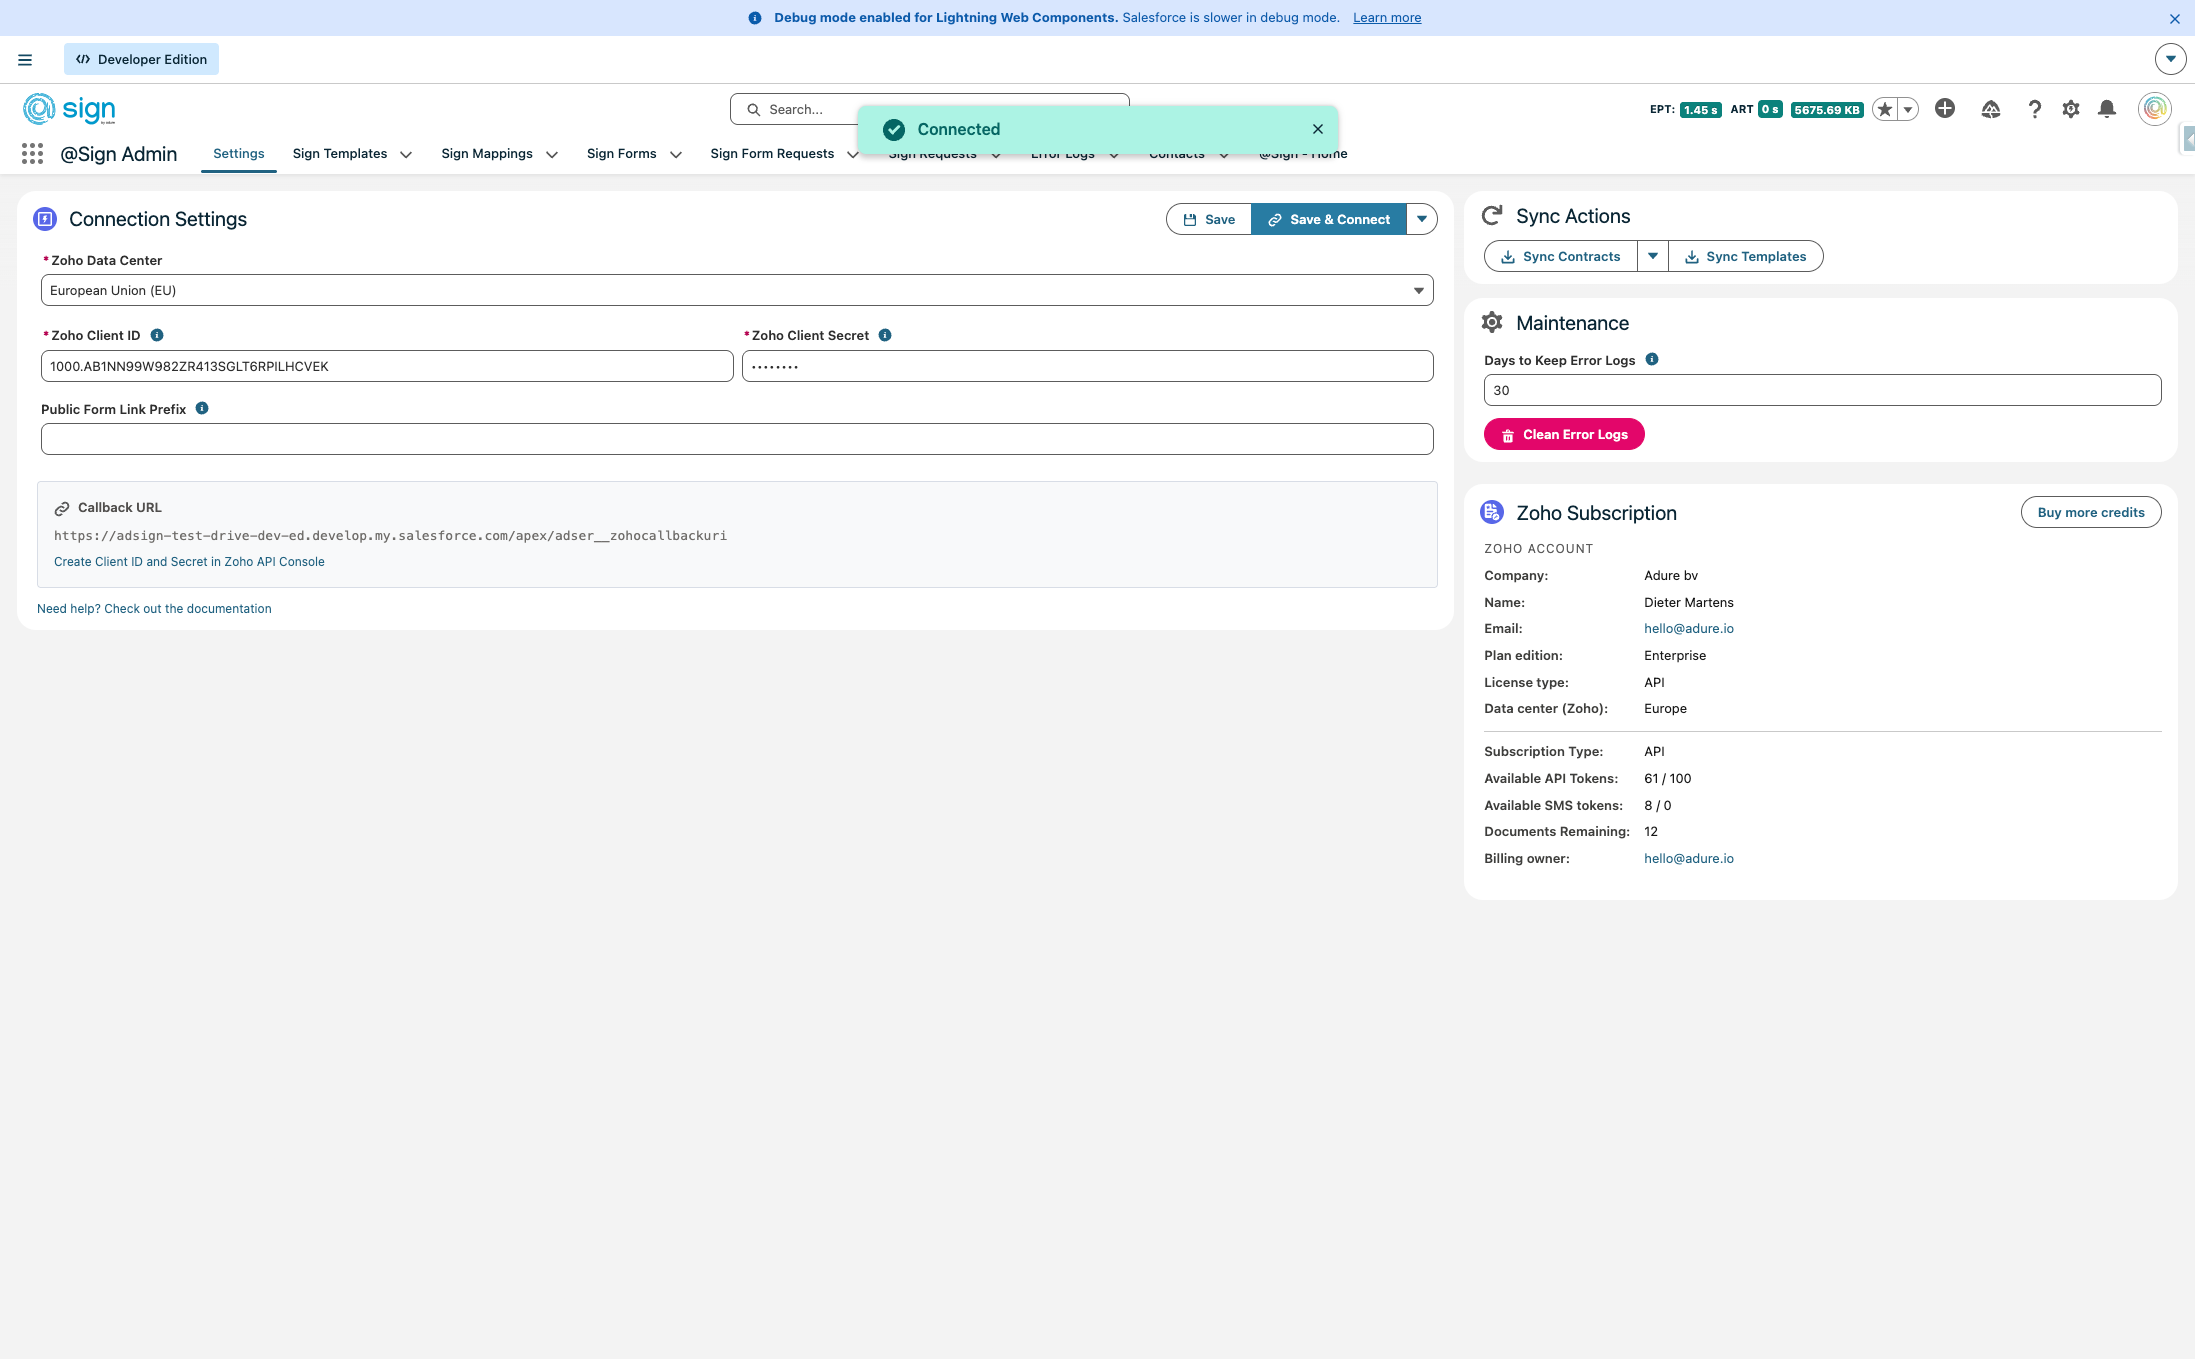
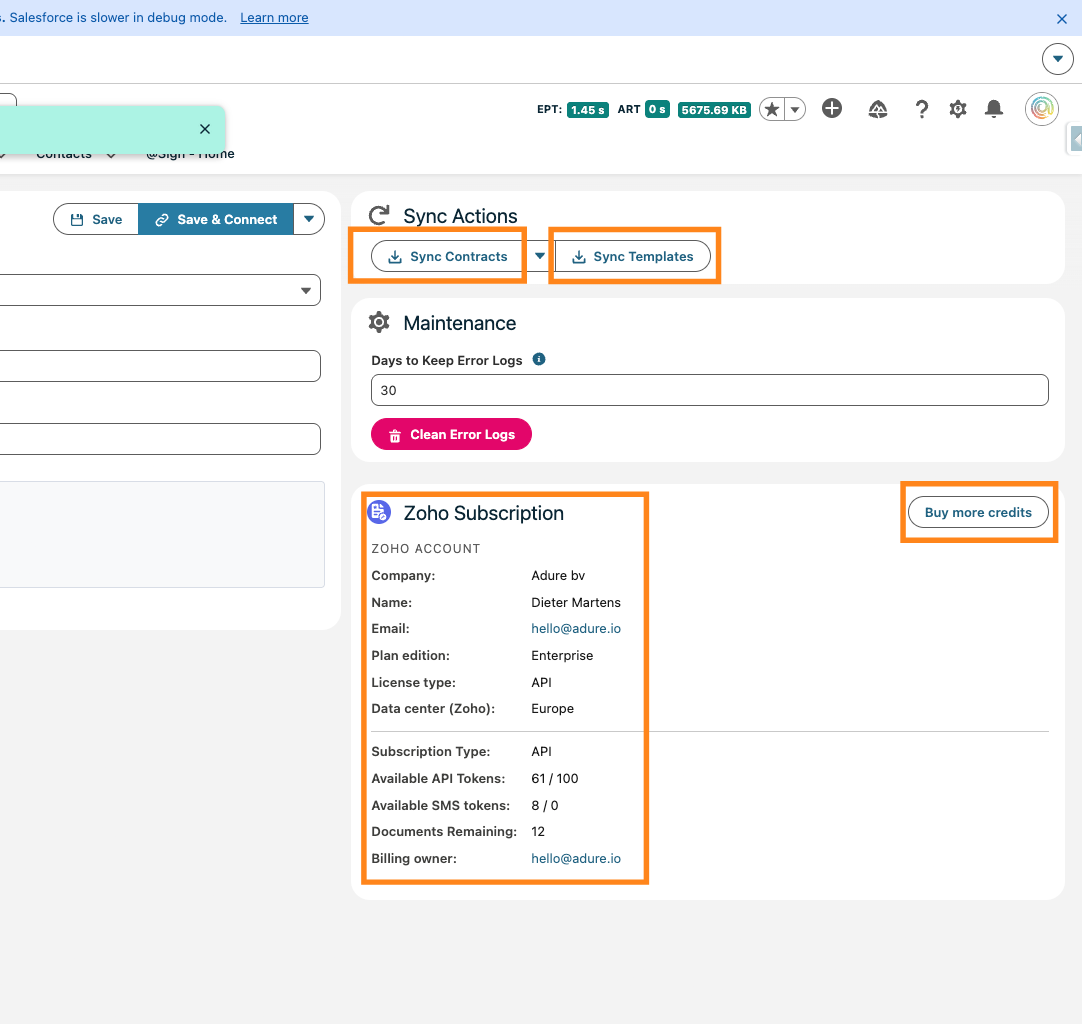
With the connection active, you can now manually sync pending contracts or templates, view your Zoho Sign subscription details (plan, credits, data center, and more), and top up your API credits directly from this screen. Note: @Sign auto-syncs every 15 minutes — for real-time updates, set up Webhooks
Drag to pan